
>>

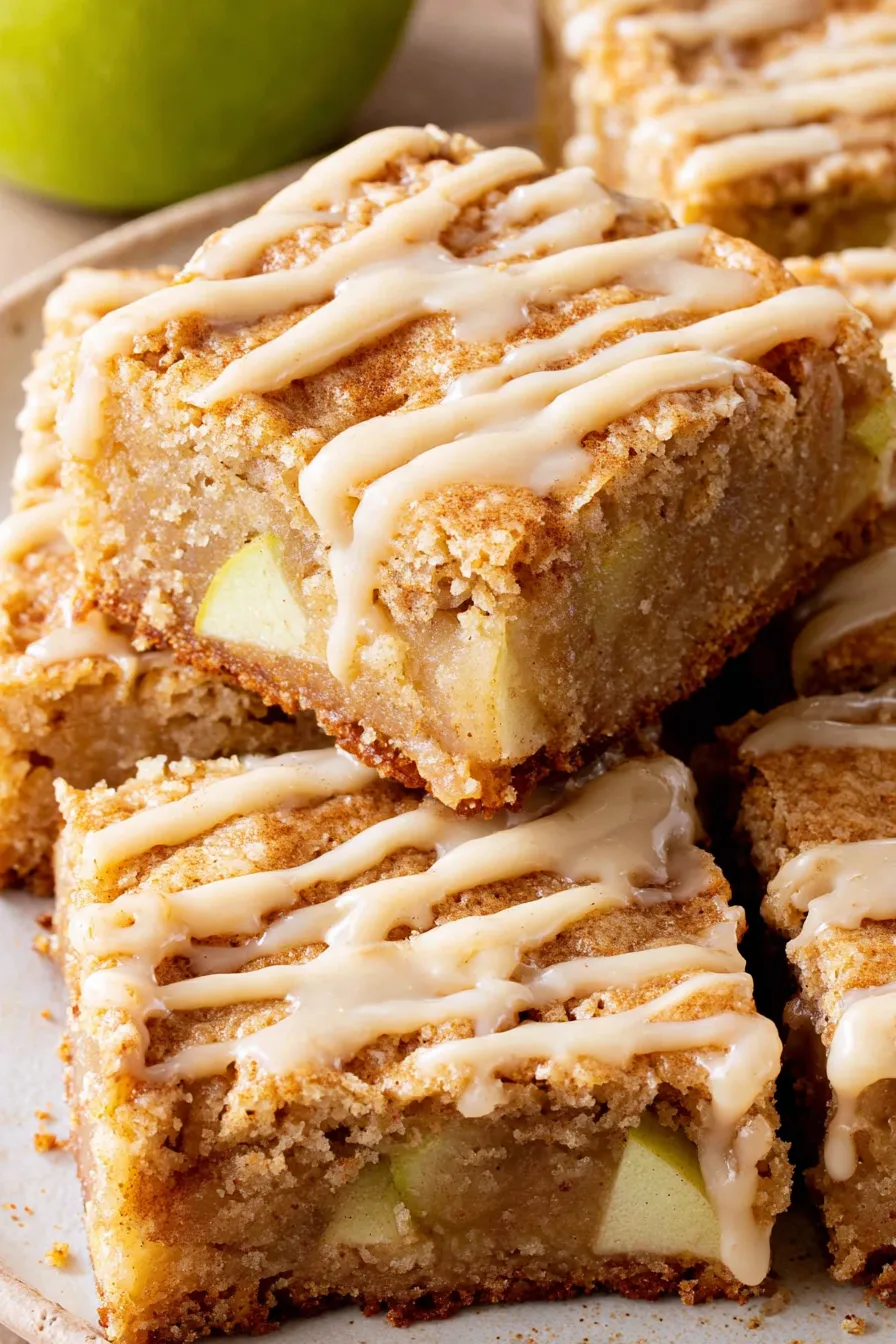
Buttery, tender blondies studded with tart apples and finished with a silky maple glaze — a cozy bar dessert that's perfect for fall and year-round comfort.
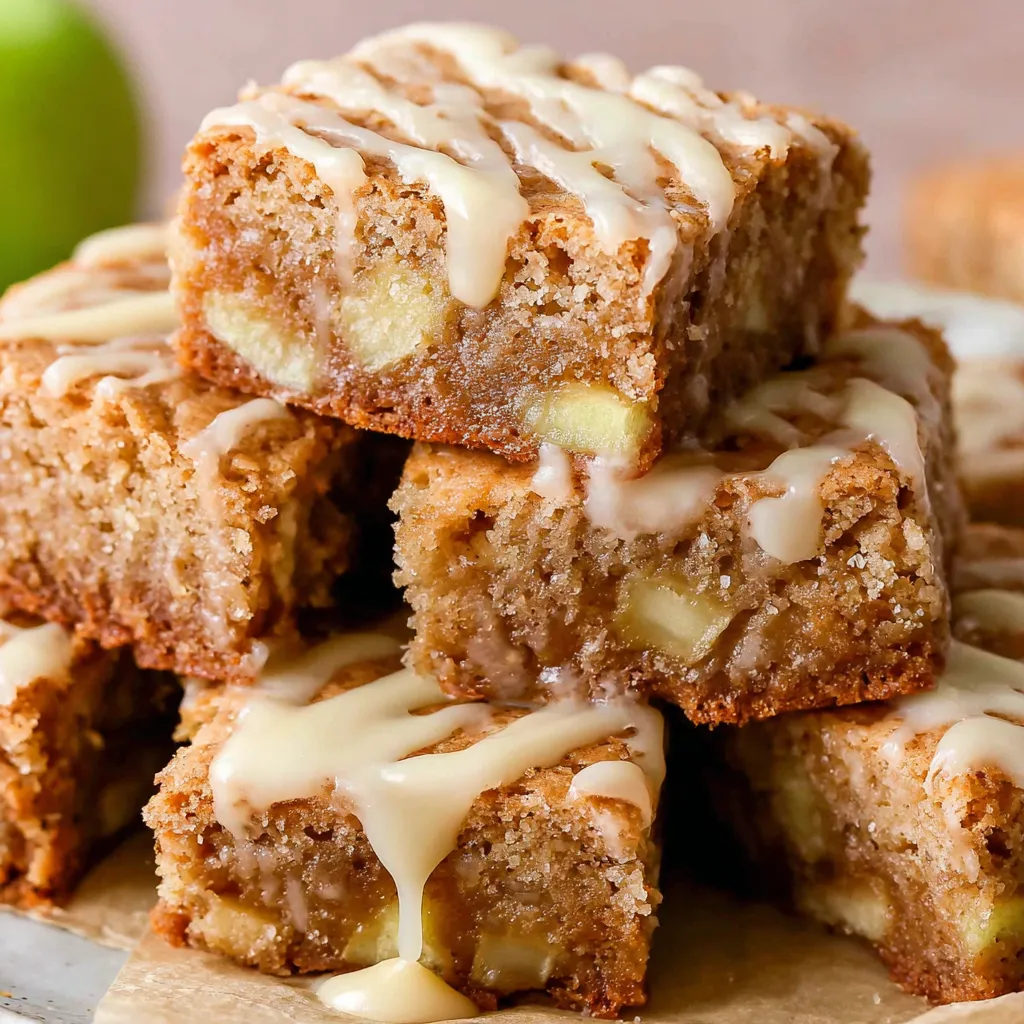
This batch of Apple Blondies with Maple Glaze began as a chilly afternoon experiment and instantly became our family's favorite weekend treat. The idea was simple: take the deep, caramel-like sweetness of brown sugar blondies, fold in diced tart apples for bright contrast, and finish with a warm maple glaze that melts into the top. I first made these on a rainy October morning when the kitchen smelled like cinnamon and wet leaves; my partner kept sneaking bites while I was still photographing them.
What makes these bars special is the balance of textures and temperature — a soft, almost fudgy interior dotted with tender apples and edges that caramelize just enough to provide a little chew. The maple glaze adds a glossy, nuanced sweetness that pairs beautifully with Granny Smith apples. These are the kind of dessert I bring to gatherings because they travel well, slice neatly, and disappear quickly. They're reliably comforting, seasonal yet simple enough to make any time you have apples and a sweet tooth.
In my experience these bars have been the star of many casual get-togethers. My neighbor asked for the recipe after trying a piece at a block party, and my sister brings them to potlucks because they stand up to travel. I love that they feel homemade without taking all afternoon — and the maple glaze is a tiny flourish that people always comment on.

I love that the bars are simultaneously indulgent and approachable — they don’t require tempering chocolate or finicky technique, yet the result tastes like a bakery treat. The first time I made them, my neighbor came by and left with two bars and a promise to return the dish; they’re that good at building community.
To keep the bars fresh, cool completely before covering. Store in an airtight container layered with parchment to prevent sticking. At room temperature they'll remain tender for 48 hours; refrigeration extends life to 4–5 days but can slightly firm the texture — bring to room temperature before serving. For longer storage, freeze unglazed bars in a single layer until solid, then stack with parchment between layers in a freezer-safe container for up to 3 months. Thaw overnight in the refrigerator, then glaze just before serving for the best shine.
If you need to swap ingredients, use coconut oil in place of melted butter for a dairy-free version (note: flavor will shift). For a lower-sugar option, reduce brown sugar by 1/4 cup and add a tablespoon of maple syrup; texture will be slightly softer. Replace all-purpose flour with a 1:1 gluten-free blend if avoiding gluten — add an extra 1/4 teaspoon baking powder for lift. Use regular cinnamon if you don’t have apple pie spice, and switch Granny Smith for Pink Lady for a milder, sweeter apple flavor.
Serve bars slightly warm with a scoop of vanilla ice cream for an indulgent dessert, or pair with a strong coffee for breakfast-on-the-go. Garnish with a dusting of extra confectioners' sugar, a drizzle of additional maple syrup, or thin apple slices fanned on top for presentation. These bars also work well on dessert boards alongside soft cheeses and toasted nuts for a party spread.
Blondies are the caramel-cousin of the brownie and have roots in American baking where brown sugar-forward bars became popular mid-20th century. Adding apples and maple ties this treat to Northeastern fall flavors — think New England orchards and maple sugaring season. The maple glaze nods to traditional maple confections and regional produce, making these bars feel both classic and place-driven.
In autumn, use a heavier pinch of warm spices and swap Granny Smith for Braeburn for a sweeter bite. For winter holidays, stir in 1/2 cup chopped toasted pecans and a tablespoon of bourbon into the batter. In spring and summer, try swapping apples for chopped stone fruits like peaches, and use a lemon-maple glaze by adding 1/2 teaspoon lemon zest to the glaze for brightness.
Make a double batch and freeze half of the unglazed slab for future weeks — slice and wrap individual portions for easy breakfasts or lunchbox treats. If prepping for a party, bake one day ahead, cool and store in the fridge, and glaze the morning of the event to keep the shine. Use a serrated knife for clean cuts; refrigerate briefly before slicing if the glaze becomes too soft.
These Apple Blondies with Maple Glaze are a reminder that simple pantry ingredients, a crisp apple, and a little attention can produce something memorable. Whether served at a family dinner, packed for a picnic, or shared with neighbors, they reward the baker and delight those who taste them. Make them your own — add nuts, spice them differently, or go classic; every variation tastes like comfort.
Dice apples small (about 1/4-inch) so they cook evenly without releasing excess juice.
Allow bars to cool completely before glazing to prevent the glaze from sinking in.
Use room-temperature eggs to ensure a smooth, well-emulsified batter.
If glaze seems too thin, add more confectioners' sugar one tablespoon at a time.
This nourishing apple blondies with maple glaze recipe is sure to be a staple in your kitchen. Enjoy every moist, high protein slice — it is perfect for breakfast or as a wholesome snack any time.
Yes. Freeze the unglazed slab in a single layer until firm, then wrap tightly and store for up to 3 months. Thaw overnight in the refrigerator and glaze after reheating.
Use Granny Smith or another tart-firm apple so the pieces retain texture during baking. Softer apples may become pulpy.
This Apple Blondies with Maple Glaze recipe makes perfectly juicy, tender, and flavorful steak every time! Serve with potatoes and a side salad for an unforgettable dinner in under 30 minutes.
Preheat oven to 350°F. Line an 8x8-inch baking dish with parchment paper or grease and flour. Use parchment for easy removal and cleaner edges.
Whisk melted butter and packed dark brown sugar in a large bowl until smooth and glossy to dissolve some sugar and create a fudgy base.
Add eggs one at a time, then the extra yolk, whisking after each. Scrape bowl sides and whisk in vanilla until combined.
Whisk flour, cornstarch, baking powder and salt in a separate bowl for even distribution and to prevent lumps.
Fold dry ingredients into wet mixture just until no streaks of flour remain. Overmixing will make bars cakier.
Gently fold in diced apples and apple pie spice for even distribution without crushing the fruit.
Spread batter in pan and bake 50–55 minutes until edges are golden and center does not jiggle. For 9x13-in, bake ~45 minutes.
Cool completely in the pan on a wire rack, at least 1 hour, so the crumb sets for clean slicing.
Warm maple syrup and butter over medium-low heat, remove from heat and whisk in confectioners' sugar until smooth. Drizzle over cooled bars and let set 10–15 minutes before slicing.
Last Step: Please leave a rating and comment letting us know how you liked this recipe! This helps our business to thrive and continue providing free, high-quality recipes for you.
Leave a comment & rating below or tag
@feastu on social media!

Delightfully spooky and sweet, these bite-sized mummy cake balls combine moist cake, creamy centers, and a vanilla candy shell for effortless Halloween fun.

Fluffy homemade donuts crowned with a shimmering galaxy glaze. Fry or bake, swirl bold colors, and watch these showstoppers disappear fast.

Buttery shortbread crust meets gooey pecan pie filling in easy bar form, perfect for holidays, bake sales, and cozy weeknights.
Leave a comment & rating below or tag @feastu on social media!
Enjoyed this recipe? Share it with friends and family, and don't forget to leave a review!
This recipe looks amazing! Can't wait to try it.
Comments are stored locally in your browser. Server comments are displayed alongside your local comments.

Join to receive our email series which contains a round-up of some of our quick and easy family favorite recipes.
