
>>

A silky cream cheese filling swirled with spiced apple butter over a crunchy gingersnap crust — an indulgent, autumn-ready dessert that's perfect for special occasions and cozy nights.
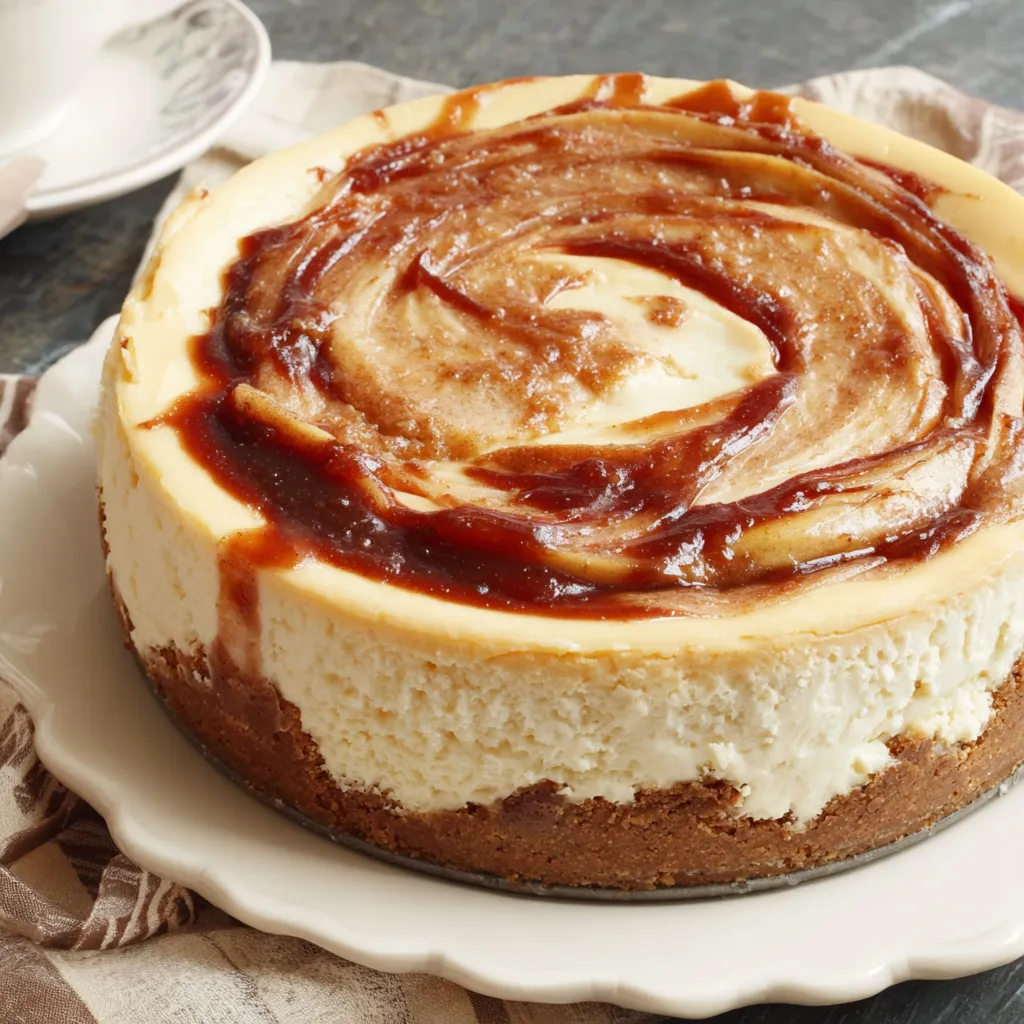
This apple butter cheesecake is one of those desserts I make when I want to slow down the evening and fill the house with warm, comforting aromas. I first discovered this combination on a chilly October afternoon while testing ways to use a jar of homemade apple butter; the deep, caramelized apple flavor paired with a smooth cream cheese filling immediately felt like the perfect autumn centerpiece. The gingersnap crust adds a lively spice note and crunchy texture that contrasts beautifully with the dense, creamy interior. It became an instant favorite at family gatherings, the kind of recipe that prompts multiple compliments and requests for the recipe every time I bring it to the table.
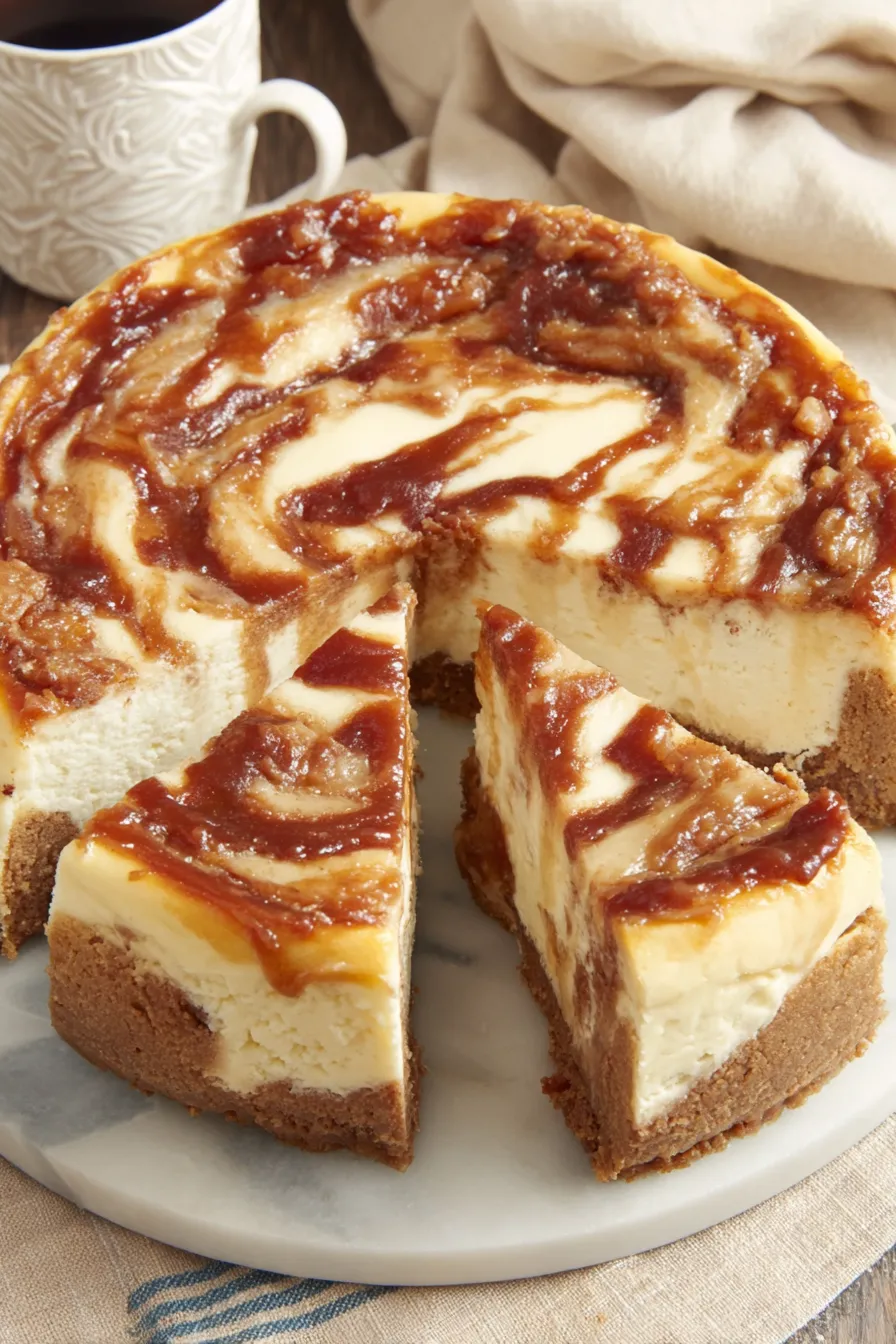
What makes this version special is the balance of textures and the gentle swirl of apple butter throughout the filling. Instead of heavy toppings, the apple butter is incorporated as ribbons and pockets, so each slice offers concentrated bursts of spiced apple sweetness. The baking technique — a brief high-heat bake followed by a long low-temperature set and warm oven rest — helps prevent cracking and produces a glossy, almost custardy top. It takes a little patience, but the payoff is a slice that slices cleanly, holds its shape, and tastes like a celebration of fall in every bite.
I remember serving this at a small family Thanksgiving where everyone came back for seconds without hesitation. The kids loved the sweeter apple ribbons and the adults appreciated the restrained sweetness and the way the gingersnaps complemented roast turkey and spiced sides. Over the years I've tweaked small things — a touch more sour cream here, a gentler swirl there — and each change made it more reliably crowd-pleasing.
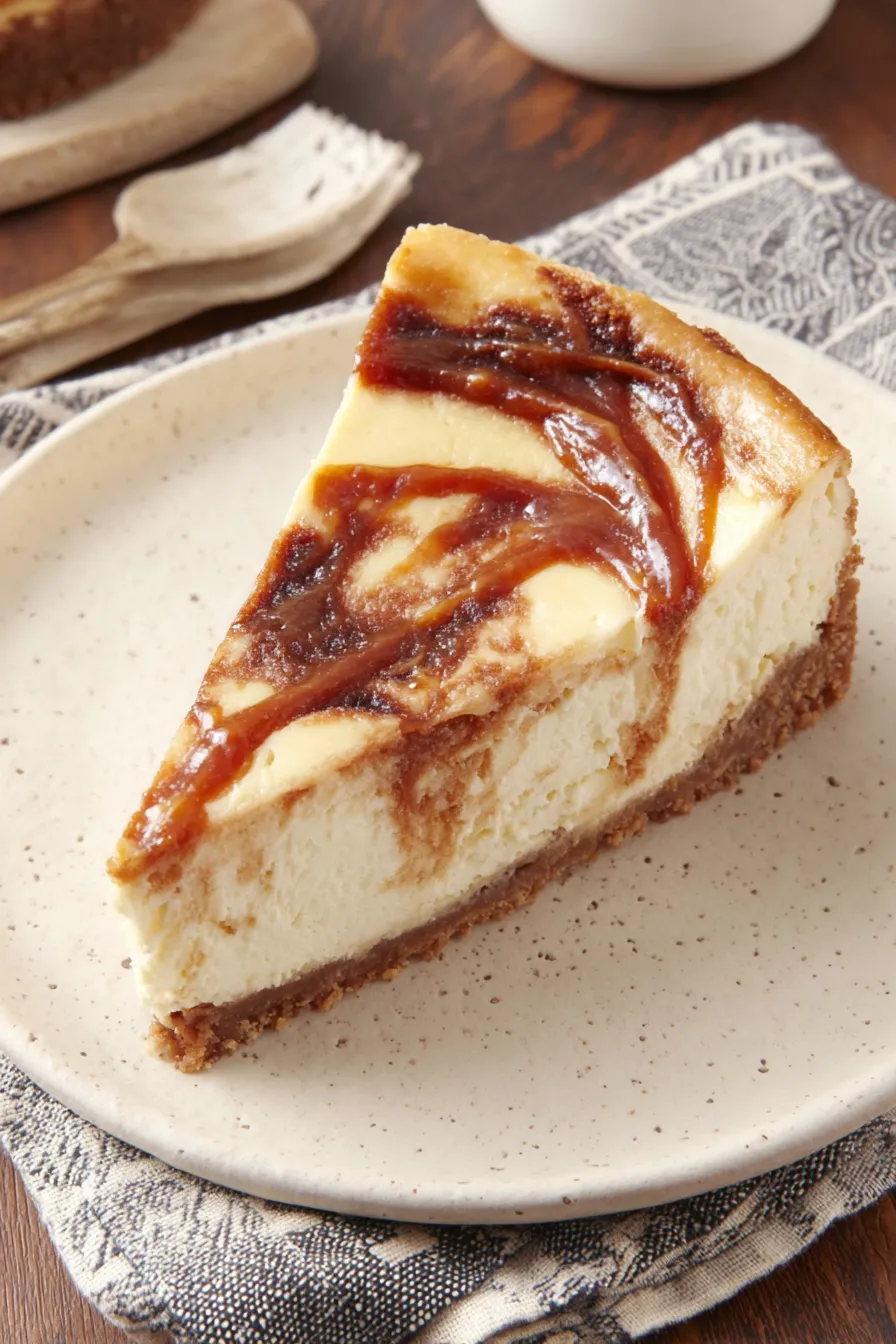
My favorite aspect of this preparation is how the apple butter concentrates flavor without overwhelming the filling; each forkful gives a creamy base punctuated by the warm, spiced apple pockets. At a recent dinner I watched guests savor the first bite in silence before praising the balance of tangy cream cheese, sweet brown sugar, and the cozy spice from the crust and apple butter. It feels like a small, edible memory every time I slice it.
Store the chilled dessert tightly covered in the refrigerator for up to four days to maintain texture and moisture; use an airtight container or wrap the pan with plastic wrap and a layer of foil. For longer storage, slice and freeze individual pieces on a baking sheet until firm, then wrap slices in plastic and foil and freeze up to three months. To thaw, move slices to the fridge for several hours or overnight before serving. Reheat gently at room temperature for 20 minutes if you prefer a slightly softer texture, but avoid microwaving to prevent melting the filling unevenly.
If you need to adapt the components, try graham cracker crumbs or finely crushed speculoos for a different spice profile instead of gingersnaps; increase melted butter slightly if using drier crumbs. Swap sour cream for full-fat Greek yogurt in equal measure for a similar tang and creaminess. For a gluten-free version, use certified gluten-free gingersnaps or a gluten-free cookie blend. To reduce sugar slightly, trim 2 tablespoons from the brown sugar — the apple butter and gingersnaps will still provide sweetness and depth.
Serve slices with a light dusting of ground cinnamon or a spoonful of warmed apple butter alongside whipped cream or a drizzle of caramel sauce for extra indulgence. The dessert pairs beautifully with black coffee, strong tea, or a dessert wine like late-harvest Riesling. For holiday tables, garnish with thin apple slices or candied ginger pieces for a decorative finish and complementary flavors.
For winter gatherings, stir a pinch of ground nutmeg and cloves into the apple butter before swirling for extra warmth. In late summer, swap apple butter for a peach or apricot conserve and follow the same swirl technique for a lighter, fruit-forward dessert. At Thanksgiving, add a teaspoon of bourbon to the filling for depth, or fold in a few tablespoons of toasted pecans into the crust for extra crunch and a festive note.
Build the crust and filling a day ahead and keep them covered in the fridge; assemble, bake, and chill overnight before serving. If you need to transport the finished dessert, freeze it partially (about 45 minutes) to firm it, then wrap and travel; thaw in the refrigerator at your destination. Use a silicone or nonstick springform pan liner to simplify unmolding and reduce the chance of cracks during travel or storage.
When you slice, wipe a warm knife between cuts for the cleanest presentation. This recipe rewards patience — the slow finish and overnight chill are key — so plan ahead and enjoy how much easier hosting feels when the most impressive dish is mostly done a day in advance.
Whether you make this for a holiday table or a quiet weekend dessert, it has a way of turning ordinary moments into memorable ones. I hope it becomes a small tradition in your home too.
Bring cream cheese and eggs to room temperature before mixing to avoid lumps and ensure a silky batter.
Use a rimmed baking sheet under the pan to catch any spills and protect the oven.
Run a thin knife around the pan edge after baking to prevent cracks as the cheesecake cools.
Chill overnight for the cleanest slices and the best texture.
Wipe a warm knife between slices for presentation that looks professional.
This nourishing apple butter cheesecake recipe is sure to be a staple in your kitchen. Enjoy every moist, high protein slice — it is perfect for breakfast or as a wholesome snack any time.
This Apple Butter Cheesecake recipe makes perfectly juicy, tender, and flavorful steak every time! Serve with potatoes and a side salad for an unforgettable dinner in under 30 minutes.
Preheat oven to 350 degrees Fahrenheit and grease a 9-inch springform pan. Combine gingersnap crumbs and melted butter, press into the bottom of the pan, and bake on a rimmed sheet for 10 minutes. Let cool while you make the filling.
Beat room-temperature cream cheese with brown sugar until smooth. Add eggs one at a time, then vanilla and sour cream. Mix until just combined, scraping the bowl to remove any lumps.
Pour half the filling over the cooled crust. Dollop half the apple butter and gently swirl with a knife. Add remaining filling, then dollop and swirl remaining apple butter to create ribbons.
Bake at 350 F for 10 minutes, then reduce oven to 200 F and bake about 2 hours until the top is almost set with a slight wobble. Remove and run a thin knife around the edge.
Turn off the oven and return the cheesecake to the warm oven for 2 hours to finish setting. After that, cover loosely and refrigerate overnight before unmolding and slicing.
Last Step: Please leave a rating and comment letting us know how you liked this recipe! This helps our business to thrive and continue providing free, high-quality recipes for you.
Leave a comment & rating below or tag
@feastu on social media!

Delightfully spooky and sweet, these bite-sized mummy cake balls combine moist cake, creamy centers, and a vanilla candy shell for effortless Halloween fun.

Fluffy homemade donuts crowned with a shimmering galaxy glaze. Fry or bake, swirl bold colors, and watch these showstoppers disappear fast.

Buttery shortbread crust meets gooey pecan pie filling in easy bar form, perfect for holidays, bake sales, and cozy weeknights.
Leave a comment & rating below or tag @feastu on social media!
Enjoyed this recipe? Share it with friends and family, and don't forget to leave a review!
This recipe looks amazing! Can't wait to try it.
Comments are stored locally in your browser. Server comments are displayed alongside your local comments.

Join to receive our email series which contains a round-up of some of our quick and easy family favorite recipes.
