
>>

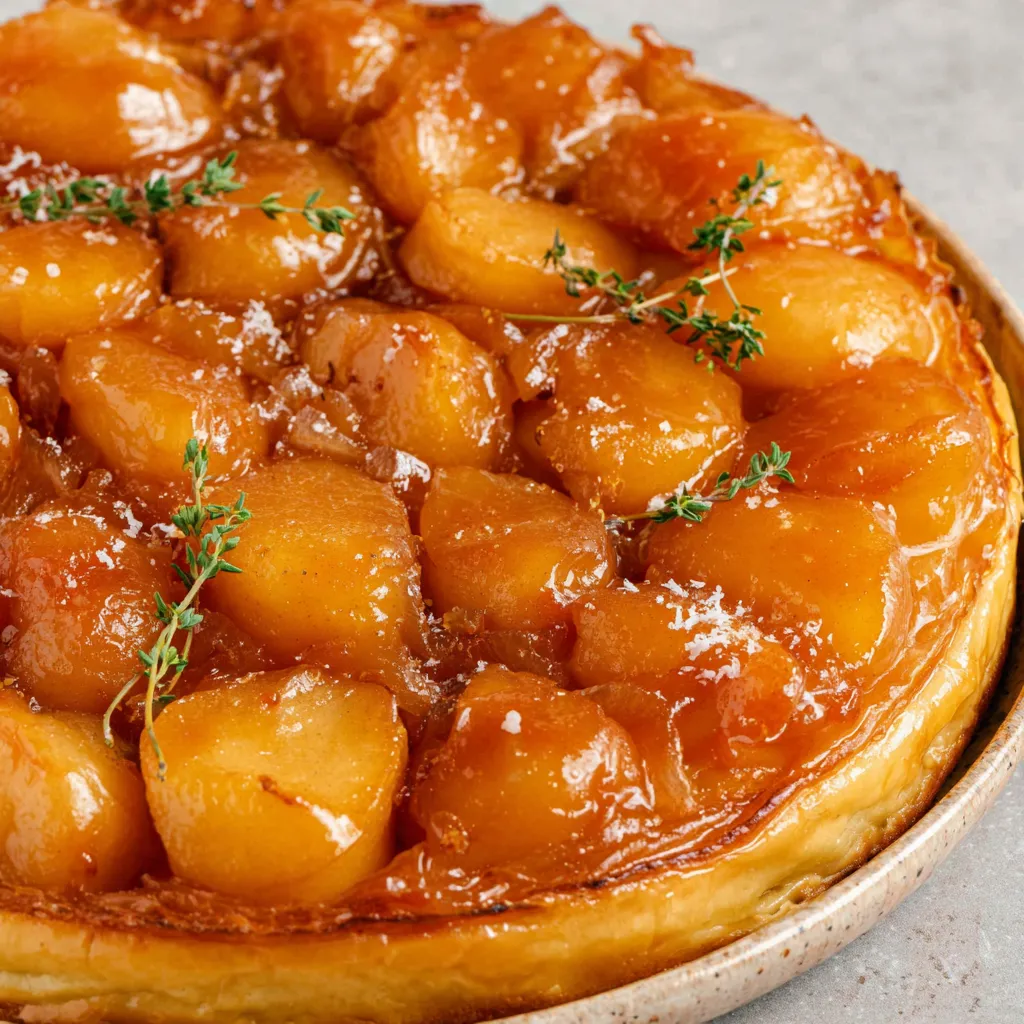
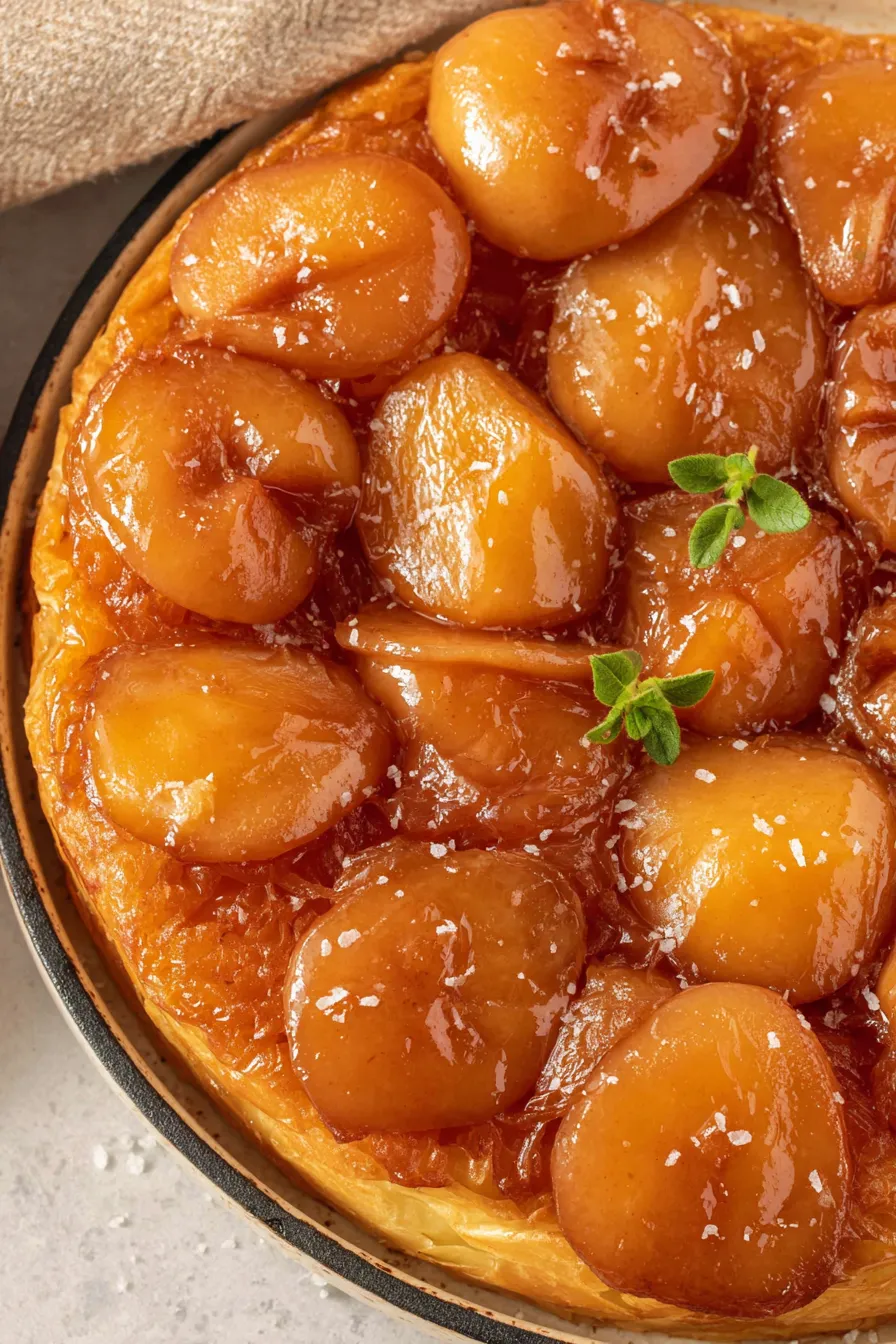
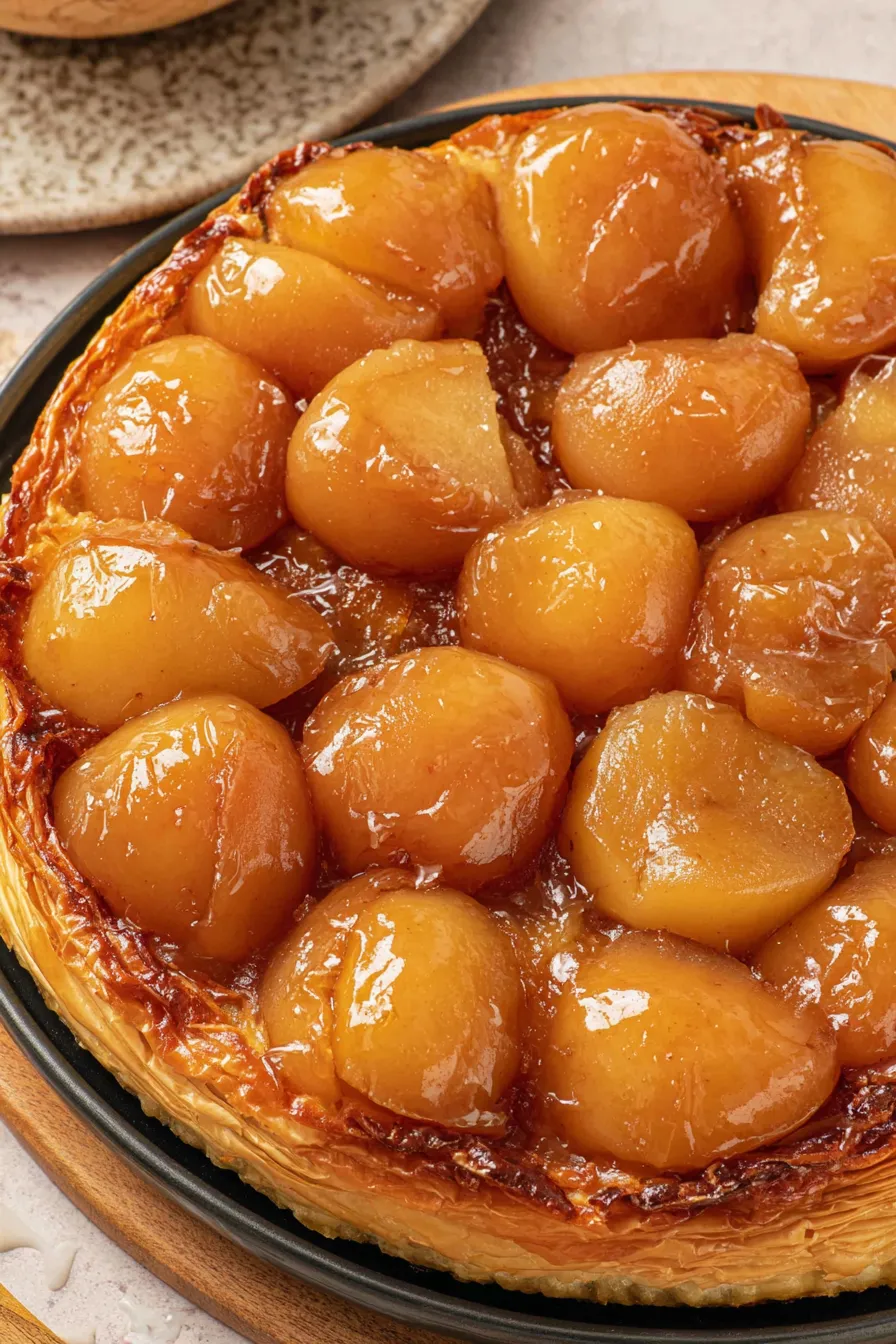
A classic upside-down caramelized apple tart with crisp puff pastry. Rich, glossy caramel and tender apples make this a showstopping dessert for any occasion.
This Apple Tarte Tatin has been a centerpiece of many family celebrations in my kitchen. I first taught myself to make it on a rainy weekend when I wanted a dessert that felt both elegant and homey. The technique is deceptively simple: fruit caramelized in butter and sugar, covered with a sheet of puff pastry, then inverted so the glossy apples are revealed. The moment the caramel glistens and the pastry is golden, the house fills with a sweet, toffee-like aroma that always gets everyone to the table.
I discovered this version while adapting a traditional French approach to use readily available ingredients from my pantry. Using tart, firm apples and store-bought puff pastry keeps the process approachable without sacrificing flavor. The textures — tender, slightly jammy apples against flaky, crisp pastry — and the balance of sweet caramel and bright lemon are what make this so memorable. It has become my go-to dessert for guests because it looks impressive, yet it is forgiving to prepare.
Personally, I love how the tart always brings people into the kitchen. My partner calls it the “first-course-for-dessert” moment because everyone tastes the caramel sauce straight from the pan while the pastry finishes browning. After a few tries I learned the timing for caramel and the importance of cooling the apples slightly before adding the dough — that small patience pays off in clean slices and a glossy finish.
My favorite part of this preparation is the pause between the par-bake and covering with pastry. That cooling step makes the difference between a tidy inversion and a sticky, overrun tart. I remember once skipping that rest and losing a few decorative apple halves. Since then, patience has been my best trick for clean presentation.
Store the tart covered in the refrigerator for up to 3 days. Use an airtight container or wrap the skillet with plastic wrap. When reheating, put slices on a baking sheet and warm at 300 degrees Fahrenheit for 8 to 12 minutes; this revives the pastry without scorching the caramel. If the caramel has become very firm, allow slices to sit at room temperature for 10 minutes before reheating. For longer storage, remove slices and freeze flat in a single layer on a sheet pan, then transfer to a freezer bag for up to one month. Reheat from frozen at 325 degrees Fahrenheit for about 15 minutes.
If you prefer less-sweet caramel, reduce sugar to 1/2 cup and add 1 tablespoon of dark corn syrup to stabilize the caramel. For a richer butter note, use brown butter (clarify or brown gently) but reduce the cooking time by a minute to avoid over-darkening. Swap apples for pears in late autumn; firm Bosc pears hold shape well. Gluten-free puff pastry can be used, but expect a slightly different lift and texture. For a vegan version, use a plant-based butter and a vegan puff pastry; the flavor will change but the technique stays the same.
Serve warm slices with a dollop of whipped chantilly or a scoop of vanilla ice cream to contrast the warm caramel. A few flaked salt crystals on top enhance complexity. For a leisurely brunch, serve alongside lightly sweetened yogurt and strong coffee. Garnish with thin apple slices or a sprig of thyme for a visual lift. For a dinner party, present the whole tart on a warmed platter and slice at the table so guests enjoy the theatrical reveal.
Tarte Tatin is a classic of French country cooking, invented in the late 19th century at the Hotel Tatin. The story goes that the tart was created by accident when the Tatin sisters caramelized apples too long and, improvising, covered them with pastry and inverted the pan. The upside-down method concentrates flavor and creates the signature glossy top. Regional variations across France include using different fruits like pears or plums and adapting sugar and butter proportions to local tastes.
In autumn and winter, use firm, tart apple varieties and add a pinch of ground cinnamon or a vanilla bean for warmth. In spring, substitute apricots or plums for a lighter fruit flavor and reduce caramel time slightly to preserve fruit freshness. During holidays, fold a tablespoon of Calvados or brandy into the caramel after removing from heat for a boozy depth. For citrus seasons, swap half the apples with quartered pears to brighten the profile.
For make-ahead convenience, caramelize and par-bake the apples up to a day in advance, cool completely, then refrigerate covered. When ready to serve, roll out pastry and finish baking. Portion the tart into individual ramekins for elegant single-serve presentations; adjust baking time slightly. Keep a small jar of reserved caramel for glazing and reheating — it elevates the look and mouthfeel when serving later in the week.
Every time I make this dessert, it reaffirms that simple techniques and good ingredients can create memorable moments. Invite friends, slice generously, and enjoy the caramel sweetness and flaky pastry together.
Use medium-sized apples for uniform cooking and a tidy presentation.
Allow the par-baked apples to cool before adding pastry to avoid sliding.
If caramel separates, whisk briefly off heat to re-emulsify before adding the apples.
This nourishing apple tarte tatin recipe is sure to be a staple in your kitchen. Enjoy every moist, high protein slice — it is perfect for breakfast or as a wholesome snack any time.
Yes. Use firm apples like Granny Smith or Braeburn. Softer varieties will break down and become mushy during cooking.
Allow the caramel to cool slightly; it will thicken but remain glossy and easier to manage when inverting. Wear oven mitts and invert while warm.
This Apple Tarte Tatin recipe makes perfectly juicy, tender, and flavorful steak every time! Serve with potatoes and a side salad for an unforgettable dinner in under 30 minutes.
Peel, core, and halve 5 to 6 medium apples. Toss with 1 tablespoon fresh lemon juice to prevent browning and ensure even cooking.
In a heavy 9-inch ovenproof skillet over medium heat, melt 3/4 cup sugar with 1/4 cup unsalted butter and 1 tablespoon lemon juice. Stir gently until a light amber color develops, about 6 to 8 minutes. Remove from heat and whisk in 1/4 teaspoon salt.
Pack the apple halves cut-side up into the hot caramel in concentric circles, leaving little space between pieces. If needed, layer apples so the surface is even.
Place the skillet in a 350°F oven for about 20 minutes until apples are partially cooked but still hold shape. Remove and cool to room temperature.
Roll chilled puff pastry into an 11 to 12-inch circle and prick all over with a fork. Keep pastry cold until assembly.
If excess liquid is present, spoon some off so apples sit in glossy caramel. Drape pastry over apples, tucking edges down. Bake at 375°F for 25 to 30 minutes until golden and crisp.
Let the tart rest 15 minutes after baking. If you reserved excess caramel, brush it over the apples for shine. Invert the skillet onto a serving plate while warm.
Slice and serve warm with whipped cream or vanilla ice cream. Reheat leftovers at 300°F for 8 to 12 minutes to revive pastry crispness.
Last Step: Please leave a rating and comment letting us know how you liked this recipe! This helps our business to thrive and continue providing free, high-quality recipes for you.
Leave a comment & rating below or tag
@feastu on social media!

Delightfully spooky and sweet, these bite-sized mummy cake balls combine moist cake, creamy centers, and a vanilla candy shell for effortless Halloween fun.

Fluffy homemade donuts crowned with a shimmering galaxy glaze. Fry or bake, swirl bold colors, and watch these showstoppers disappear fast.

Buttery shortbread crust meets gooey pecan pie filling in easy bar form, perfect for holidays, bake sales, and cozy weeknights.
Leave a comment & rating below or tag @feastu on social media!
Enjoyed this recipe? Share it with friends and family, and don't forget to leave a review!
This recipe looks amazing! Can't wait to try it.
Comments are stored locally in your browser. Server comments are displayed alongside your local comments.

Join to receive our email series which contains a round-up of some of our quick and easy family favorite recipes.
