
>>

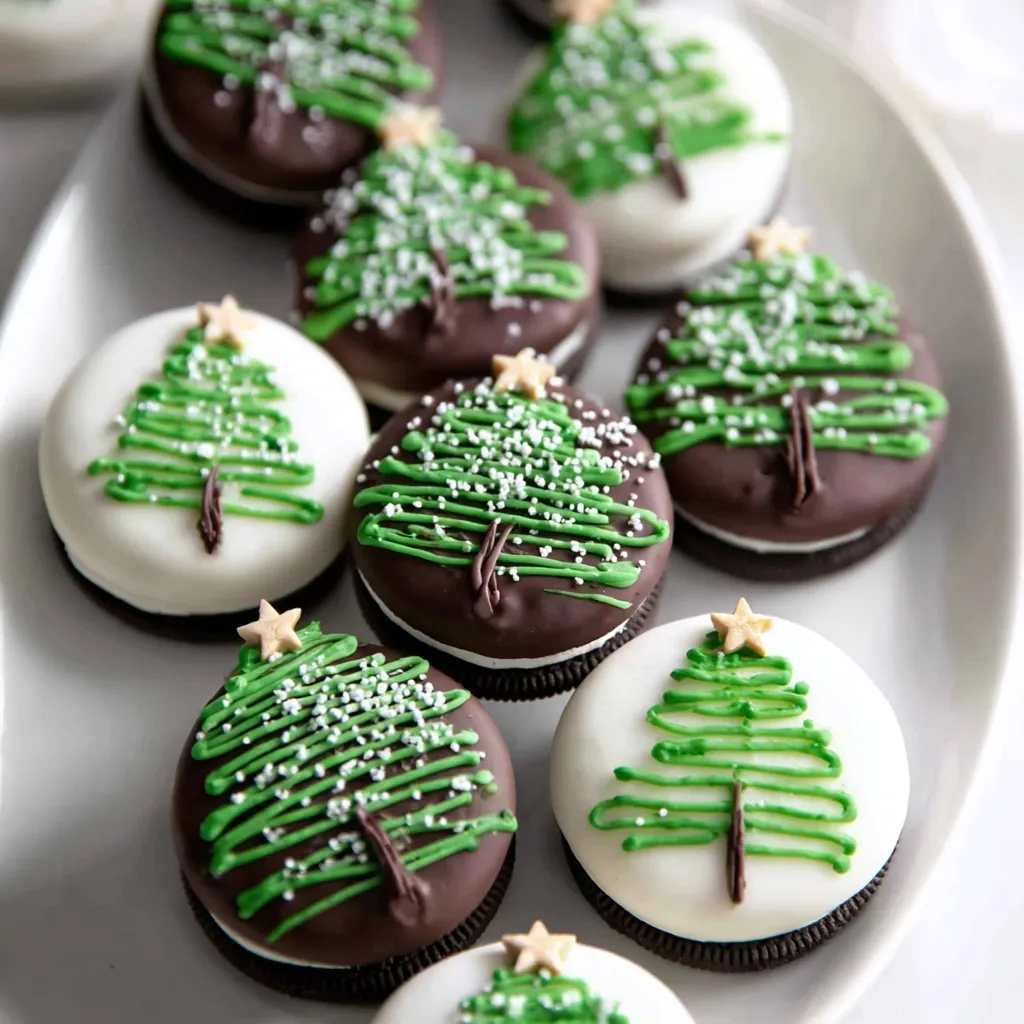
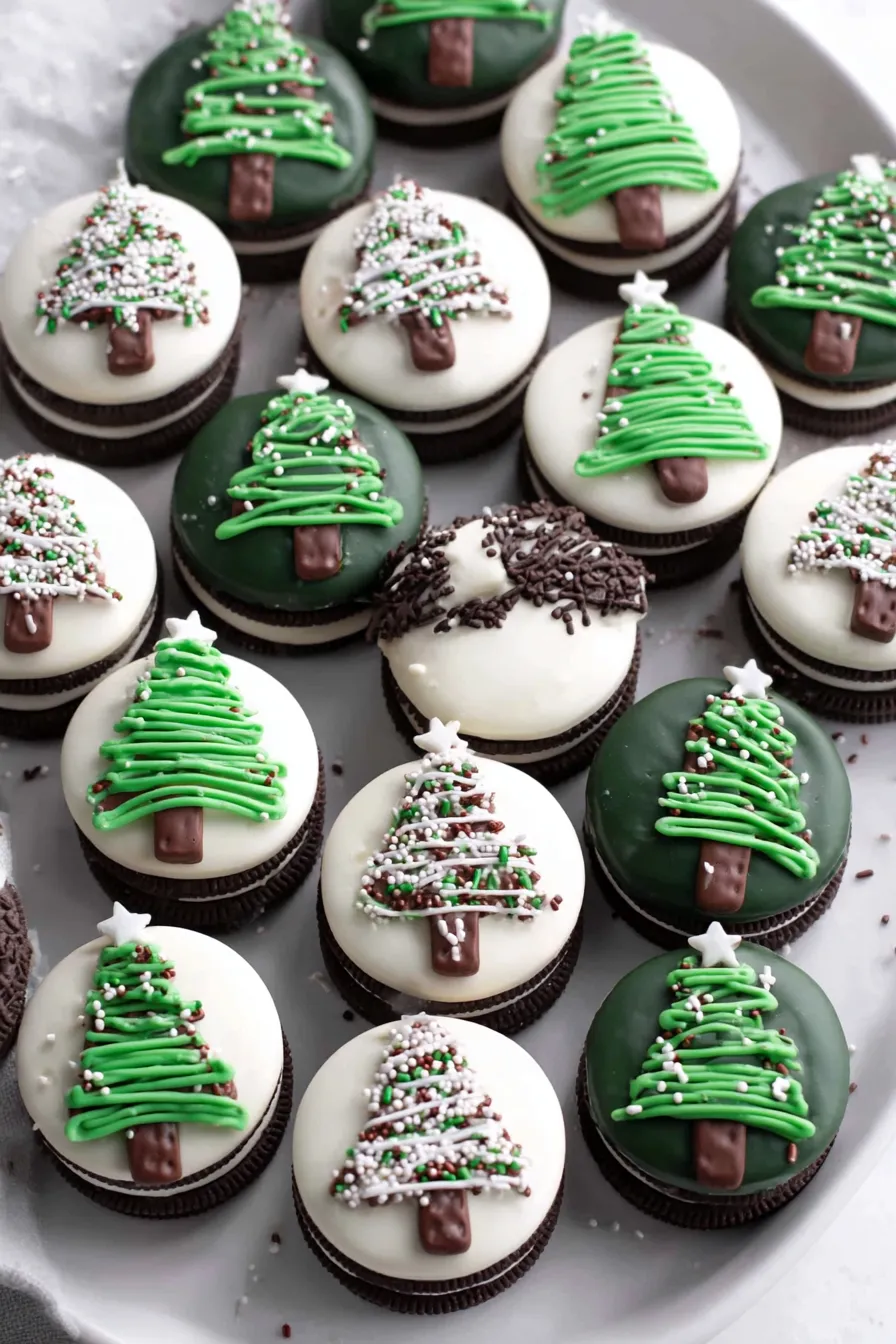
Turn simple Oreos into festive Christmas tree cookies with melted white and green chocolate, candy star toppers, and chocolate jimmies for trunks — a quick, crowd-pleasing holiday treat.
This Christmas Oreo Tree Cookies idea is one of those holiday projects that began as a quick afternoon experiment and turned into a seasonal tradition. I first made these on a wet December day when I needed something cheerful for a neighborhood cookie swap: plain Oreos, a couple of bags of melting wafers, and a handful of candy stars. The simplicity of the technique — dipping, piping, and decorating — surprised me. The white chocolate provides a clean canvas, the green chocolate becomes playful and painterly, and a tiny star on top makes each cookie feel like a miniature celebration.
What makes these so special is how accessible they are: no rolling, no chilling of dough, and almost no special equipment. Kids love piping the tree shapes, and adults appreciate the nostalgic crunch of an Oreo paired with silky chocolate. These cookies are crisp at the edges with a smooth, slightly creamy top layer when the chocolate sets. They’re perfect for holiday platters, neighbor gifts, or a simple after-dinner treat when you want something quick but festive.
I remember the first time I brought a tin of these to a cookie exchange and watched neighbors light up when they realized they were Oreos in disguise. One friend immediately asked for the recipe; another framed the single perfect tree cookie as a centerpiece before the rest were eaten. Simple gestures like a candy star or crunchy jimmies can turn the ordinary into something memorable.
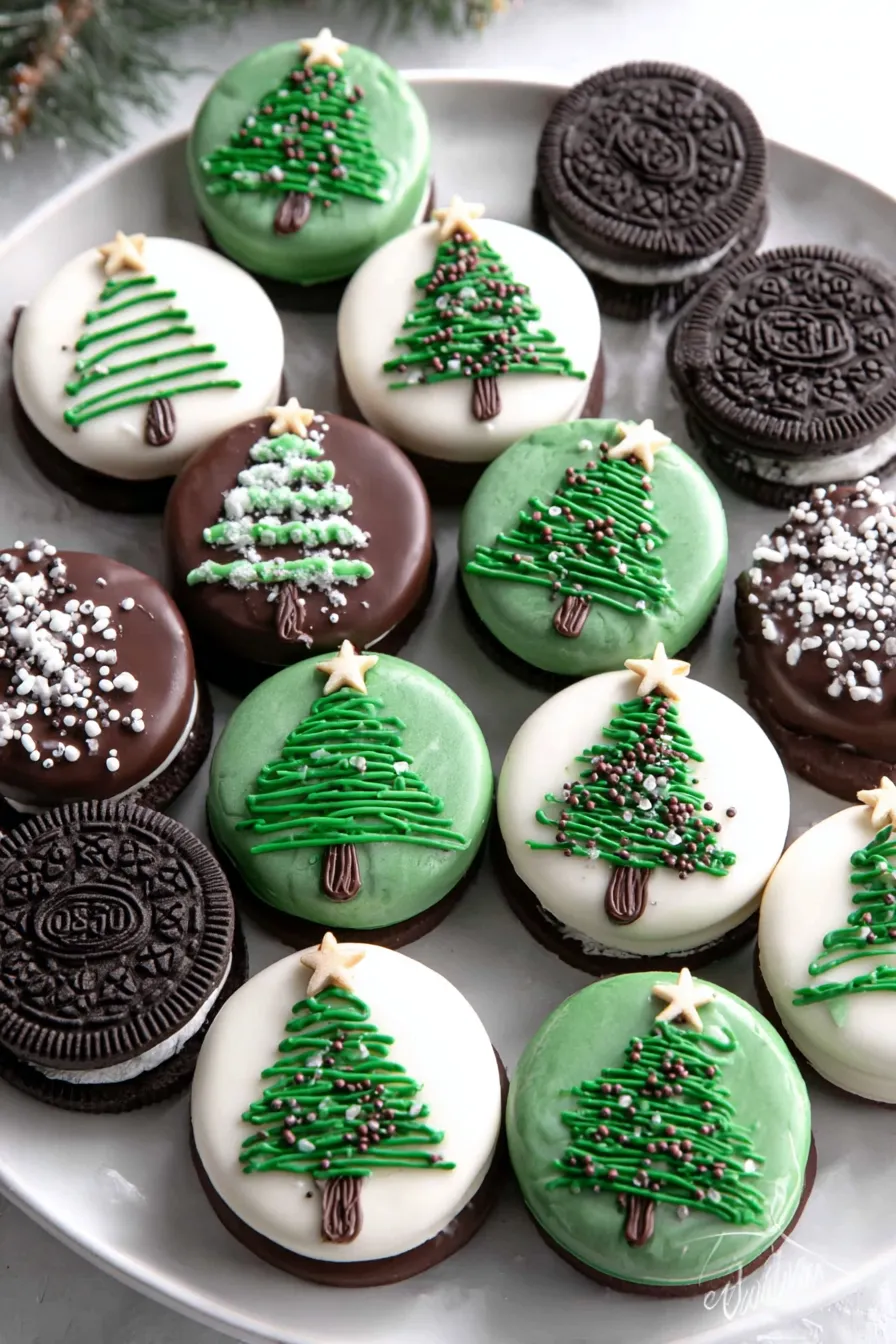
My favorite part of this project is the decorating table — neighbors, kids, and friends hovering with hot chocolate, each making slightly different trees. One year my niece insisted on gold stars on every cookie and we ended up with the shiniest batch on the block. The technique rewards creativity: swap colors, use edible glitter, or add tiny holly leaves with red sprinkles for instant variety. These simple steps create a festive spread that always disappears fast.
Keep finished cookies in a single layer or separated with parchment paper in an airtight container at cool room temperature. Avoid the refrigerator unless your home is very warm; condensation can dull the shine and make coatings sticky. For longer storage, freeze in a flat layer on a sheet pan until solid, then stack with parchment between layers in a freezer-safe container for up to 2 months. Thaw in the refrigerator briefly, then bring to room temperature before serving to prevent moisture on the coating.
If you need dairy-free options, choose vegan white melts and check that Oreos or alternative sandwich cookies are dairy-free in your region. For gluten-free versions, use certified gluten-free sandwich cookies and ensure coating wafers are labeled gluten-free. Swap candy stars for small sugar pearls or halved M&M candies for color variation. If you want a deeper green, mix dark chocolate with a little green oil-based coloring or use tinted modeling chocolate — just note that adding water-based food color to melting wafers can seize them.
Arrange cookies on a festive platter with a few whole candy canes, fresh rosemary sprigs to mimic pine, and small bowls of extra sprinkles for a DIY decorating station. They pair beautifully with mulled cider, coffee, or a creamy hot chocolate. For a party, stack them in clear cello bags tied with ribbon as individual favors, or create a cookie tree display by stacking tiers of cookies separated with parchment circles.
Decorated cookies have long been part of Christmas celebrations in many cultures, where ornamental sweets convey hospitality and cheer. These Oreo trees are a modern, Americanized take — combining the classic sandwich cookie with festive confectionery techniques. They reflect the holiday spirit of repurposing familiar treats into decorative bites that bring people together for simple, shared pleasures.
In winter, try deep emerald green and metallic gold stars for a luxe look; during the holidays’ child-focused parties, bright lime and neon pink make whimsical options. For Thanksgiving, warm amber and russet tones with leaf-shaped sprinkles create seasonal flair. You can also create mini snowmen by piping white circles and using small candies for eyes and scarves — the basic dipping and piping method is very adaptable.
To streamline prep for a large event, pre-measure your melts into microwave-safe bowls and set out piping bags and toppers on a tray. Dip all cookies first and let them set while you melt the green wafers. If making several colors or designs, label bowls and bags to avoid confusion. Use a cooling rack over parchment to save counter space, and have extra spatulas and spoons ready for quick cleanup between batches.
These Christmas Oreo Tree Cookies are simple to make, endlessly adaptable, and always a crowd-pleaser. Whether you’re gifting them, bringing them to a swap, or setting up a family decorating afternoon, they capture a playful holiday spirit with minimal fuss. Try a batch this season and make the design your own — the best part is sharing them with people you love.
Heat the melting wafers in short bursts and stir frequently to prevent scorching.
Pipe on a steady surface and use small snips in a piping bag for better control.
Chill briefly if your kitchen is warm to help decorations set without smudging.
This nourishing christmas oreo tree cookies recipe is sure to be a staple in your kitchen. Enjoy every moist, high protein slice — it is perfect for breakfast or as a wholesome snack any time.
If you chill the cookies, place them in the refrigerator for about 5–10 minutes until the coatings set. Avoid long refrigeration to prevent condensation.
Yes — swap to dairy-free melting wafers and certified gluten-free sandwich cookies to make this suitable for those dietary needs.
This Christmas Oreo Tree Cookies recipe makes perfectly juicy, tender, and flavorful steak every time! Serve with potatoes and a side salad for an unforgettable dinner in under 30 minutes.
Line a baking sheet with parchment paper or use a silicone mat to keep dipped cookies from sticking while the coating sets.
Heat 6 ounces of white melting chips in a microwave-safe bowl in 30-second bursts, stirring between each until fully melted and smooth. Avoid overheating.
Dip each Oreo halfway into the melted white chocolate, lift with a fork to allow excess to drip, then place on the prepared sheet to set.
Melt 3 ounces of green melting wafers in a separate bowl, stirring until smooth. If necessary, add a small teaspoon of vegetable oil to reach pipeable consistency.
Pipe back-and-forth lines in a triangular shape on the white-coated portion to form a tree. Use steady motions for even branches and correct any snags before the coating hardens.
Place a candy star on top of each tree and use chocolate jimmies or piped brown chocolate to create the trunk. Allow all decorations to fully set before serving.
Last Step: Please leave a rating and comment letting us know how you liked this recipe! This helps our business to thrive and continue providing free, high-quality recipes for you.
Leave a comment & rating below or tag
@feastu on social media!

Delightfully spooky and sweet, these bite-sized mummy cake balls combine moist cake, creamy centers, and a vanilla candy shell for effortless Halloween fun.

Fluffy homemade donuts crowned with a shimmering galaxy glaze. Fry or bake, swirl bold colors, and watch these showstoppers disappear fast.

Buttery shortbread crust meets gooey pecan pie filling in easy bar form, perfect for holidays, bake sales, and cozy weeknights.
Leave a comment & rating below or tag @feastu on social media!
Enjoyed this recipe? Share it with friends and family, and don't forget to leave a review!
This recipe looks amazing! Can't wait to try it.
Comments are stored locally in your browser. Server comments are displayed alongside your local comments.

Join to receive our email series which contains a round-up of some of our quick and easy family favorite recipes.
