
Coconut Brownies

Decadent layered squares with a fudgy chocolate base, a sweet coconut filling, and a crisp top — perfect for sharing and potlucks.
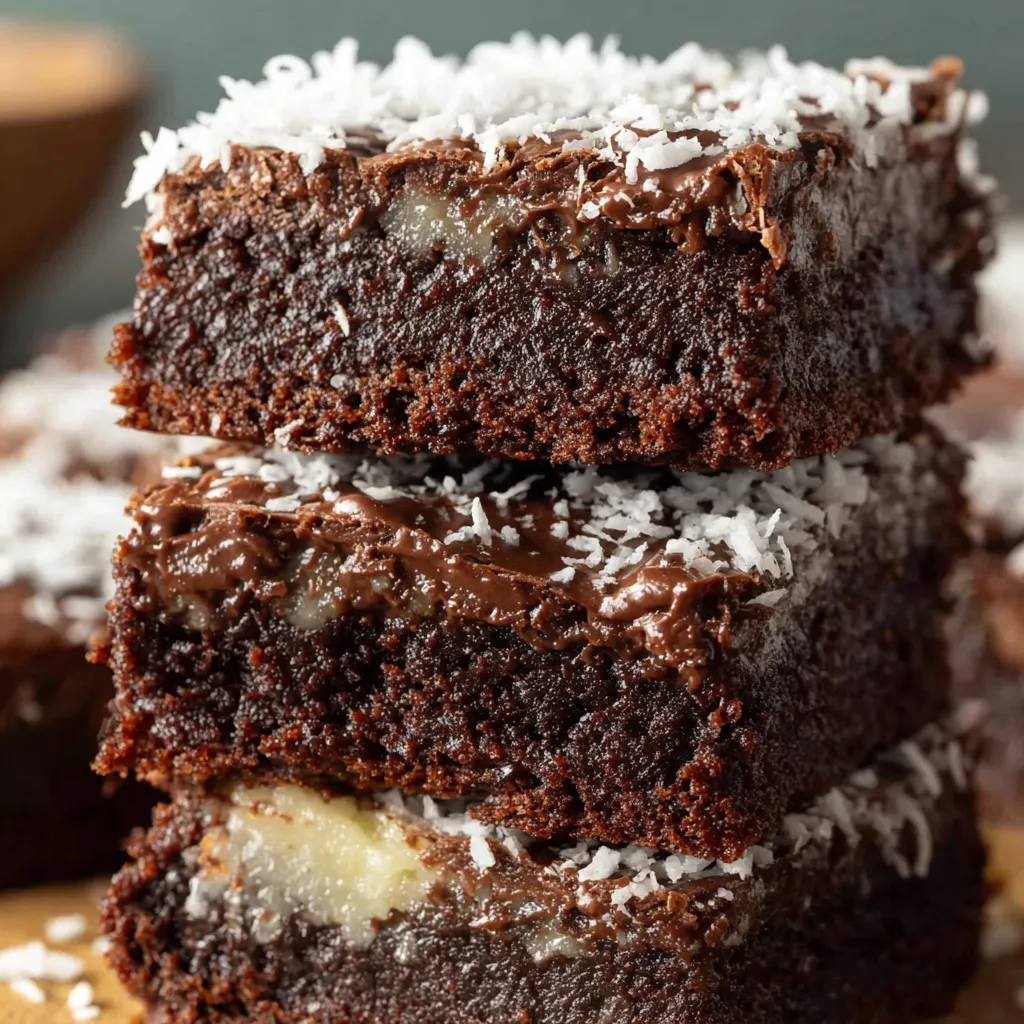
This coconut brownie is one of those recipes I reached for the moment I wanted something both nostalgic and indulgent. I first made these on a rainy afternoon when a bag of sweetened coconut and a craving for something chocolatey collided. The moment I sliced into the pan and the coconut layer showed a soft, glossy seam between two layers of fudgy brownie, I knew it was a keeper. The combination of chewy coconut, sweetened condensed milk, and a tender chocolate base creates a satisfying contrast of textures and a familiar taste that reminds me of childhood bake sale treats.
These squares are special because they balance richness with a pleasant chew. The bottom and top layers are classic cocoa-forward brownies that remain tender rather than cakey, thanks to melted butter and just enough flour. The middle layer is a coconut filling made with sweetened coconut flakes and condensed milk that melts into a slightly caramelized, sticky ribbon as the bake completes. Serve warm for a gooey center or chilled for clean slices. Both ways bring smiles at the table.
Why You'll Love This Recipe
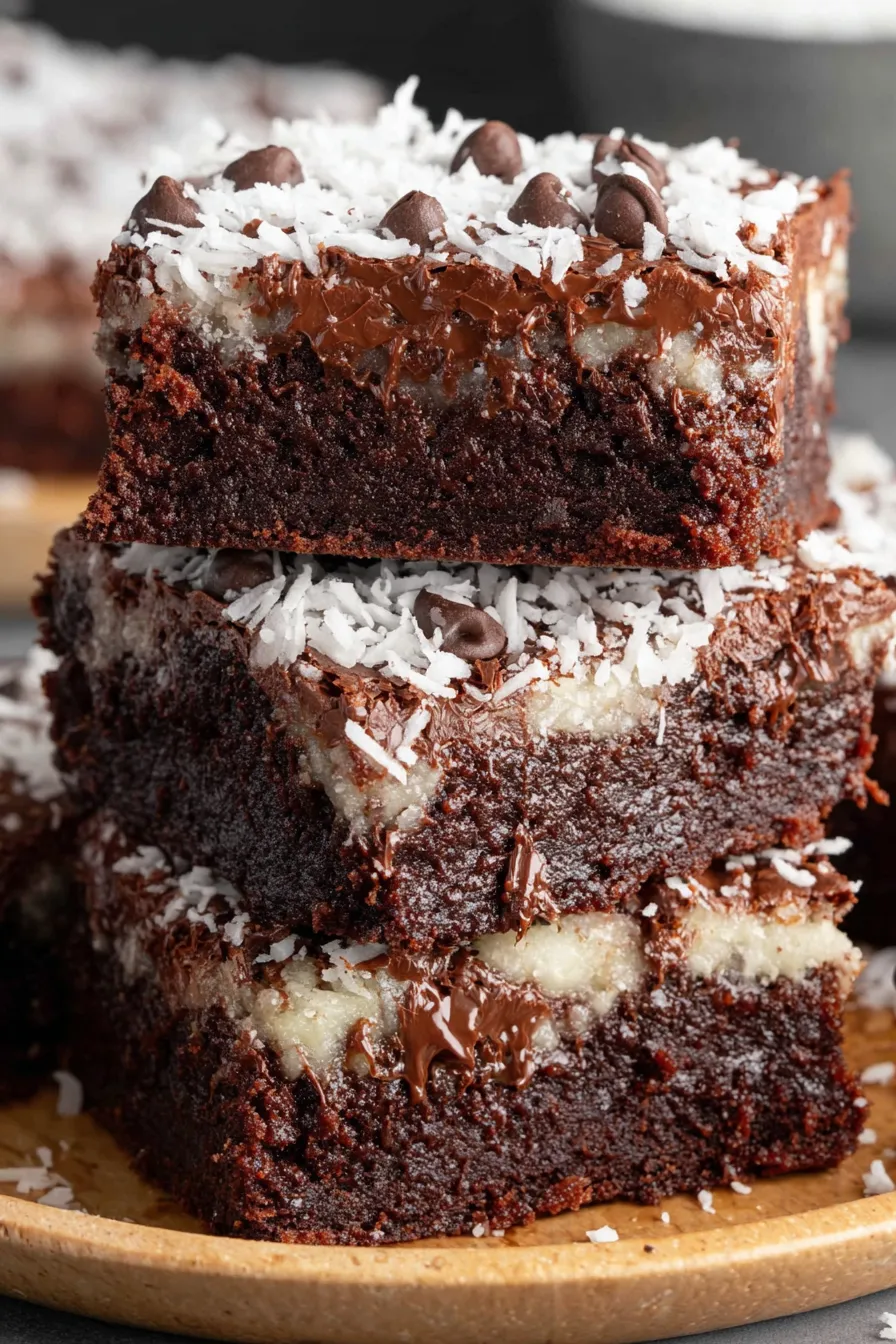
- Layered texture that delivers fudgy chocolate, a chewy coconut ribbon, and a satisfying bite in every square; the contrast keeps each mouthful interesting.
- Uses pantry staples like all purpose flour, granulated sugar, cocoa powder, and sweetened condensed milk so you can pull this together quickly without a special trip to the store.
- Comforting and crowd pleasing; ideal for potlucks and celebrations because it slices into neat two inch squares that travel well.
- Make-ahead friendly: the flavor improves when chilled overnight and these hold shape for easy transport or gifting in a bake box.
- Simple technique that even beginners can master: melt, whisk, fold, layer, and bake. Ready in about 60 minutes from start to finish including baking and initial cooling.
I remember the first time I brought these to a neighborhood gathering and watched people reach for seconds before dessert plates had been cleared. My partner commented that the coconut layer tastes like caramelized candy while my friend insisted they were better than store-bought bars. That enthusiastic response cemented this version as my go-to when I want to impress without fuss.
Ingredients
- All purpose flour: Use 1 cup plus an extra teaspoon for tossing with the chocolate chips. Choose a fresh, unbleached brand for the best flavor and avoid overmeasuring to keep the base tender.
- Cocoa powder: Half a cup of unsweetened cocoa powder gives that deep chocolate flavor. I prefer natural cocoa for a slightly brighter finish; use Dutch processed if you want a darker, smoother note.
- Salt: A quarter teaspoon in the batter and a quarter teaspoon in the coconut mixture both enhance flavor and prevent sweetness from becoming flat.
- Granulated sugar: One and a half cups; this balances the bitterness of the cocoa and the chew of the coconut. Use regular white sugar for predictable texture.
- Salted sweet cream butter: Three quarters cup, melted and cooled. Salted butter adds a subtle savory lift; if using unsalted, add an extra pinch of salt to the batter.
- Eggs: Two large eggs bind and add richness; room temperature eggs mix more evenly into the batter.
- Vanilla extract: Two teaspoons in the batter and one teaspoon in the coconut layer to deepen aroma and tie the layers together.
- Mini semi sweet chocolate chips: Half a cup, tossed with a teaspoon of flour to keep them suspended in the batter and prevent sinking during baking.
- Sweetened coconut flakes: Two and a half cups for a pronounced coconut ribbon. Shredded sweetened flakes give the classic chew and bite.
- Sweetened condensed milk: Two thirds cup binds the coconut into a glossy, slightly caramelized filling when baked.
Instructions
Preheat and prepare pan: Preheat oven to 350 degrees Fahrenheit. Line an 8 by 8 inch baking dish with parchment paper leaving an overhang for easy removal. Lightly spray the parchment with nonstick spray so the brownies release cleanly after cooling. Mix dry base ingredients: Whisk together 1 cup of all purpose flour, 1/2 cup cocoa powder, and 1/4 teaspoon salt in a medium bowl. Sifting the cocoa at this stage helps prevent lumps and ensures an even cocoa distribution. Toss chips: In a small bowl stir the 1/2 cup mini chocolate chips with the extra teaspoon of flour until they are lightly coated. This thin coating reduces sinking and gives an even distribution in the batter. Whisk wet ingredients: In another medium bowl whisk together the melted and cooled 3/4 cup butter, 1 and 1/2 cups granulated sugar, two eggs, and 2 teaspoons vanilla extract until glossy. Cooling the butter prevents cooking the eggs and ensures smooth integration. Combine batter: Using a wooden spoon fold the flour and cocoa mixture into the wet mixture. Stir just until combined; over mixing develops gluten and will lead to a denser texture rather than a tender bite. Fold in chips and layer: Fold in the floured chocolate chips. Spread half of the batter evenly into the prepared pan, smoothing with an offset spatula to the edges for an even bottom layer. Prepare coconut filling: In a small mixing bowl combine 2 and 1/2 cups sweetened coconut flakes, 2/3 cup sweetened condensed milk, 1 teaspoon vanilla extract, and 1/4 teaspoon salt. Stir until fully combined. The mixture will be thick and glossy. Assemble layers: Using a silicone spatula or offset spatula, carefully spread the coconut filling over the bottom layer. Work gently to avoid disturbing the brownie base. Spoon dollops of the remaining brownie batter over the coconut and use the spatula to spread into an even top layer. Bake and check doneness: Bake at 350 degrees Fahrenheit for 35 to 40 minutes until the edges are set and a toothpick inserted into the chocolate layer comes out with a few moist crumbs but not wet batter. Baking times vary with oven; rotate the pan halfway through if your oven has hot spots. Cool and slice: Allow the pan to cool completely on a wire rack before lifting out using the parchment overhang. Chill for cleaner slices if desired, then slice 4 across and 4 down into sixteen 2 inch by 2 inch squares.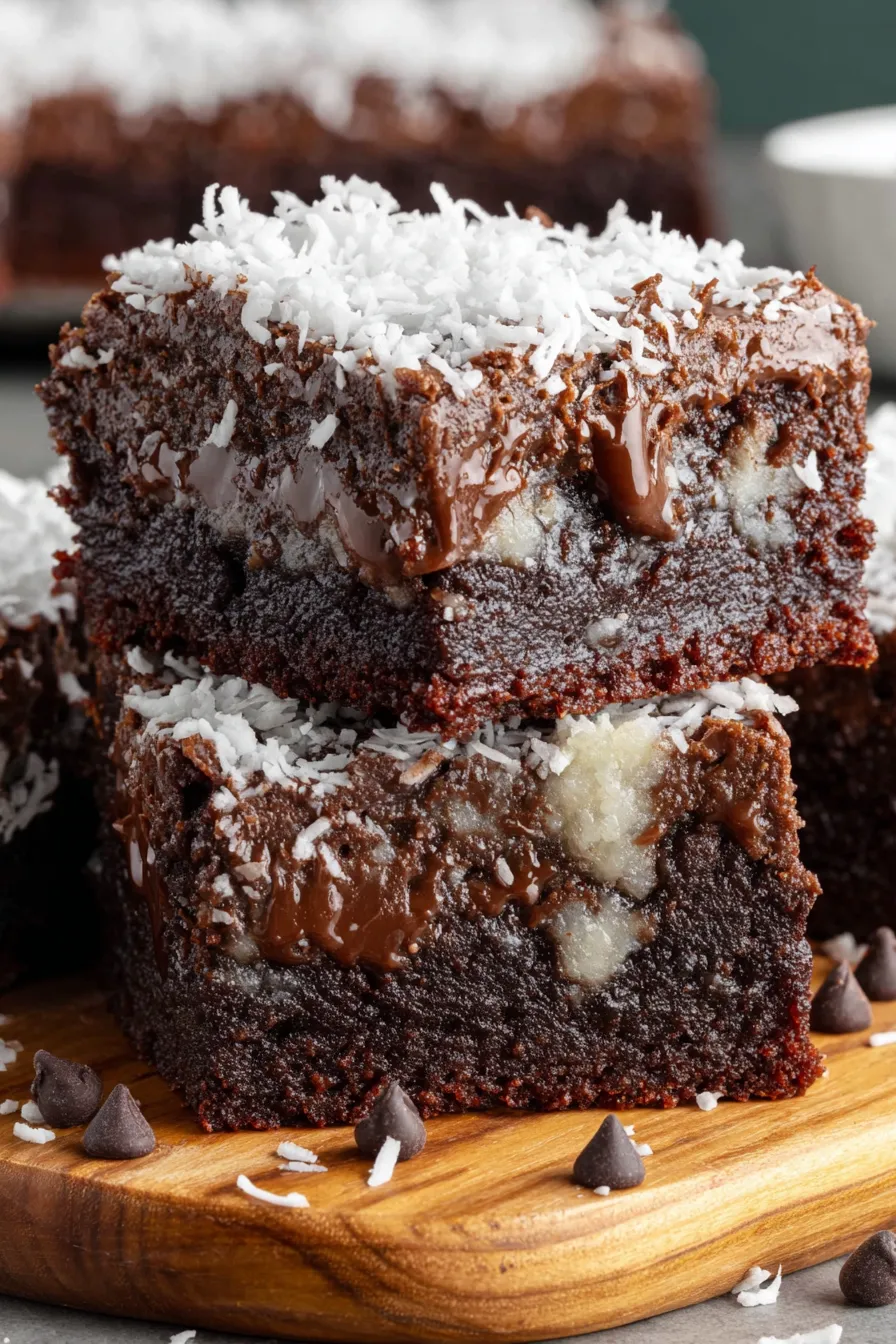
You Must Know
- High in calories and sugar per serving; each square is rich and best enjoyed in moderation as a treat.
- These hold well refrigerated for up to five days when stored in an airtight container and freeze beautifully for up to three months wrapped tightly.
- Allowing the pan to cool fully before slicing yields cleaner edges; chilling for 30 minutes produces the cleanest cuts.
- If you prefer a less sweet filling, substitute one cup unsweetened coconut with one and a half cups sweetened for reduced sweetness and similar texture.
My favorite thing about this combination is how the condensed milk creates a slightly caramelized glue that transforms plain coconut flakes into something more decadent. I have gifted these bars many times and received notes that the flavor evokes store-bought candy bars with a homemade warmth. Watching a batch disappear at a bake sale convinced me that the balance of chocolate and coconut appeals to both kids and adults.
Storage Tips
Store cooled squares in an airtight container lined with parchment to prevent sticking. At room temperature they stay good for two days; refrigerate for up to five days to maintain the coconut filling texture and make slicing easier. For longer storage freeze in single layers on a baking sheet until firm, then stack with parchment between layers inside a freezer safe container for up to three months. Reheat individual squares in a 325 degree Fahrenheit oven for 8 to 10 minutes to revive a warm, gooey center or microwave for 12 to 20 seconds for a quick treat.
Ingredient Substitutions
If you prefer a less sweet filling swap half of the sweetened coconut for unsweetened flaked coconut and reduce the condensed milk to one half cup. For dairy free options use coconut oil instead of butter and a dairy free sweetened condensed milk alternative; note texture will be slightly less tender. To intensify chocolate flavor stir in one quarter cup of finely chopped dark chocolate with the chips. If you want a nutty addition fold in a half cup toasted chopped almonds into the coconut filling for crunch and contrast.
Serving Suggestions
Serve warm with a scoop of vanilla ice cream and a dusting of cocoa or toasted coconut flakes for a showstopping dessert. For a party, arrange squares on a platter with small dessert forks; garnish with a few extra mini chocolate chips or a drizzle of melted chocolate. These pair well with robust coffee or a lightly sweet dessert wine. For a lighter finish serve small squares with fresh berries to cut the sweetness.
Cultural Background
Layered bars that combine chocolate and coconut are popular in many Western baking traditions, inspired by candy bar combinations and classic bake sale offerings. Sweetened condensed milk became widely used in mid twentieth century baking as a convenience ingredient that provides sweetness, moisture, and a caramelized quality when heated. This specific combination evokes familiar confections like coconut chocolate bars and reflects the mid century love for simple, shelf-stable ingredients turned into comforting sweets.
Seasonal Adaptations
In summer swap part of the coconut for toasted macadamia nuts and add a tablespoon of lime zest to the filling for a tropical twist. During the holidays stir in a quarter teaspoon ground cinnamon and replace mini chips with chopped peppermint bark for festive flavor. For Easter consider adding colorful sprinkles to the top layer before baking for a celebratory look that keeps the texture the same.
Meal Prep Tips
Make a double batch and freeze individual portions for quick dessert options. Bake, cool, and cut into squares then flash freeze on a tray before stacking in a freezer-safe container. Thaw in the refrigerator overnight or microwave briefly to enjoy a warm treat. Label containers with the bake date and use within three months for best quality. Using an 8 by 8 inch pan yields consistent two inch squares that are ideal for portion control and gifting.
Ultimately, these coconut squares are an easy way to bring a nostalgic, layered dessert to any gathering. They require basic technique, provide impressive results, and adapt well to seasonal or dietary preferences. I hope these tips help you bake with confidence and share something special with the people you love.
Pro Tips
Coat the mini chocolate chips with a teaspoon of flour to prevent sinking during baking.
Cool the pan completely before slicing to get clean, square edges; chilling for 30 minutes yields even cleaner cuts.
Use room temperature eggs and cooled melted butter to prevent cooking the eggs and to ensure a smooth batter.
This nourishing coconut brownies recipe is sure to be a staple in your kitchen. Enjoy every moist, high protein slice — it is perfect for breakfast or as a wholesome snack any time.
Tags
Coconut Brownies
This Coconut Brownies recipe makes perfectly juicy, tender, and flavorful steak every time! Serve with potatoes and a side salad for an unforgettable dinner in under 30 minutes.
Ingredients
Brownie layers
Coconut filling
Instructions
Preheat and prepare pan
Preheat oven to 350 degrees Fahrenheit. Line an 8 by 8 inch baking dish with parchment paper and spray lightly with nonstick spray. Set aside.
Combine dry ingredients
Whisk together 1 cup all purpose flour, 1/2 cup cocoa powder, and 1/4 teaspoon salt in a medium bowl until evenly blended.
Toss chips
Stir 1/2 cup mini chocolate chips with 1 teaspoon flour in a small bowl so the chips do not sink when baked.
Whisk wet ingredients
Whisk together melted and cooled 3/4 cup butter, 1 and 1/2 cups granulated sugar, two eggs, and 2 teaspoons vanilla extract until glossy and combined.
Combine batter
Fold the flour and cocoa mixture into the wet mixture with a wooden spoon just until combined then fold in the floured chocolate chips.
Layer and assemble
Spread half of the batter in the prepared pan. Stir together coconut filling ingredients and spread over the bottom brownie layer. Top with remaining batter and smooth surface.
Bake and cool
Bake for 35 to 40 minutes until edges are set and a toothpick inserted in the chocolate layer comes out with moist crumbs. Cool completely before slicing into sixteen 2 inch squares.
Last Step: Please leave a rating and comment letting us know how you liked this recipe! This helps our business to thrive and continue providing free, high-quality recipes for you.
Nutrition
Did You Make This?
Leave a comment & rating below or tag
@feastu on social media!
Categories:
You might also like...

Spooky Mummy Cake Balls
Delightfully spooky and sweet, these bite-sized mummy cake balls combine moist cake, creamy centers, and a vanilla candy shell for effortless Halloween fun.

Galaxy Donuts with Swirled Glaze
Fluffy homemade donuts crowned with a shimmering galaxy glaze. Fry or bake, swirl bold colors, and watch these showstoppers disappear fast.

Buttery Pecan Pie Bars
Buttery shortbread crust meets gooey pecan pie filling in easy bar form, perfect for holidays, bake sales, and cozy weeknights.
Did You Make This?
Leave a comment & rating below or tag @feastu on social media!
Rate This Recipe
Share This Recipe
Enjoyed this recipe? Share it with friends and family, and don't forget to leave a review!
Comments (1)
This recipe looks amazing! Can't wait to try it.
Comments are stored locally in your browser. Server comments are displayed alongside your local comments.

Hi, I'm Emma!
What's Popular

30-Minute Meals!
Join to receive our email series which contains a round-up of some of our quick and easy family favorite recipes.