
>>

Decadent brownie-wrapped cookie dough bites dipped in glossy chocolate — an irresistible party treat that's part brownie, part cookie dough, and all indulgence.
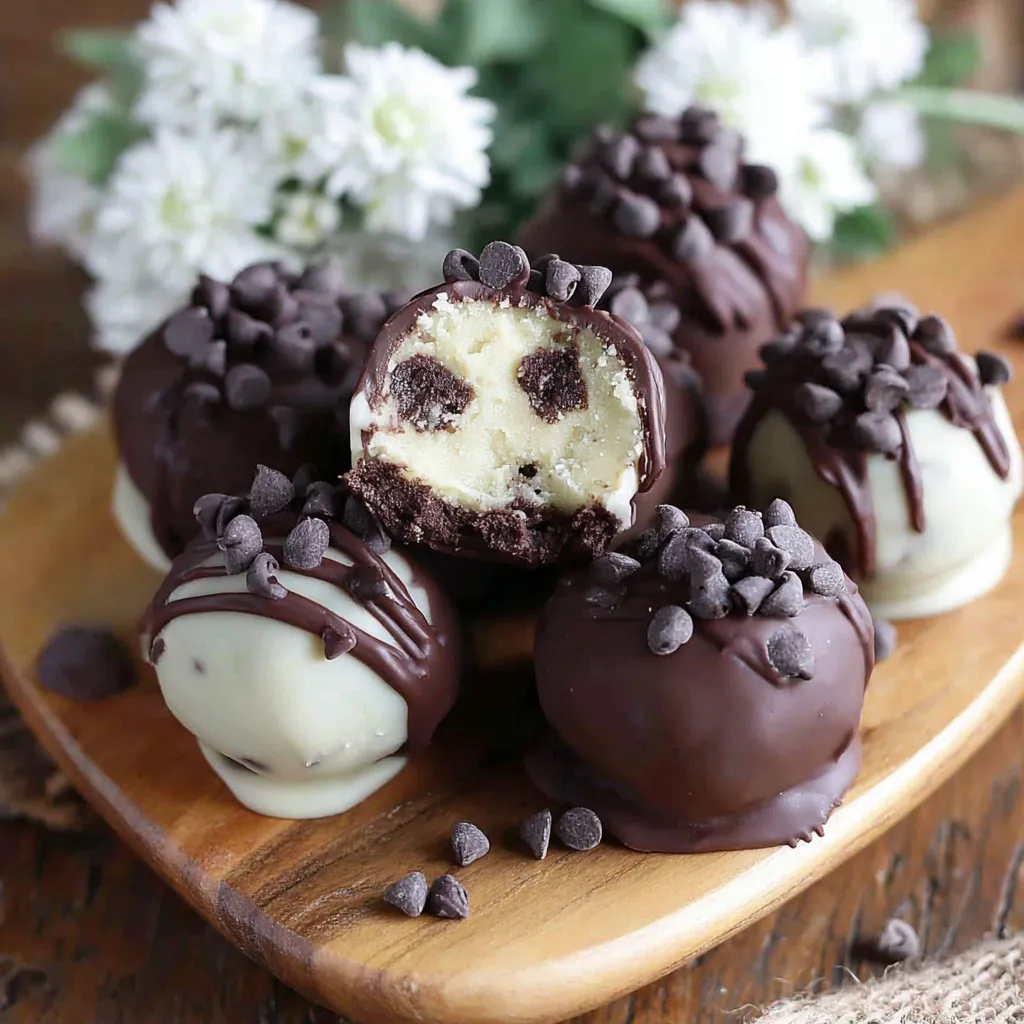
This recipe is my go-to when I want to make a show-stopping dessert that disappears in minutes: chewy brownie wrapped around a buttery cookie dough center, finished with a crisp chocolate shell. I first assembled these one slow Sunday afternoon when friends unexpectedly dropped by; I had a pan of brownies cooling and a simple cookie dough I was testing. Combining the two into bite-sized spheres felt mischievous and effortless, and the result — that warm, fudgy brownie hugging a slightly firm, sweet cookie dough core — became an instant crowd-pleaser.
What makes these treats special is the contrast of textures and temperatures. The brownie brings dense chocolate depth while the cookie dough center stays silky and sweet. Coating them in melting candy creates a satisfying snap and makes them perfect for gifting or a potluck. Over a few years I refined the technique — chilling times, portion sizes, and the final dip — so these bombs are consistent every time, whether I'm prepping for a small family gathering or a big holiday spread.
When I serve these, people always comment on how unexpected they are — the surprise center is a conversation starter. My niece declared them “the best candy ever” and at a holiday exchange they were the first plate gone. I love that the recipe makes a visually impressive tray without demanding advanced pastry skills.
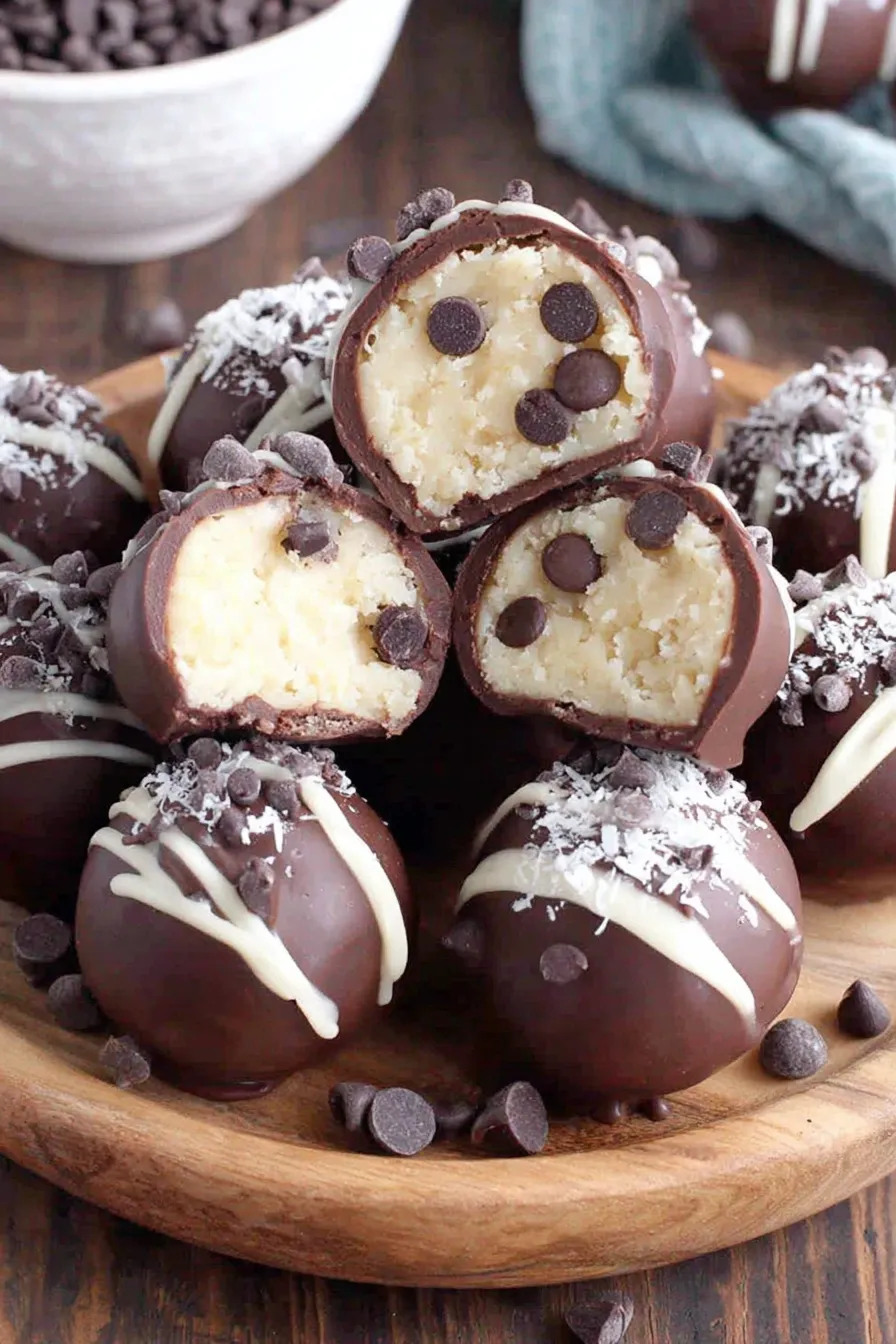
My favorite part is the reveal when someone bites in and discovers cookie dough inside a brownie — it's a joyful moment every time. Over holidays I label them as ‘mini desserts’ and they become the centerpiece of dessert trays. I’ve learned to stagger dipping in small batches so the coating stays glossy and to top them while the candy is still wet, which keeps them looking professional without any tempering skills.
Keep finished bombs on a parchment-lined tray in a single layer in the refrigerator for up to 5 days if you'll serve them soon. For longer storage, freeze in a single layer until firm, then transfer to an airtight container with parchment between layers to prevent sticking. Thaw in the fridge for 30–60 minutes before serving for the best texture; avoid room-temperature thawing for extended periods to maintain the coating integrity. If transporting, keep them chilled in a cooler or insulated bag to prevent melting.
If you need to adapt the elements, swap the unsalted butter for salted and reduce the pinch of salt slightly. For a dairy-free version, use a vegan butter and dairy-free chocolate melting wafers; expect a slightly different mouthfeel. Replace the all-purpose flour with a gluten-free 1:1 baking blend and test a small batch as absorption can vary. You can also use a boxed brownie mix in place of homemade brownies — choose a fudgy variant. For extra crunch, mix chopped toasted pecans into the dough (replace 1/4 cup of chips with 1/4 cup nuts).
Serve these on a platter dusted with cocoa powder or alongside espresso and citrusy dessert wines to cut through the sweetness. Garnish with a sprinkling of flaky sea salt on half of the batch for contrast. They work beautifully as a plated dessert with a scoop of vanilla ice cream, or packaged in cellophane bags tied with ribbon for gifting. For parties, arrange them on tiered stands or on parchment-lined trays to make a striking display.
Combining two beloved American desserts — brownies and cookie dough — is a modern comfort-food mashup rooted in indulgent home baking traditions. Brownies originated in the United States in the early 20th century and quickly became associated with casual entertaining. Edible cookie dough gained popularity as bakers experimented with safe-to-eat recipes and mixes. These bombs are an example of contemporary dessert hybrids that celebrate nostalgia while delivering a playful, shareable format.
Customize the coating for seasons: use white melting candy with red and green sprinkles for holidays, or drizzle with caramel and chopped toasted pecans for fall. In summer, try a salted dark chocolate coating to balance sweetness. For winter gatherings, fold in a pinch of cinnamon to the dough and top with crushed peppermint after dipping for a festive twist. These little changes keep the base technique but shift the flavor profile for different occasions.
Make cookie dough and freeze scoop portions ahead of time; label them with dates and assemble the day before an event. If you plan to serve many guests, assemble and freeze all bombs; dip them in chocolate the morning of the event for the freshest sheen. Use portioned scoops and number your trays to keep track of how many you’ve dipped. A silicone mat makes clean-up fast and prevents sticking during freezing and setting.
These bites bring people together — whether for a birthday, bake sale, or late-night treat. Try making a double batch once you’ve mastered the technique; you’ll have freezer-ready desserts for weeks. Enjoy the playful contrast and the delighted reactions when someone discovers the center.
Chill the dough and the assembled bombs thoroughly so the coating sets cleanly and the centers don’t shift.
Use a tablespoon scoop for uniform cookie dough portions to ensure even assembly and baking-free consistency.
Tap the fork gently after dipping to remove excess coating and create a smooth shell.
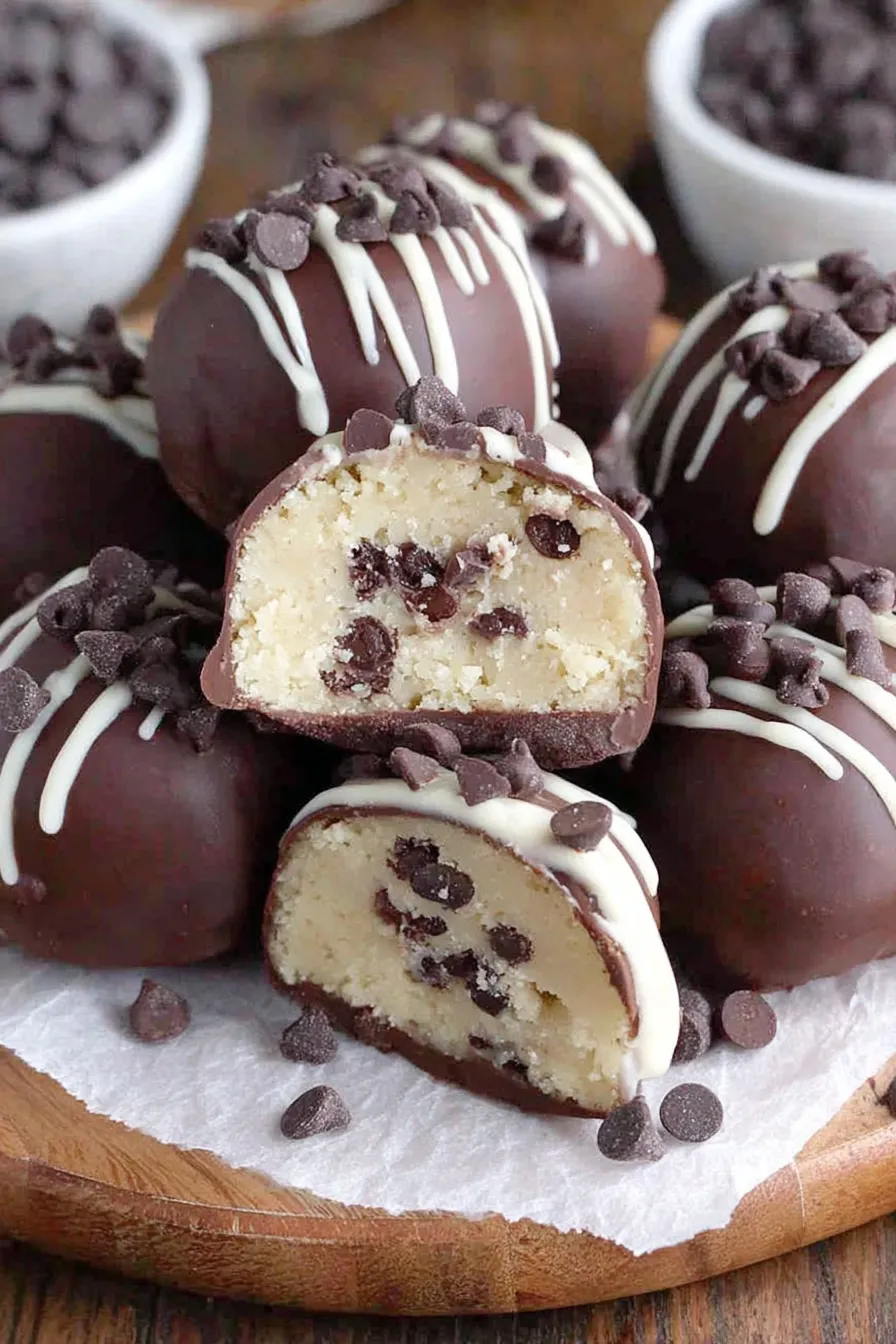
Top immediately with mini chips or sprinkles while the coating is wet to ensure they adhere.
Work in small batches when melting coating to avoid overheating and seizing the chocolate.
This nourishing cookie dough brownie bombs recipe is sure to be a staple in your kitchen. Enjoy every moist, high protein slice — it is perfect for breakfast or as a wholesome snack any time.
Yes. To keep the cookie dough safe without eggs, this recipe does not include eggs. If you prefer raw-egg cookie dough, use pasteurized eggs and consume promptly.
Freeze in a single layer until firm, then transfer to an airtight container for up to 3 months. Thaw in the fridge 30–60 minutes before serving.
This Cookie Dough Brownie Bombs recipe makes perfectly juicy, tender, and flavorful steak every time! Serve with potatoes and a side salad for an unforgettable dinner in under 30 minutes.
In a stand mixer bowl, beat softened butter with light brown sugar and white sugar until light and fluffy, about 2–3 minutes. Add milk and vanilla and mix until incorporated, scraping down the sides as needed.
On low speed add the flour and pinch of salt in two additions, mixing only until a cohesive dough forms. Fold in 1 cup miniature chips by hand to avoid overmixing.
Spoon tablespoon-sized portions onto a parchment-lined sheet and freeze for about 30 minutes until firm to the touch. Chilled dough is easier to wrap with the brownie.
Cut the cooled 9x13 pan into 15 equal squares. Flatten each square into a 2–3 inch disk with your hand or a rolling pin to create a thin wrapper.
Place a frozen dough ball in the center of a flattened brownie square and wrap the brownie around it, sealing seams and shaping into a smooth sphere. Repeat for all portions.
Arrange the wrapped spheres on the lined sheet and freeze for another 20 minutes so they are firm for dipping.
Melt the chocolate wafers according to package directions until smooth. Dip each frozen bomb using a fork, tap off excess coating, place on a silicone mat, and top with miniature chips while coating is wet.
Last Step: Please leave a rating and comment letting us know how you liked this recipe! This helps our business to thrive and continue providing free, high-quality recipes for you.
Leave a comment & rating below or tag
@feastu on social media!

Delightfully spooky and sweet, these bite-sized mummy cake balls combine moist cake, creamy centers, and a vanilla candy shell for effortless Halloween fun.

Fluffy homemade donuts crowned with a shimmering galaxy glaze. Fry or bake, swirl bold colors, and watch these showstoppers disappear fast.

Buttery shortbread crust meets gooey pecan pie filling in easy bar form, perfect for holidays, bake sales, and cozy weeknights.
Leave a comment & rating below or tag @feastu on social media!
Enjoyed this recipe? Share it with friends and family, and don't forget to leave a review!
This recipe looks amazing! Can't wait to try it.
Comments are stored locally in your browser. Server comments are displayed alongside your local comments.

Join to receive our email series which contains a round-up of some of our quick and easy family favorite recipes.
