
>>

Crispy rolled taquitos stuffed with shredded rotisserie chicken, creamy cheese, spinach and warm spices — oven-baked or quick-fried for a party-ready snack or weeknight dinner.

This version of rolled chicken taquitos has been a lifeline for busy weeknights and casual gatherings at my house. I first put this combination together one rainy Saturday when I had a leftover rotisserie chicken, a tub of cream cheese, and a craving for something handheld and crunchy. The result — creamy, savory filling tucked into crisp shells — quickly became a staple. The contrast between the warm, silky interior and the crunchy exterior is what keeps everyone coming back for more. Whether I’m prepping a big batch for a game day or making a quick dinner that the kids will eat without fuss, these are always a win.
What makes these special is the balance: the cheese and sour cream give the filling a luscious mouthfeel, while shredded roasted chicken adds savory depth. Fresh baby spinach folds in at the end so it wilts just enough to be tender but still bright. I prefer corn tortillas for flavor and a slightly lighter shell, but flour tortillas work beautifully and soften more easily when warmed. Serve with guacamole, extra salsa and spicy hot sauce — the dips elevate each bite and make these irresistible finger food.
In my experience, family and friends respond to the crunch first and stay for the filling. At a recent backyard get-together, these disappeared faster than any other dish — I learned to double the batch. The simplicity and speed are what make these my go-to, and the little tweaks (extra salsa, a squeeze of lime over warm taquitos) are what make them unforgettable.
My favorite part is watching guests break one open to reveal the creamy interior — it’s always a little moment of surprise. During last winter’s party, a neighbor asked for the recipe and then texted me photos of the taquitos she made that evening; that kind of immediate, joyful feedback is why I keep this in my regular rotation.
Store cooled taquitos in an airtight container in the refrigerator for up to 3 days. For longer storage, place a single layer on a baking sheet and freeze until firm, then transfer to a freezer bag for up to 3 months. To reheat from frozen, bake at 375 degrees F for 12–15 minutes, flipping once for even browning; for best texture, avoid microwaving as it will make the shells soggy. If you baked them initially, a quick 2–3 minute blast under a hot broiler restores crispness.
Swap shredded rotisserie chicken for cooked ground turkey or canned chicken for convenience. For a vegetarian version, use cooked black beans (1 1/2 cups) mashed slightly with the cream cheese to mimic texture. Replace cheddar with Monterey Jack for a milder, creamier melt. Use corn tortillas for a gluten-reduced option; if sensitive to dairy, try plant-based cream cheese and vegan cheddar, keeping in mind texture differences and slightly longer melting times.
Serve these as an appetizer at gatherings with a trio of dips: creamy guacamole, tangy tomatillo salsa, and a smoky chipotle crema. For a meal, plate with a simple cabbage slaw tossed in lime vinaigrette and black bean salad on the side. Garnish with chopped cilantro, pickled onions or a drizzle of hot sauce. They also make a fun addition to a taco board paired with warm chips, queso, and pickled jalapeños.

Rolled and fried tortillas filled with savory fillings are a popular form of street food across Mexico and parts of the American Southwest. The concept evolved from simpler corn-based preparations and has been adapted widely in home kitchens and restaurants. In the U.S., rolled chicken taquitos became an approachable party item — easy to hold and eat with fingers — while still carrying the comforting flavors of seasoned chicken, cheese and chiles. This version leans toward a home-cooked American interpretation with creamy binding agents and milder spices suited for broad palates.
In summer, add grilled corn and chopped roasted peppers into the filling for a smoky brightness; in winter, fold in roasted butternut squash and sage for a comforting change. Holiday gatherings welcome a festive cranberry-lime salsa on the side for sweet-tart contrast. For spring, baby arugula or fresh herbs like chopped cilantro make the filling feel lighter and fresher.
Make the filling up to 48 hours ahead and store in a sealed container; when ready to serve, warm the tortillas, roll and bake. For an efficient party workflow, pre-roll and place on a tray in the refrigerator, covered, and bake or fry just before guests arrive. Use parchment-lined baking sheets for easy cleanup, and keep a bowl of warm water nearby to moisten any tortillas that begin to crack while rolling.
These taquitos are a reliable, adaptable dish that invites improvisation. They’re perfect for sharing, simple enough to make any night of the week, and versatile enough to suit many dietary tweaks — give them a try and make them your own.
Warm tortillas thoroughly until pliable to prevent cracking when rolling.
Shred rotisserie chicken finely so it distributes evenly and each bite has creamy filling.
Brush or spray oil on baked shells to promote even browning and crunch.
Avoid over-filling tortillas; about 2 tablespoons of filling keeps the roll compact and cooks evenly.
This nourishing crispy chicken taquitos with creamy spinach filling recipe is sure to be a staple in your kitchen. Enjoy every moist, high protein slice — it is perfect for breakfast or as a wholesome snack any time.
Yes — prepare the filling up to 48 hours ahead and refrigerate. Warm tortillas and roll shortly before baking or frying for best texture.
Bake at 375°F for 12–15 minutes for frozen taquitos, flipping once halfway through to restore crispness.
This Crispy Chicken Taquitos with Creamy Spinach Filling recipe makes perfectly juicy, tender, and flavorful steak every time! Serve with potatoes and a side salad for an unforgettable dinner in under 30 minutes.
In a large mixing bowl, combine softened cream cheese, salsa and sour cream. Whisk until smooth to ensure the base is even and free of lumps.
Add shredded chicken, shredded cheddar, chopped spinach and spices. Toss until evenly combined and season to taste. The mixture should be moist and scoopable.
Heat corn or flour tortillas briefly on a griddle until pliable (15–30 seconds per side for corn, 10–15 seconds for flour). Stack and keep covered to retain warmth.
Place a spoonful of filling along each tortilla edge and roll tightly. Secure with a toothpick if needed and place seam-side down on a prepared sheet.
For an oven finish, preheat to 425°F, arrange taquitos seam-side down, lightly oil the tops and bake 15–20 minutes until golden and crisp.
For frying, heat 1 1/2 inches of neutral oil to medium-high and fry taquitos in small batches, turning until evenly golden, about 30–60 seconds per side. Drain on paper towels.
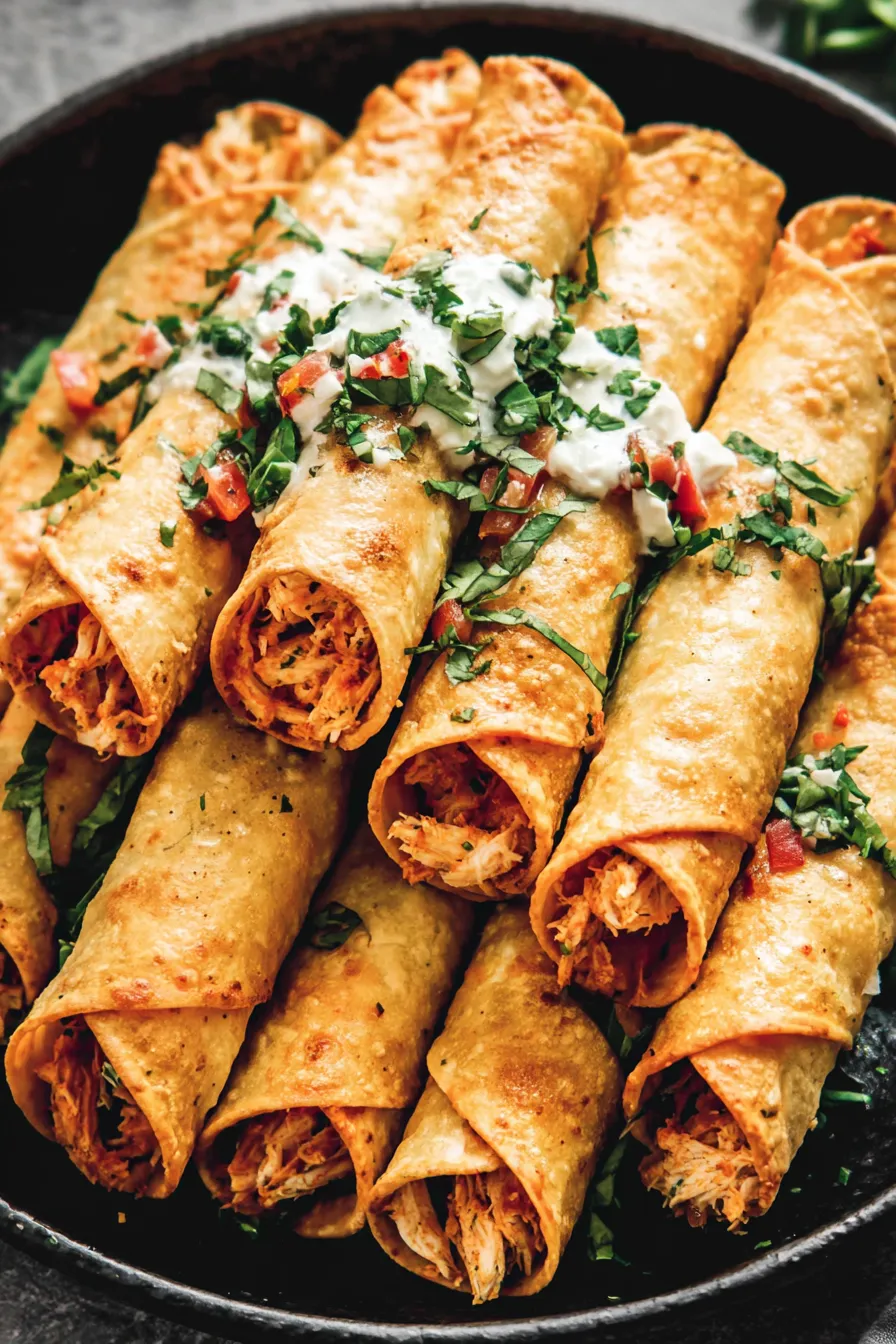
Remove toothpicks, arrange on a platter and serve immediately with guacamole, salsa and extra sour cream. Add lime wedges and chopped cilantro if desired.
Last Step: Please leave a rating and comment letting us know how you liked this recipe! This helps our business to thrive and continue providing free, high-quality recipes for you.
Leave a comment & rating below or tag
@feastu on social media!

Delightfully spooky and sweet, these bite-sized mummy cake balls combine moist cake, creamy centers, and a vanilla candy shell for effortless Halloween fun.

Fluffy homemade donuts crowned with a shimmering galaxy glaze. Fry or bake, swirl bold colors, and watch these showstoppers disappear fast.

Buttery shortbread crust meets gooey pecan pie filling in easy bar form, perfect for holidays, bake sales, and cozy weeknights.
Leave a comment & rating below or tag @feastu on social media!
Enjoyed this recipe? Share it with friends and family, and don't forget to leave a review!
This recipe looks amazing! Can't wait to try it.
Comments are stored locally in your browser. Server comments are displayed alongside your local comments.

Join to receive our email series which contains a round-up of some of our quick and easy family favorite recipes.
