
>>

Ultra-fudgy brownies topped with gooey mini marshmallows and a glossy chocolate icing that sets into a dreamy slice-and-serve crowd-pleaser.

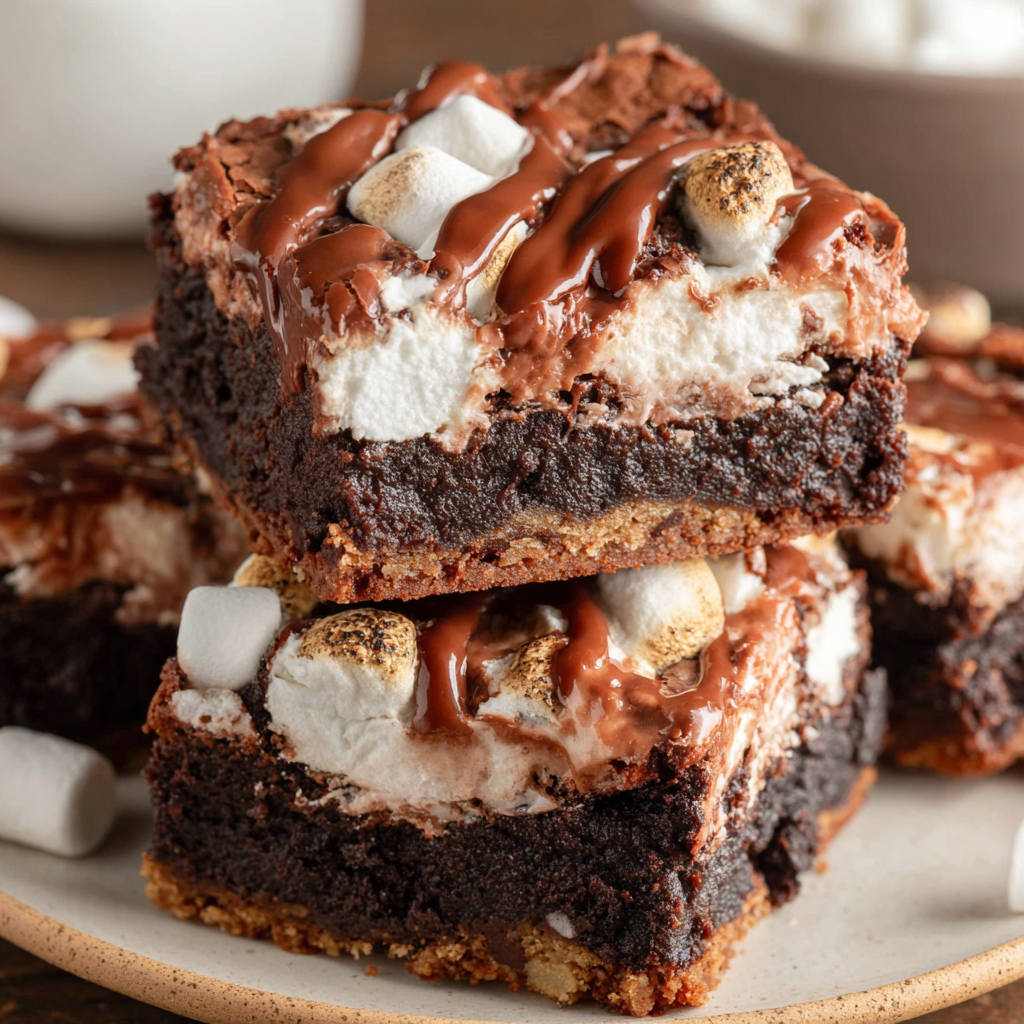
When I set this pan on the table, everyone leans in to see the marshmallow top. My kids love the sticky layer, and the adults always comment on how fudgy the base stays even the next day. The icing locks in moisture and brings a nostalgic bakery-style finish that looks impressive without any extra fuss.
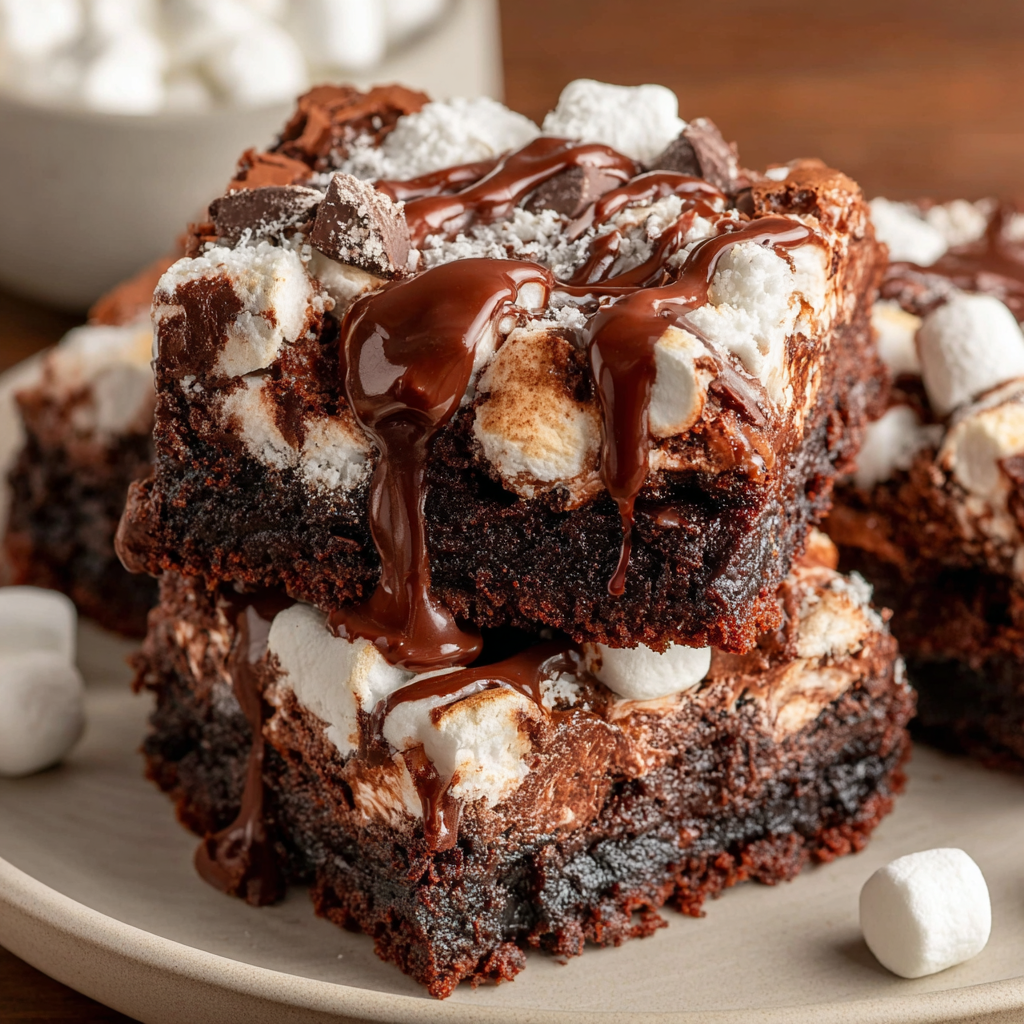
My favorite part of this bake is the reveal after the icing sets. Lift the slab onto a cutting board, and the first slice shows the neat layers: dark, glossy brownies; a cloud of marshmallow; and a smooth sheath of chocolate icing. It feels like a bake-sale classic, the kind of treat that makes adults nostalgic and kids very happy.
Cool completely, then store the brownies in a single layer or with parchment between layers in an airtight container at room temperature for 2 to 3 days. If your kitchen is warm, refrigerate for up to 5 days; bring to room temperature before serving for the best texture. For longer storage, freeze tightly wrapped slabs or individual squares for up to 3 months. Thaw overnight in the refrigerator or at room temperature for 1 to 2 hours. Avoid microwaving to reheat, as marshmallows can melt and get overly sticky; if you must, use very short bursts.
No canola oil? Use melted neutral oil like vegetable or light olive oil in the same amount. If you only have natural cocoa, you can substitute cup-for-cup, but expect a slightly different flavor profile and a tad lighter color. Semi-sweet chocolate chips work in place of chopped bars; fold in 1 cup and reserve a few tablespoons for topping. If you’re low on powdered sugar, whisk 2 cups and add milk gradually until the icing is spreadable. For extra salt balance, use unsalted butter in the icing and add a pinch of salt to taste. Lactose-free milk works for the icing; plant milk can be used, but the set may be slightly softer.
Cut small squares for party platters, or larger pieces with forks for a plated dessert. A scoop of vanilla ice cream or a dollop of lightly sweetened whipped cream plays beautifully with the warm chocolate notes. In summer, add sliced strawberries or raspberries on the side for a bright contrast. For birthdays, scatter a few sprinkles on the icing before it sets. At holiday gatherings, serve alongside coffee or hot cocoa so guests can enjoy the full marshmallow-chocolate experience.
This style of brownie nods to the beloved Southern Mississippi Mud tradition, where marshmallows and warm chocolate icing form a soft, sticky “mud” over a rich base. Home bakers have passed versions of this dessert down for decades, often tweaking the topping or adding nuts. While every family has its spin, the constant is generosity: a big pan meant to share. The technique of adding a quick-set icing over warm marshmallows is a hallmark that transforms a simple brownie into a celebration treat with nostalgic charm.
In fall, fold in 1/2 teaspoon cinnamon and top slices with toasted pecans for a cozy twist. Around winter holidays, add 1 teaspoon peppermint extract to the icing and sprinkle with crushed candy cane before it sets. In spring, swirl 1/4 cup raspberry jam over the marshmallow layer before pouring the icing. For summer cookouts, chill the sliced brownies and serve cold for neater bites in the heat; the icing stays snappy and refreshing.
Make the brownies a day ahead and keep covered at room temperature; the flavor deepens and the layers settle for cleaner cuts. For lunchbox portions, slice into small squares and wrap individually in parchment, then store in an airtight container. If freezing, place pieces on a sheet pan to firm up, then transfer to freezer bags to prevent sticking. Thaw wrapped pieces at room temperature to avoid condensation, which can make the icing tacky.
Whether you serve them at a potluck or just because it’s Tuesday, these fudgy marshmallow brownies bring the kind of joy that starts conversations and ends with happy, sticky fingers. Bake a pan, share generously, and make the moment a little sweeter.
Use room-temperature eggs; cold eggs can seize the warm batter.
Chop chocolate into penny-sized chunks for melty pockets.
Grease the knife or use a plastic one for clean edges.
Do not overbake; pull at set edges with a soft center for fudgy texture.
Sift cocoa and powdered sugar for lump-free icing.
Work quickly when spreading icing; it sets fast.
This nourishing fudgy marshmallow brownies recipe is sure to be a staple in your kitchen. Enjoy every moist, high protein slice — it is perfect for breakfast or as a wholesome snack any time.
Yes. Fold in 1 cup chopped toasted pecans or walnuts with the chocolate. For the icing, sprinkle a few extra on top before it sets.
Bake 5 minutes longer to dry the surface slightly, and chill the pan before slicing. A plastic knife helps prevent sticking.
Yes. Replace whole milk with the same amount of lactose-free or plant-based milk. Note the icing may set a touch softer with plant milk.
Store at room temperature for 2 to 3 days in an airtight container. Refrigerate up to 5 days, or freeze up to 3 months.
This Fudgy Marshmallow Brownies recipe makes perfectly juicy, tender, and flavorful steak every time! Serve with potatoes and a side salad for an unforgettable dinner in under 30 minutes.
Preheat oven to 350°F. Line a metal 9x13-inch baking pan with parchment, leaving a 2-inch overhang on two sides, and lightly coat with nonstick spray.
In a heavy saucepan over low heat, melt 1 cup unsalted butter. Stir in 2 1/2 cups granulated sugar until smooth and glossy with no separated butter. Remove from heat and cool 5 minutes, stirring to release steam.
Stir in 2 tablespoons canola oil and 1 tablespoon vanilla extract until the surface is uniform with no oily film.
Add 5 large eggs one at a time, beating well after each addition until the batter is thick and shiny.
Sift in 1 cup all-purpose flour, 3/4 cup plus 1 tablespoon Dutch-process cocoa powder, and 3/4 teaspoon salt. Fold just until no dry streaks remain.
Fold in most of the 8 ounces chopped chocolate, reserving a small handful for topping.
Spread batter in prepared pan, sprinkle reserved chocolate on top, and bake for 25 minutes until edges are set and the center is slightly soft.
Remove pan, cover evenly with 6 cups mini marshmallows, and return to the oven for 3 minutes to puff and adhere.
In a saucepan over medium heat, melt 6 tablespoons salted butter. Whisk in 2 1/2 cups powdered sugar and 2 tablespoons unsweetened cocoa powder, then whisk in 1/4 cup whole milk and 2 teaspoons vanilla until smooth and pourable.
Immediately pour icing over marshmallows, spreading gently to cover. Cool completely in the pan on a rack until the icing is set.
Lift the slab out using the parchment overhang. For clean cuts, use a plastic knife or grease a metal knife and wipe between slices.
Last Step: Please leave a rating and comment letting us know how you liked this recipe! This helps our business to thrive and continue providing free, high-quality recipes for you.
Leave a comment & rating below or tag
@feastu on social media!

Delightfully spooky and sweet, these bite-sized mummy cake balls combine moist cake, creamy centers, and a vanilla candy shell for effortless Halloween fun.

Fluffy homemade donuts crowned with a shimmering galaxy glaze. Fry or bake, swirl bold colors, and watch these showstoppers disappear fast.

Buttery shortbread crust meets gooey pecan pie filling in easy bar form, perfect for holidays, bake sales, and cozy weeknights.
Leave a comment & rating below or tag @feastu on social media!
Enjoyed this recipe? Share it with friends and family, and don't forget to leave a review!
This recipe looks amazing! Can't wait to try it.
Comments are stored locally in your browser. Server comments are displayed alongside your local comments.

Join to receive our email series which contains a round-up of some of our quick and easy family favorite recipes.