
>>

A fuss-free, one-dish meal of tender shrimp baked over fragrant garlic butter rice — perfect for weeknights, dinner parties, and make-ahead meals.
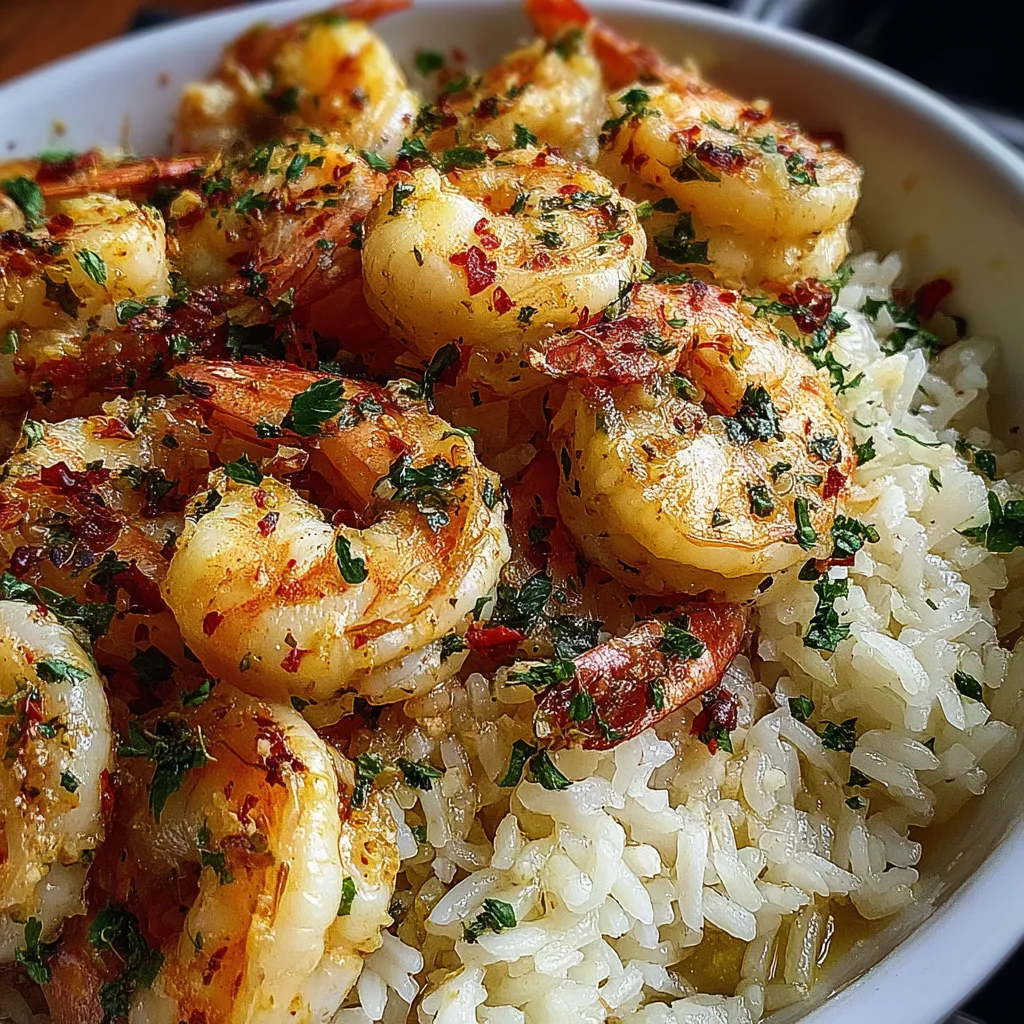
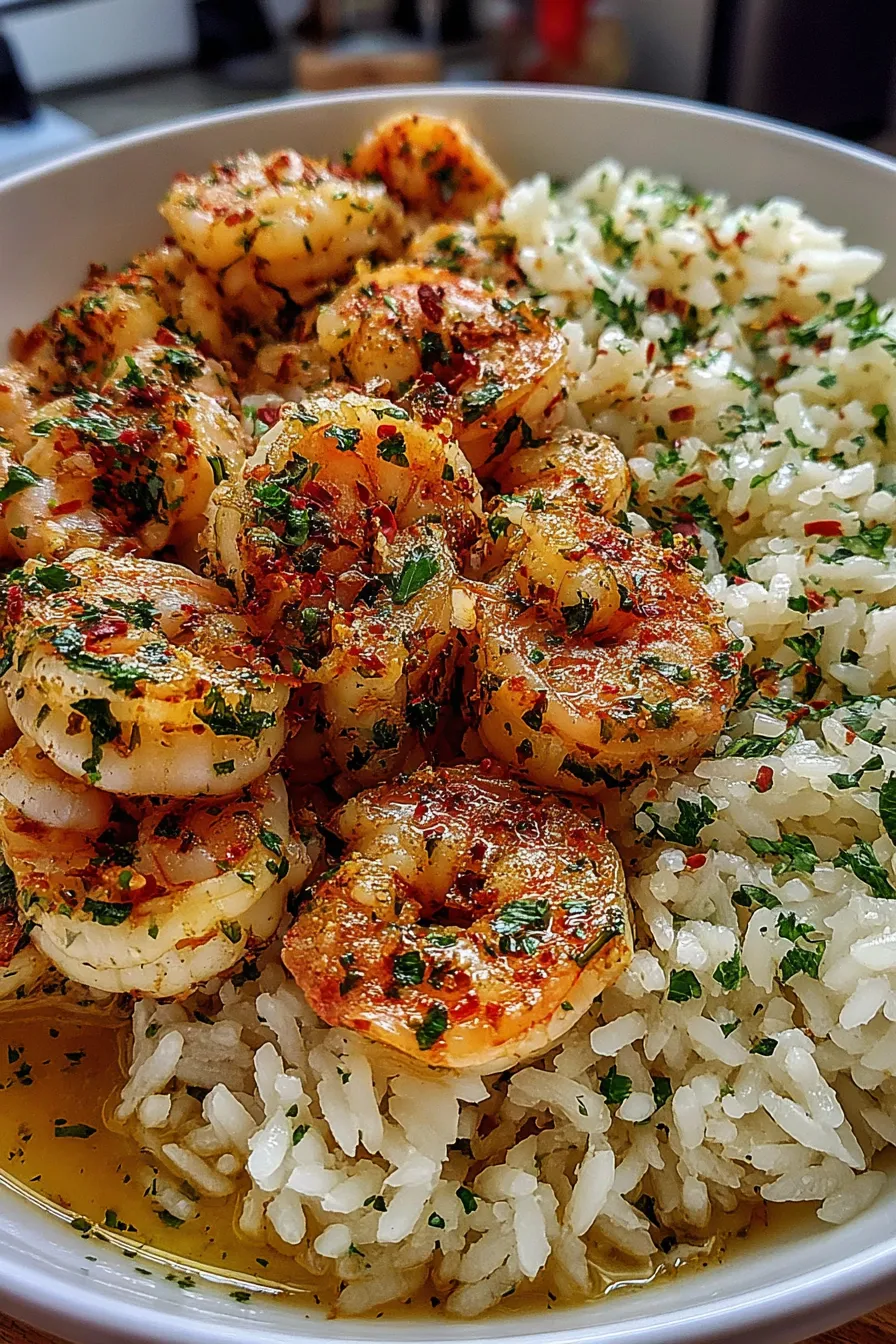
This Garlic Butter Shrimp Rice Bake became a household favorite the first chilly evening I threw it together when friends dropped by unexpectedly. I had shrimp in the freezer, rice in the pantry, and basic aromatics on the counter — the kind of salvage-that-dinner moment that turns into a keeper. The dish hits that sweet spot between comfort and elegance: buttery, garlicky rice infused with lemon and smoked paprika, topped with plump, quickly baked shrimp that stay juicy because they finish cooking right on the rice.
I discovered this combination while experimenting with weeknight shortcuts. Layering seasoned shrimp on partially cooked rice lets both components finish at the same time without overcooking the shrimp. The texture contrast — fluffy grains beneath snappy crustacean — is what keeps everyone reaching for seconds. It’s also forgiving: you can swap broth types, use peeled/ready-to-cook shrimp, and adapt the heat level. I often make it when I want something homey but impressive enough for guests.
When I first served this at a small dinner, guests kept commenting on the bright lemon behind the buttery garlic — and how the rice somehow tasted richer from the shrimp juices. My partner insisted I write it down; it’s since become a reliable fallback for busy weeks and casual entertaining.
What I love most is how forgiving the method is: you can tweak the aromatics, swap citrus for a different brightener, or add vegetables like diced bell pepper or peas. Family feedback is always unanimous on this one — it’s comfort food with a seafood twist and almost always disappears within minutes of hitting the table.
Store leftovers in an airtight container in the refrigerator for up to 3 days. To preserve texture, I recommend reheating gently in a 325°F oven covered with foil until warmed through (about 12–15 minutes), or microwave in 1-minute intervals stirring between. For freezing, assemble the rice base and cover tightly, freeze up to 3 months, and add fresh shrimp before baking or thaw and top with pre-cooked shrimp warmed separately to avoid textural loss.
If you don’t have long-grain white rice, jasmine or basmati work nicely — increase liquid slightly for basmati. Swap butter with olive oil for a dairy-free variation and increase lemon for brightness. Use vegetable broth to make it pescatarian-friendly without chicken stock. For a heartier version, stir in thawed peas or diced roasted red peppers during the final 10-minute bake.
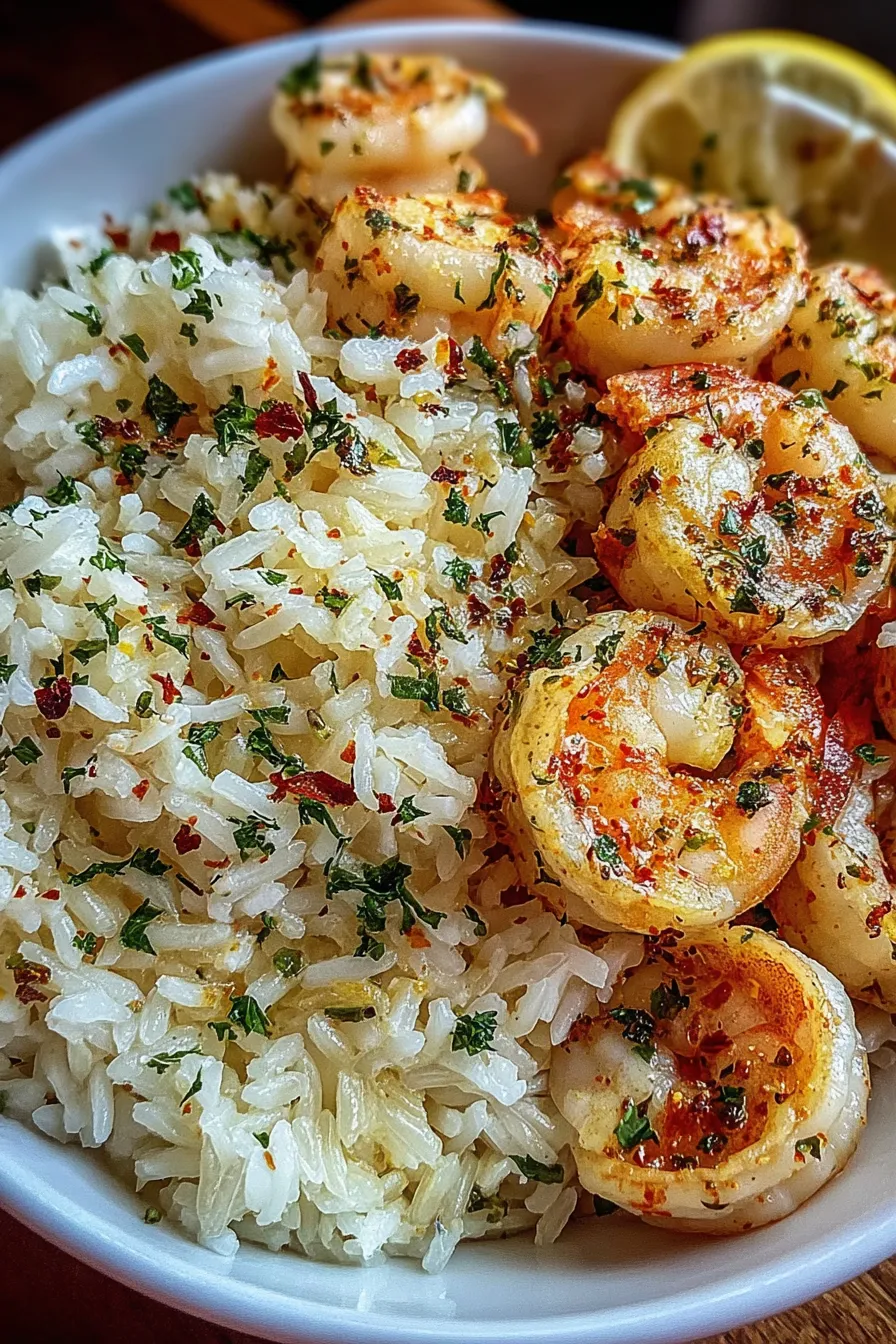
Serve straight from the dish with lemon wedges and a crisp green salad for contrast. A drizzle of extra-virgin olive oil or a sprinkle of grated Parmesan adds richness. For a festive meal, pair with roasted asparagus or a chilled cucumber-tomato salad. Garnish with chopped chives or a light dusting of smoked paprika to echo the dish’s warming notes.
Layered rice-and-protein bakes appear in many coastal cuisines where seafood and rice are staples. This preparation borrows the idea of cooking rice in seasoned stock — common in Mediterranean and coastal American cooking — then finishing delicate seafood on top. The smoked paprika nods to Iberian flavors, while lemon and butter keep the profile bright and classicly American.
Spring: add fresh peas and chopped tarragon; summer: finish with diced tomatoes and basil; fall: stir roasted squash into the rice before the shrimp step; winter: fold in chopped kale or serve alongside roasted root vegetables. Small swaps can shift the whole meal to match seasonal produce availability and holiday menus.
For meal prep, cook the rice portion ahead and refrigerate separately. When ready to eat, top with seasoned shrimp and bake only until warmed and the shrimp are opaque — this keeps the protein juicy. Portion into shallow containers for even reheating and label with date — they’ll keep 2–3 days refrigerated for lunches or quick dinners.
At its heart, this dish is about ease and flavor. With a handful of pantry staples and a simple technique, you get a satisfying, elegant meal that invites company and repeats. Try it once and I bet you’ll add it to your regular rotation.
Rinse rice until the water runs clear to prevent gummy textures and ensure separate, fluffy grains.
Pat shrimp dry before tossing with butter so they sear slightly rather than steam when they hit the oven.
Use low-sodium broth so you can control final seasoning; adjust salt after baking to taste.
Let the dish rest a few minutes after baking so juices redistribute and the rice firms slightly for easier serving.
This nourishing garlic butter shrimp rice bake recipe is sure to be a staple in your kitchen. Enjoy every moist, high protein slice — it is perfect for breakfast or as a wholesome snack any time.
If your shrimp are frozen, thaw them thoroughly in the refrigerator overnight or under cold running water for 10–15 minutes before using. Pat completely dry to avoid adding excess liquid.
Yes — assemble the rice base and refrigerate covered for up to 24 hours. Add shrimp and finish baking when ready to serve.
If the rice is still a little firm after the shrimp cook, cover and let rest 5–10 minutes; residual steam will finish the grains without overcooking the shrimp.
This Garlic Butter Shrimp Rice Bake recipe makes perfectly juicy, tender, and flavorful steak every time! Serve with potatoes and a side salad for an unforgettable dinner in under 30 minutes.
Preheat oven to 375°F. In a 9×13-inch baking dish combine rinsed rice, chopped onion, half the minced garlic, 2 tablespoons melted butter, smoked paprika, salt, and black pepper. Stir so rice is evenly coated.
Pour 2 cups low-sodium broth and juice of 1 lemon over the rice. Stir gently, cover tightly with foil, and bake 25 minutes so the rice begins absorbing liquid without fully cooking.
While rice bakes, toss shrimp with remaining garlic, 2 tablespoons melted butter, and red pepper flakes if using. Pat shrimp dry first for better texture.
Remove foil, fluff rice lightly with a fork, arrange shrimp in a single layer over the rice, and return to oven uncovered. Bake 10 minutes until shrimp are opaque and pink.
Scatter chopped parsley over the top and let the dish rest 3–5 minutes before serving to allow juices to settle.
Last Step: Please leave a rating and comment letting us know how you liked this recipe! This helps our business to thrive and continue providing free, high-quality recipes for you.
Leave a comment & rating below or tag
@feastu on social media!

Delightfully spooky and sweet, these bite-sized mummy cake balls combine moist cake, creamy centers, and a vanilla candy shell for effortless Halloween fun.

Fluffy homemade donuts crowned with a shimmering galaxy glaze. Fry or bake, swirl bold colors, and watch these showstoppers disappear fast.

Buttery shortbread crust meets gooey pecan pie filling in easy bar form, perfect for holidays, bake sales, and cozy weeknights.
Leave a comment & rating below or tag @feastu on social media!
Enjoyed this recipe? Share it with friends and family, and don't forget to leave a review!
This recipe looks amazing! Can't wait to try it.
Comments are stored locally in your browser. Server comments are displayed alongside your local comments.

Join to receive our email series which contains a round-up of some of our quick and easy family favorite recipes.
