
>>

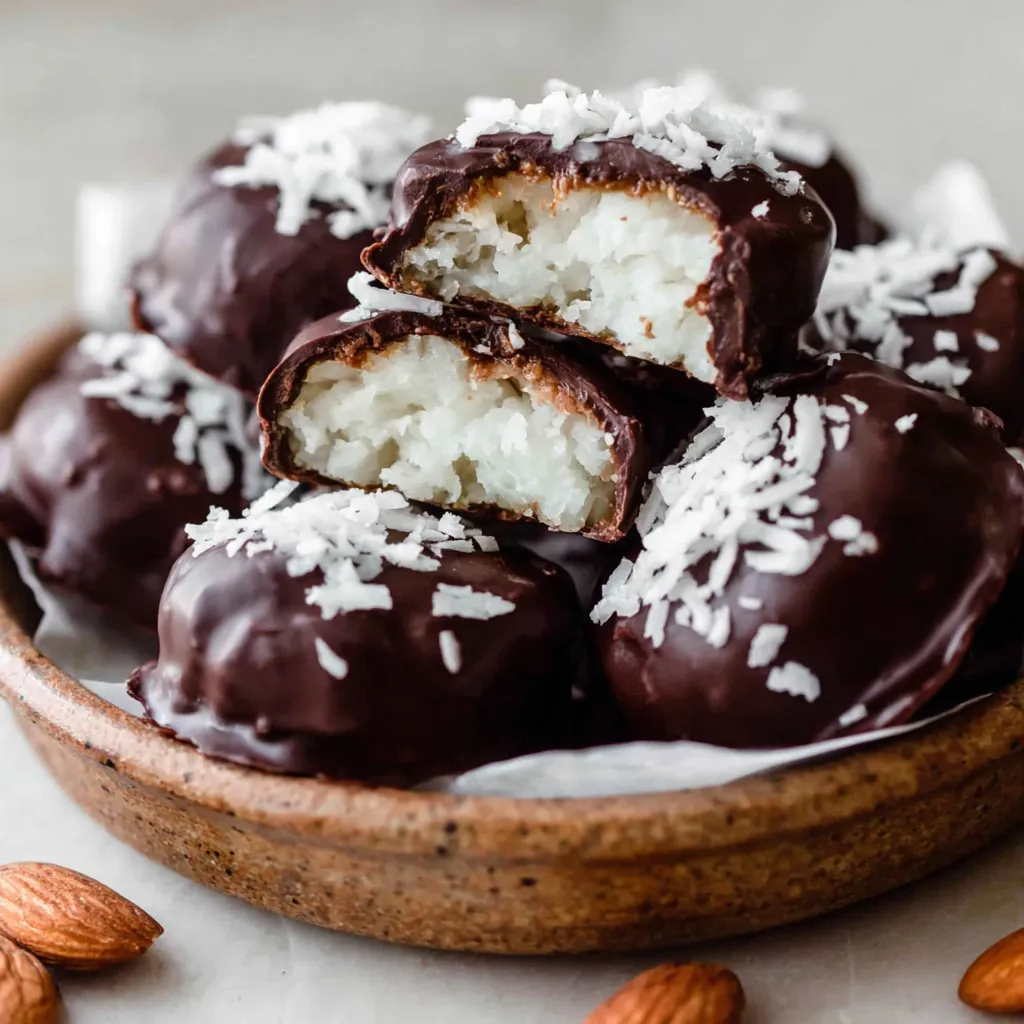
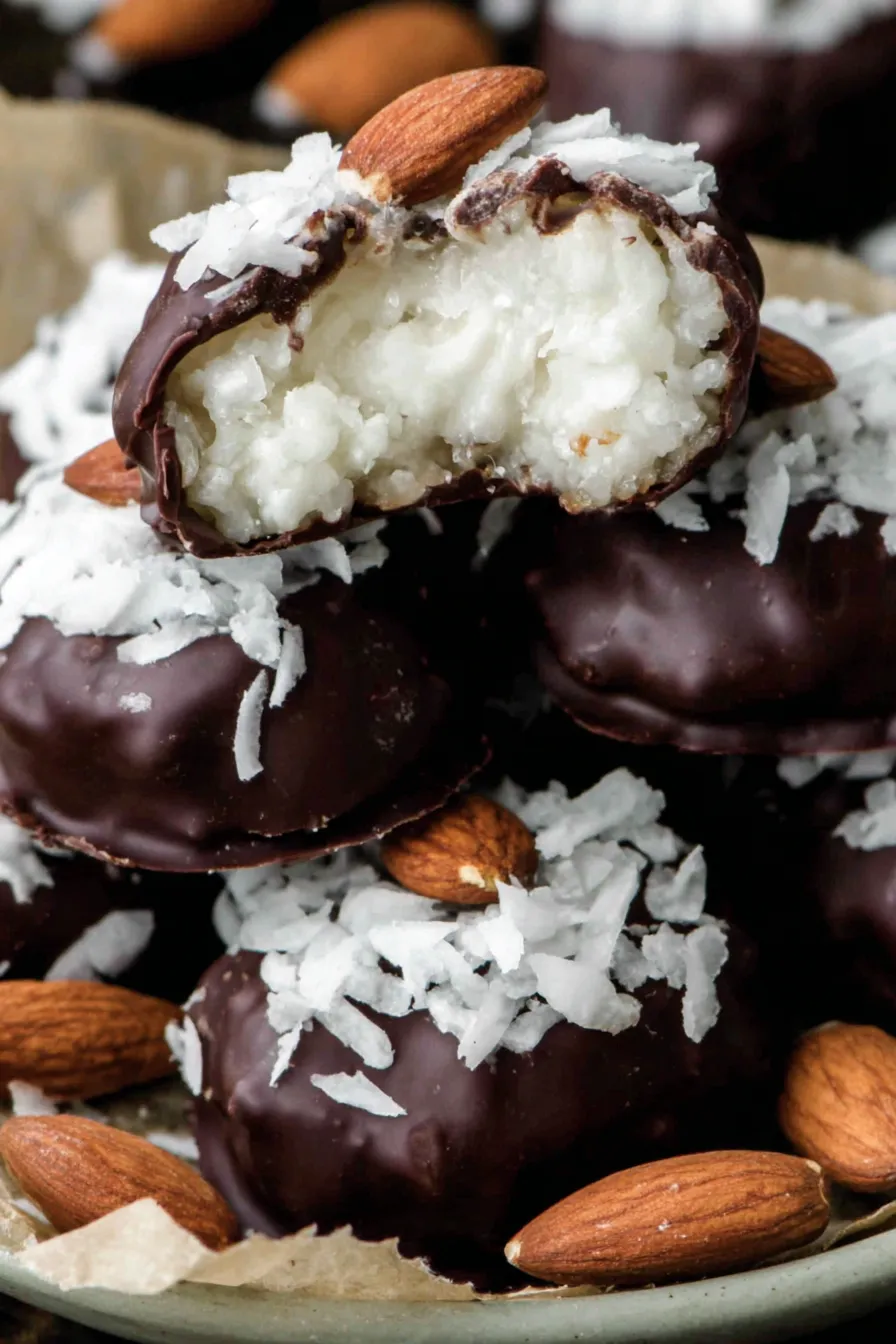
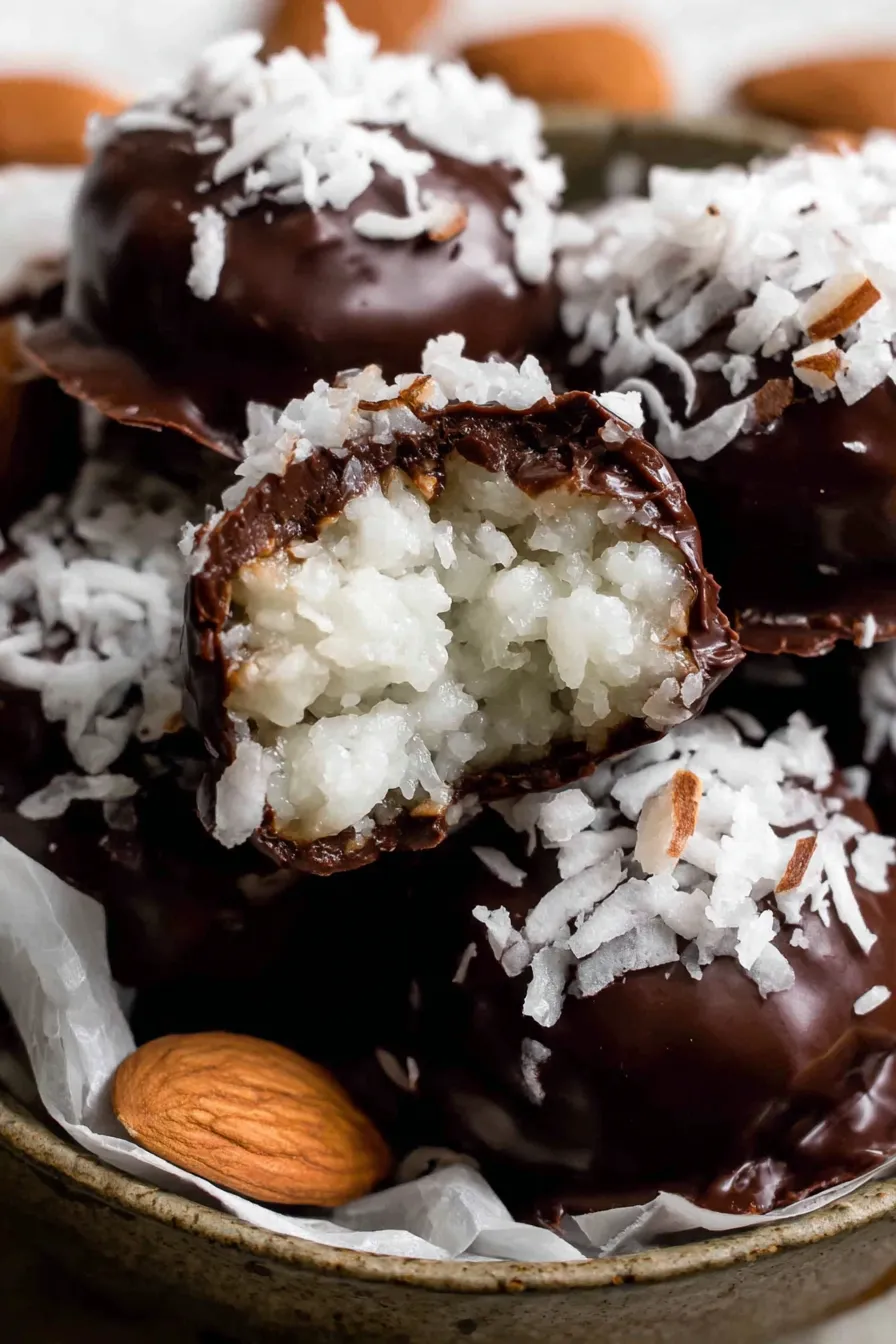
Creamy coconut centers topped with roasted almonds and coated in semi-sweet chocolate — a homemade take on the classic candy bar that's easy to make and even easier to love.
This homemade Almond Joy recipe started as a weekend experiment when I wanted to recreate a childhood favorite with better ingredients and a touch of homemade care. I first tested this method on a rainy Saturday afternoon, using good quality semi-sweet chocolate and roasted almonds from a local market, and the result felt instantly familiar and somehow better: the coconut was more pronounced, the almond had a fresh roast aroma, and the chocolate coating was glossy and satisfying. It became an immediate hit with family and friends and now appears whenever we need a portable, shareable sweet — whether for a game night, a school bake sale, or a holiday cookie tray.
What makes these particularly special is the balance between texture and flavor: a chewy, slightly sticky coconut center, a crisp toasted almond on top, and a thin, crackling shell of chocolate that yields beautifully when bitten. The marshmallow and corn syrup base gives the coconut center a shiny, cohesive structure that holds together well for dipping, and chilling the formed pieces makes handling them straightforward. Over several batches I refined the size and chilling times to arrive at roughly 25 perfectly sized candies that are both nostalgic and refined.
In my experience, guests always remark on how fresh the almonds taste and how the coconut center manages to be tender yet substantial. The first batch I made disappeared within an afternoon and sparked a dozen requests for the recipe from friends who assumed they were store-bought.
My favorite thing about these is how quickly they elevate a gathering — they always spark memories and questions about how they were made. The first time I made them for a holiday exchange, neighbors asked for extras and the batch was a talking point for weeks.
Store finished candies in an airtight container layered with parchment to prevent sticking. Keep them refrigerated and use within two weeks for best texture. To freeze, arrange pieces in a single layer on a tray until solid, then transfer to a freezer-safe container with parchment between layers; they will keep for up to three months. Thaw in the refrigerator to avoid condensation on the chocolate, then bring to cool room temperature before serving to maintain snap.
If you prefer a richer bite, swap semi-sweet for dark chocolate (60–70% cacao) or white chocolate for a sweeter profile. For a dairy-free option select certified dairy-free chocolate and vegan marshmallows (made without gelatin). You can use almond bark for faster melting at the cost of a slightly waxier mouthfeel. For crunch variation, replace whole almonds with blanched almonds or almond slivers; if avoiding nuts entirely, sunflower seeds or roasted pepitas create a different but pleasant texture.
Serve on a decorative platter lined with parchment or wax paper alongside coffee or tea. They pair well with lightly salted nuts, biscotti, or sliced apples for contrast. For parties, arrange in mini cupcake liners for an elegant presentation. Sprinkle flaky sea salt on top of the wet chocolate for a sophisticated sweet-salty finish, or drizzle contrasting white chocolate for a festive look.
The classic commercially produced Almond Joy has roots in mid-20th-century American candy-making, combining coconut, almonds, and chocolate in a convenient bar format. Coconut-based confections are found in many tropical cuisines, but this particular trio became iconic in the United States. Making them at home allows for fresher nuts, higher-quality chocolate, and the ability to control sweetness and texture — an evolution from factory-produced treats to approachable homemade confections.
Adapt this recipe for holidays by swapping almonds for pistachios and using a pistachio-colored drizzle in spring, or add cinnamon and orange zest to the coconut mix for winter festivities. For summer gatherings, form smaller bite-sized pieces and serve chilled for a refreshing sweet. Adjust the chocolate type seasonally to match pairings — darker chocolate for winter warmth, milk chocolate for nostalgic summer desserts.
Make the coconut centers up to three days ahead and keep chilled until ready. On dipping day, work in batches and re-chill the centers between sets to maintain cold cores for easier coating. Use a cooling rack set over parchment to catch drips and reuse excess chocolate by reheating gently. Label containers with dates if freezing, and portion individually for grab-and-go snacks.
These homemade Almond Joys are a satisfying project with a high return on flavor: minimal active time, flexible timing, and a treat that's sharable, giftable, and genuinely loved by a wide range of eaters. Try a small test batch first to dial in size and chocolate sheen, then scale up for holiday trays or party platters.
Chill the coconut centers thoroughly before dipping; very cold centers reduce the chance of falling apart while coating.
Use good-quality chocolate and melt in short bursts to avoid burning; stirring well between intervals ensures an even melt.
For a glossy finish add a small teaspoon of neutral oil or cocoa butter to the melted chocolate, and tap off excess chocolate when dipping to reduce pooled drips.
This nourishing homemade almond joys recipe is sure to be a staple in your kitchen. Enjoy every moist, high protein slice — it is perfect for breakfast or as a wholesome snack any time.
Yes. The coconut centers can be refrigerated for up to 3 days before dipping, and finished candies keep in the fridge for about 2 weeks or frozen for up to 3 months.
If using dairy-free chocolate and vegan marshmallows, you can make a dairy-free and vegetarian-friendly version. Note marshmallows often contain gelatin which is not vegetarian.
This Homemade Almond Joys recipe makes perfectly juicy, tender, and flavorful steak every time! Serve with potatoes and a side salad for an unforgettable dinner in under 30 minutes.
Combine corn syrup, marshmallows, and a pinch of salt in a medium saucepan over medium heat. Stir constantly until fully melted and smooth, about 4–6 minutes, then cook an additional minute while stirring.
Remove from heat and immediately stir in shredded coconut and vanilla extract until evenly coated and cohesive.
Transfer mixture to a bowl, cover, and refrigerate for at least 1 hour or until well chilled and firm enough to shape.
Scoop chilled mixture into small logs on a parchment-lined sheet and press one roasted almond into the top of each piece; aim for 25 pieces.
Return the shaped pieces to the refrigerator or freezer for 10–15 minutes so they are very cold and easier to dip.
Chop chocolate and melt in a microwave in 20-second increments, stirring between each, until smooth. Optionally stir in a teaspoon of neutral oil for shine.
Using a fork, dip each chilled piece into the melted chocolate, tap off excess, and place back on parchment to set. Refrigerate briefly to speed setting if desired.
Last Step: Please leave a rating and comment letting us know how you liked this recipe! This helps our business to thrive and continue providing free, high-quality recipes for you.
Leave a comment & rating below or tag
@feastu on social media!

Delightfully spooky and sweet, these bite-sized mummy cake balls combine moist cake, creamy centers, and a vanilla candy shell for effortless Halloween fun.

Fluffy homemade donuts crowned with a shimmering galaxy glaze. Fry or bake, swirl bold colors, and watch these showstoppers disappear fast.

Buttery shortbread crust meets gooey pecan pie filling in easy bar form, perfect for holidays, bake sales, and cozy weeknights.
Leave a comment & rating below or tag @feastu on social media!
Enjoyed this recipe? Share it with friends and family, and don't forget to leave a review!
This recipe looks amazing! Can't wait to try it.
Comments are stored locally in your browser. Server comments are displayed alongside your local comments.

Join to receive our email series which contains a round-up of some of our quick and easy family favorite recipes.
