
>>

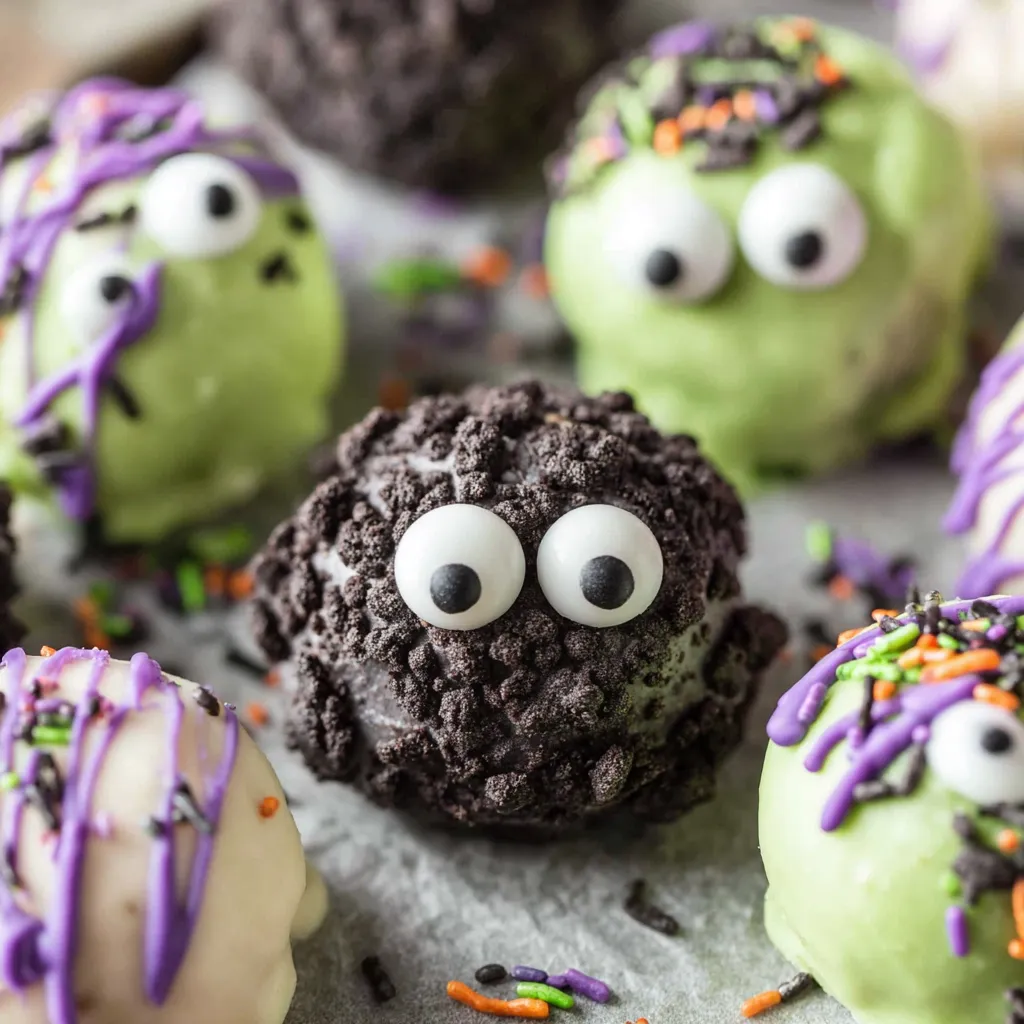
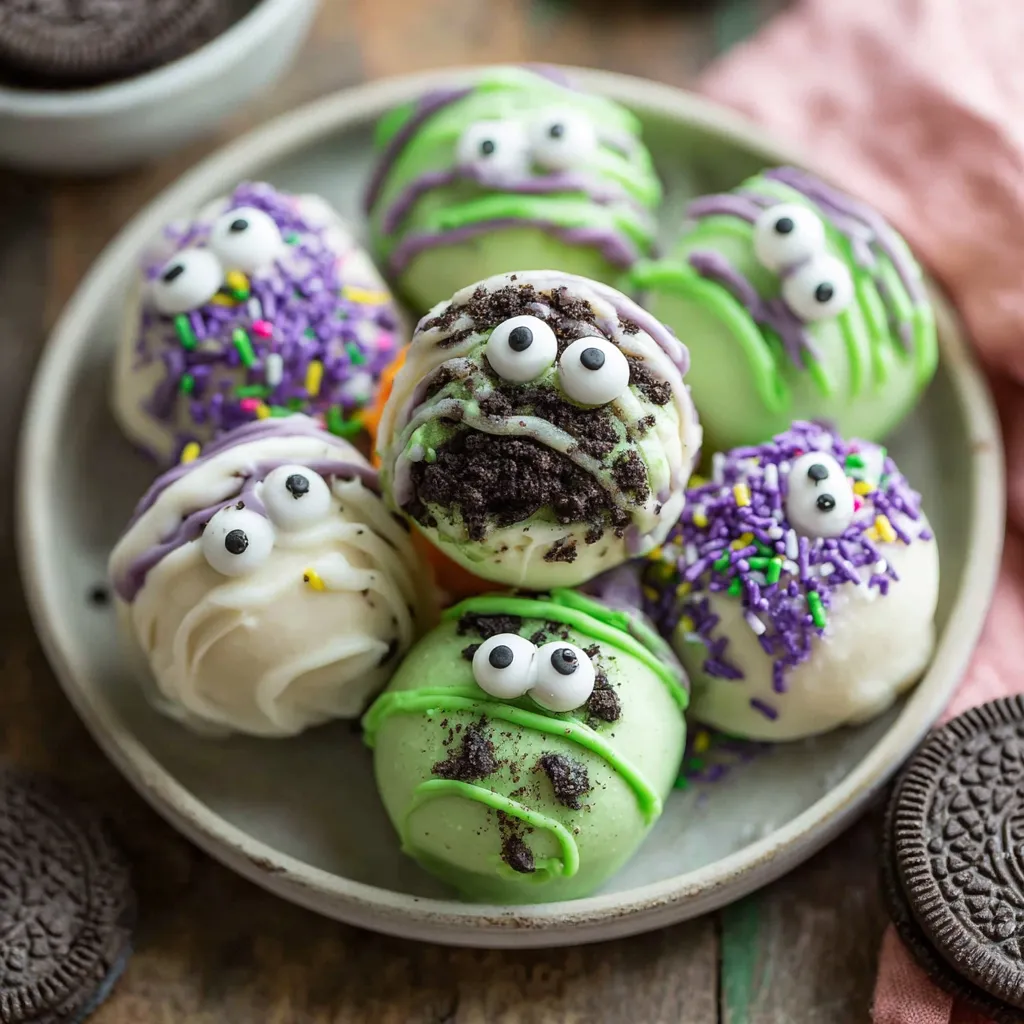
Spooky, creamy truffles made from crushed Oreos and cream cheese, dipped in colored white chocolate and decorated with candy eyes and sprinkles—perfect for Halloween party treats.
This recipe for No Bake Monster Truffles is my go-to for Halloween gatherings and last-minute party trays. I first made these during a neighborhood potluck when I wanted something festive, fast, and impossible not to eat. The combination of crunchy cookie crumbs, silky cream cheese, and sweet white coating creates a texture contrast that feels indulgent yet familiar. Each bite gives you that split-second of creamy center followed by a crisp chocolate shell, and the candy eyes make them delightfully silly and a little spooky.
I discovered this method when adapting a classic cookie ball idea to fit a Halloween theme. It was one of those late October evenings when kids were out testing their treat routes and I was experimenting with food coloring gels. The green and purple coatings looked so vibrant that I knew these would become an instant favorite. Family and friends loved how quick they were to assemble and how beautifully they held up on a platter. Whether you make a dozen or two dozen, they vanish fast.
Every time I bring a tray to a party people ask how I made the colors so even and the centers so cream-forward. The secret is chilling the formed balls until they are firm and using a fork to tap off excess coating so each bite stays balanced. These treats have become a seasonal must for our family, and I love that they let me get creative with simple materials.
My favorite part about these is how they transform a handful of humble ingredients into a showstopper. I once made 100 of these for a school bake sale and they sold out in under an hour. The kids loved choosing which truffle looked the scariest. The key detail that consistently earns compliments is chilling the formed centers until firm; it prevents the coating from cracking and keeps each bite perfectly balanced.
Store finished sweets in a single layer in an airtight container at room temperature for up to 48 hours if your kitchen is cool. For longer storage, keep them refrigerated for up to one week; bring to room temperature 15 minutes before serving for the best flavor. To freeze, arrange on a baking sheet until solid, then transfer to a freezer-safe bag or container with parchment between layers to prevent sticking. Thaw in the refrigerator overnight rather than at room temperature to maintain texture and prevent condensation on the coating.
If you need dairy-free options, replace the cream cheese with a full-fat non-dairy cream cheese and use dairy-free white candy melts. For gluten-free needs, use certified gluten-free sandwich cookies; note that texture and sweetness may vary slightly. Want a richer center? Swap half the cream cheese for 2 tablespoons of unsalted butter for extra decadence. If you prefer darker coatings, use white chocolate tinted with a little melted dark chocolate to tone down sweetness before adding color.

Arrange on a black or orange platter for a classic Halloween look. Pair with caramel apples, pumpkin cookies, or a bowl of popcorn for a Halloween dessert table. For a kids table, offer a decorating station with extra eyes and sprinkles so guests can personalize their own. These bite-sized sweets also work well as cupcake toppers or as part of gift boxes for neighbors and party favors.
These treats are a playful modern take on truffles that evolved from traditional European chocolate truffles and American cookie balls. They blend the idea of a soft center coated in chocolate with the American fondness for sandwich cookies. Decorating with candy eyes and themed sprinkles is a recent trend tied to seasonal celebrations and social media baking culture where whimsical presentation is celebrated.
For autumn versions beyond Halloween, tint coatings in amber and deep red and use leaf-shaped sprinkles. At winter holidays swap the eyes for small festive candies and use red and green coatings. For Valentine variations make pink and red coatings and add heart sprinkles. The same technique works year-round by adjusting colors and toppers to fit each season.
Make the centers up to two days ahead and freeze them to speed up final assembly. Keep bowls of melted chocolate warm over a bowl of gently simmering water if you are coating large batches; do not let water touch the chocolate. Use two forks or a dipping tool to speed the coating process and lay truffles on parchment to set. Label containers with the date and flavor variants if making several colors for different events.
I first shared these at a neighborhood Halloween where people kept asking for the recipe. One family renamed them monster bites and made them part of their annual tradition. Another time I adapted the colors to match a baby shower and guests were delighted that something so simple looked custom-made. The technique is forgiving and always produces consistent results even when made by baking novices.
These no-bake treats are a joy to make and share. They transform everyday ingredients into a memorable party conversation piece. Make them your own, enjoy the process, and watch them disappear.
Chill the formed centers until firm before dipping to prevent cracking and ensure a smooth coating.
Use gel food coloring rather than liquid to avoid thinning the melted chocolate.
Work in small batches to keep the melted chocolate at the right consistency and avoid seizing.
Tap off excess coating with a fork and scrape against the bowl to reduce pooling and create a neater finish.
This nourishing no bake monster truffles (halloween oreo balls) recipe is sure to be a staple in your kitchen. Enjoy every moist, high protein slice — it is perfect for breakfast or as a wholesome snack any time.
This No Bake Monster Truffles (Halloween Oreo Balls) recipe makes perfectly juicy, tender, and flavorful steak every time! Serve with potatoes and a side salad for an unforgettable dinner in under 30 minutes.
Line a baking sheet with parchment. Process 24 sandwich cookies in a food processor until fine crumbs form. If you lack a processor, crush cookies in a resealable bag until sand-like.
Add 4 ounces softened cream cheese to the crumbs and pulse until a uniform dough forms. Scrape sides and pulse again; the mixture should clump when pressed.
Portion using a small scoop or 2 tablespoons and roll into balls. Place on the parchment-lined sheet and freeze for 20 minutes until firm and chilled through.
Melt 8 ounces white melting chocolate in a microwave-safe bowl in 30 second intervals, stirring between heats until smooth. Stir in 3 to 4 drops green gel until evenly colored.
Dip chilled balls into the green coating using a fork, tap off excess, and return to parchment. Work quickly to keep coating even and glossy.
Melt the remaining 8 ounces chocolate, tint with purple gel, then drizzle over the green-coated truffles. Press candy eyes into the tacky coating and sprinkle with Halloween sprinkles. Let set.
Last Step: Please leave a rating and comment letting us know how you liked this recipe! This helps our business to thrive and continue providing free, high-quality recipes for you.
Leave a comment & rating below or tag
@feastu on social media!

Delightfully spooky and sweet, these bite-sized mummy cake balls combine moist cake, creamy centers, and a vanilla candy shell for effortless Halloween fun.

Fluffy homemade donuts crowned with a shimmering galaxy glaze. Fry or bake, swirl bold colors, and watch these showstoppers disappear fast.

Buttery shortbread crust meets gooey pecan pie filling in easy bar form, perfect for holidays, bake sales, and cozy weeknights.
Leave a comment & rating below or tag @feastu on social media!
Enjoyed this recipe? Share it with friends and family, and don't forget to leave a review!
This recipe looks amazing! Can't wait to try it.
Comments are stored locally in your browser. Server comments are displayed alongside your local comments.

Join to receive our email series which contains a round-up of some of our quick and easy family favorite recipes.
