
>>

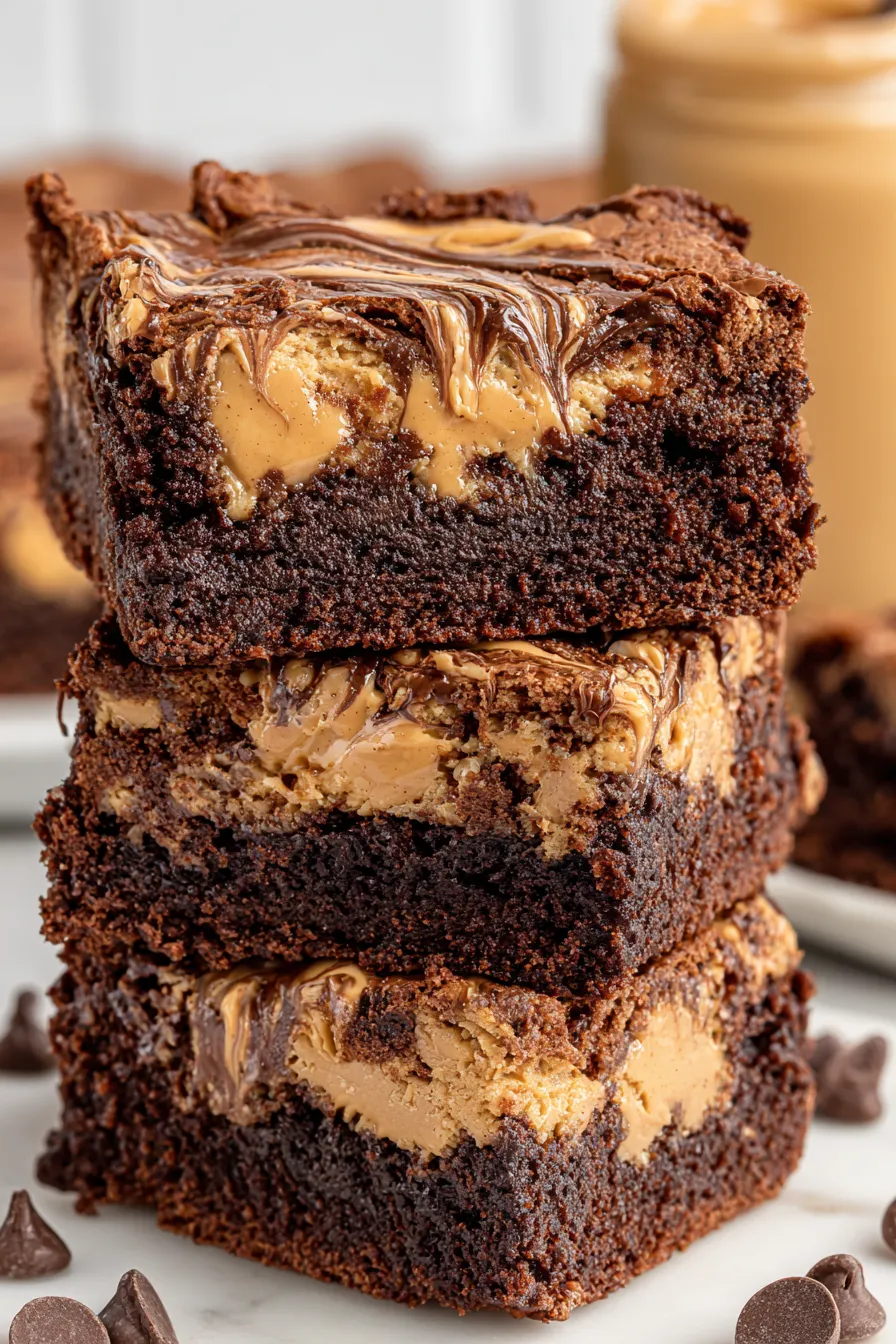
Fudgy, chocolatey squares with ribbons of creamy peanut butter — easy to make and impossible to resist.
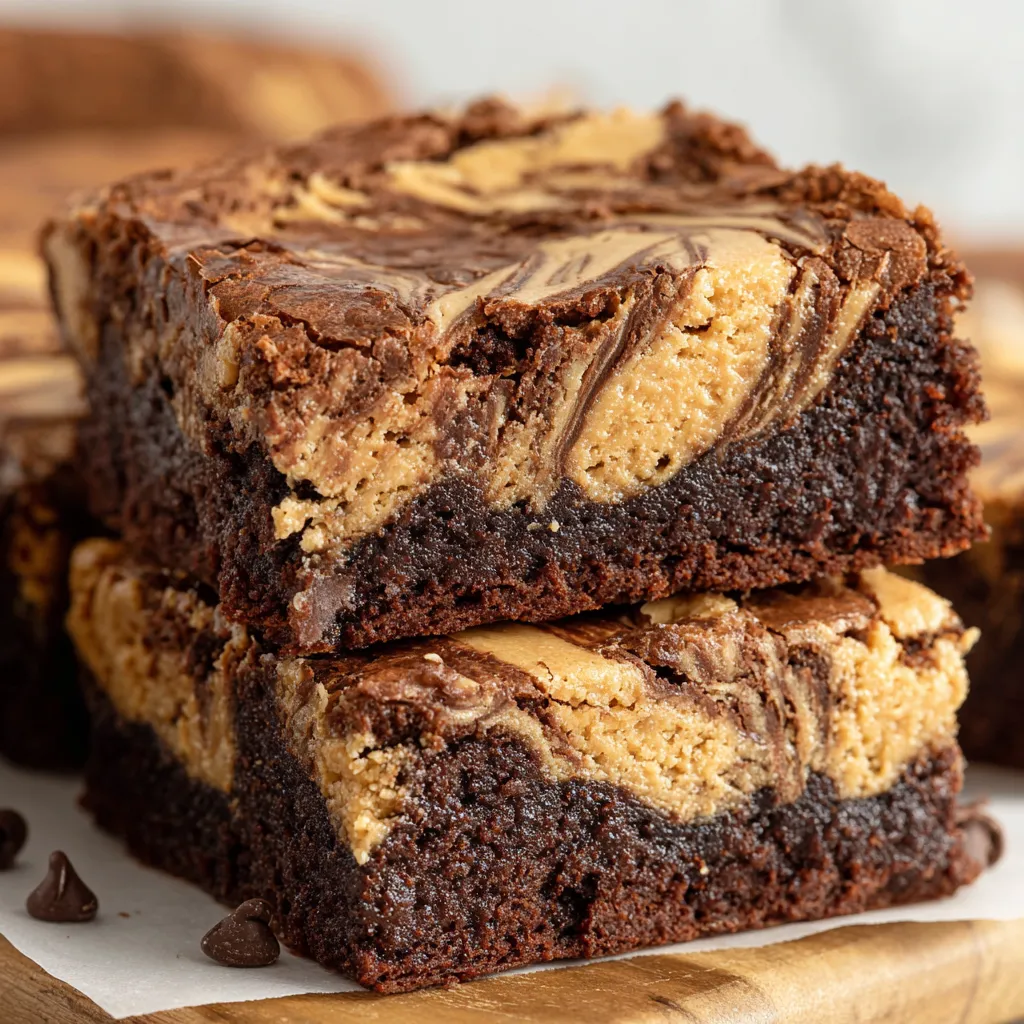
This peanut butter brownies recipe has been my go-to when I want something that feels indulgent but comes together with minimal fuss. I discovered this combination one rainy weekend when I had a jar of peanut butter and a craving for deep chocolate — the swirl of peanut butter through a fudgy brownie base made each bite feel like a little revelation. The texture balances a tender, slightly gooey center with crisp edges, while the peanut butter adds a creamy, salty contrast to the rich cocoa. It’s the sort of dessert that disappears quickly at gatherings and always brings up requests for the recipe.
I particularly love making these when I need a bake-ahead dessert for potlucks or when friends drop in unexpectedly. The flavors mature a bit after a day, the peanut butter ribbons blending into the chocolate for a softer, almost ganache-like finish. If you prefer firm brownies with defined edges, bake toward the longer end of the timing; if you love gooey centers, slightly underbake and allow time to cool. These squares marry pantry-stable ingredients with one small technique — gentle mixing — that makes all the difference in texture.
In my household these have become the dessert I bring when woodsmoke is in the air and friends gather — everyone comments on the peanut butter swirls. I once brought a pan to a neighborhood picnic and had neighbors asking for the recipe within the hour; they loved how the peanut butter felt like a surprise in the middle of each bite. It’s reliably adored and rarely makes it through the afternoon.
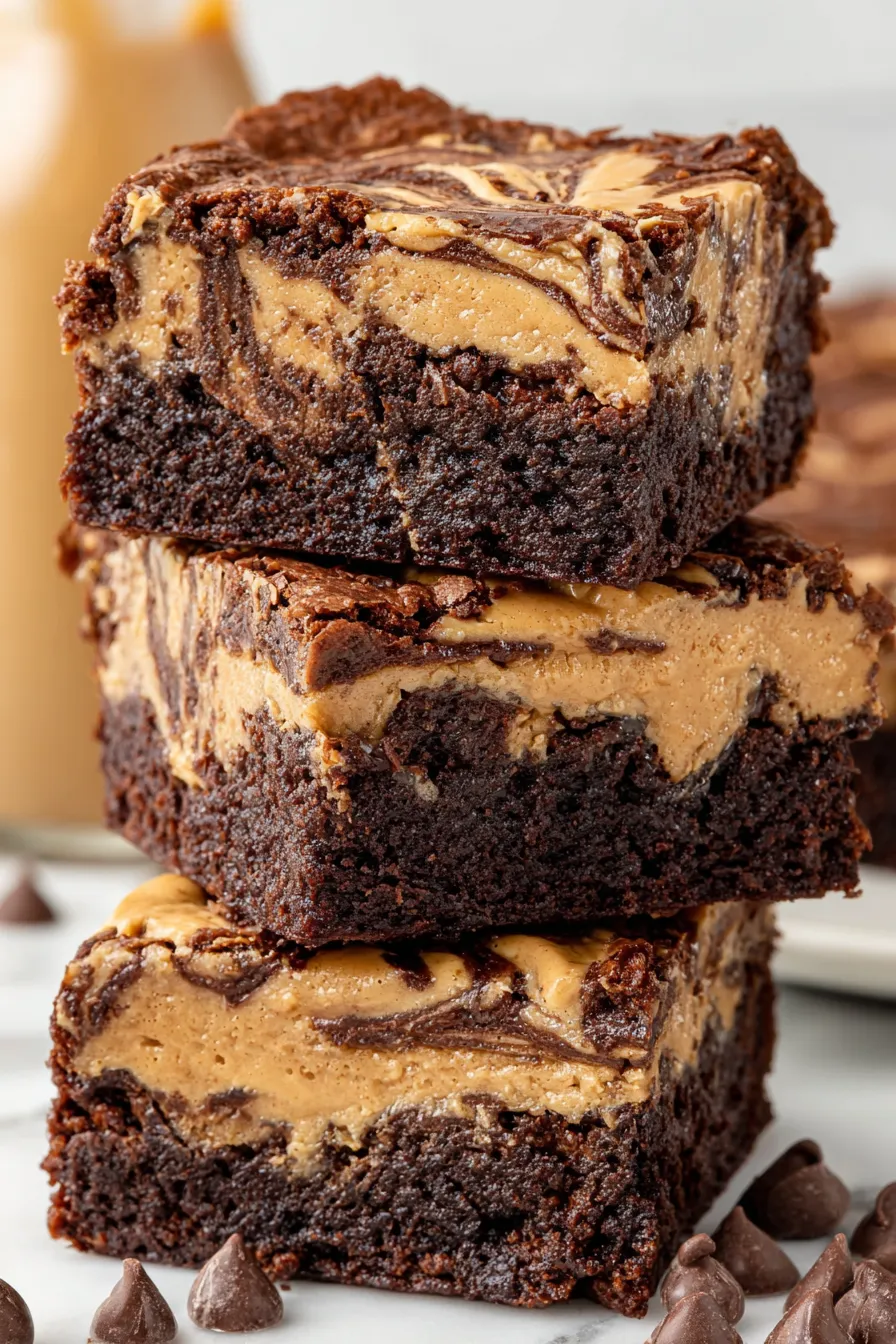
What I love most is how the swirls look like little pieces of art and how the salty peanut butter brightens the chocolate. Family members often argue over who gets the corner pieces, and I’ve learned to cut with a light touch and let the brownies rest so the slices hold their shape.
For short-term storage, place cooled squares in a single layer in an airtight container at room temperature for up to 48 hours. If you stack, separate layers with parchment paper. For longer storage, freeze individual squares on a parchment-lined tray for an hour, then transfer to a freezer bag or container with parchment between layers — they’ll last up to 3 months. To thaw, leave at room temperature for 30–60 minutes or warm gently in a 300°F oven for 6–8 minutes for a just-baked texture.
If you don’t have salted butter, use unsalted and add an extra 1/4 teaspoon kosher salt. For gluten-free versions, substitute a 1-to-1 gluten-free baking flour and avoid cross-contamination. Swap peanut butter for sunflower seed butter to make them nut-free (note that color and flavor will change slightly). If you prefer less sugar, reduce granulated sugar to 2/3 cup and keep the brown sugar for moisture; expect a slightly less sweet but still rich bar.
Serve slightly warm with a scoop of vanilla ice cream and a drizzle of chocolate sauce for an indulgent dessert. For a party platter, cut into smaller bite-sized squares and garnish with a light sprinkle of flaky sea salt or crushed roasted peanuts for crunch. These pair beautifully with coffee or a full-bodied milk: the bitterness of the coffee balances the sweet, while milk complements the peanut butter’s creaminess.
Chocolate and peanut butter are a classic American flavor pairing, popularized in confections and sandwiches across the 20th century. The combination evokes regional favorites such as peanut butter cups and Elvis-inspired sandwiches. Swirled bars like these borrow from American home-baking traditions where layered and marbled desserts are prized for both visual appeal and textural contrast — a simple technique with roots in mid-century cookbooks and contemporary home kitchens alike.
In autumn, fold in 1/2 teaspoon ground cinnamon and finish with toasted pecans for a warm, nutty twist. For summer gatherings, serve chilled squares alongside fresh berries to lighten the richness. Around the holidays, substitute half the chocolate chips with peppermint baking chips or scatter crushed candy canes on top after baking for a festive finish — allow cooling so the peppermint adheres without melting.
Make a double batch and freeze half for later: bake, cool, slice, freeze in a single layer, then bag. Label with the date and reheat individual squares in the microwave for 10–15 seconds or in a low oven to revive texture. If prepping for a party, bake a day ahead, keep at room temperature covered, and add fresh garnishes right before serving to maintain crisp edges and glossy swirls.
These peanut butter brownies are a small ritual of comfort — straightforward to make, endlessly shareable, and a delightful blend of texture and flavor. Try them your way and enjoy the smiles they bring.
Bring eggs to room temperature to help them emulsify evenly with melted butter and sugar for a smoother texture.
Don’t overmix once you add the flour; overworking the batter develops gluten and leads to tough brownies.
Warm the reserved peanut butter slightly before drizzling so it flows and creates clear, defined swirls.
This nourishing peanut butter brownies recipe is sure to be a staple in your kitchen. Enjoy every moist, high protein slice — it is perfect for breakfast or as a wholesome snack any time.
Store cooled brownies in an airtight container at room temperature for up to 48 hours or refrigerate up to 5 days. Freeze for up to 3 months.
Yes — warm a square in the microwave for 10–15 seconds or in a 300°F oven for 6–8 minutes for a freshly baked feel.
This Peanut Butter Brownies recipe makes perfectly juicy, tender, and flavorful steak every time! Serve with potatoes and a side salad for an unforgettable dinner in under 30 minutes.
Preheat oven to 350°F. Line a 9x9-inch baking dish with parchment paper leaving a small overhang and lightly spray to prevent sticking.
In a small bowl, whisk together the all-purpose flour, unsweetened cocoa powder, baking powder, and chocolate chips to remove lumps and distribute leavening.
In a medium bowl, mix melted and cooled salted butter with granulated and light brown sugar, then add eggs, vanilla, and kosher salt. Stir until just combined.
Gently stir the dry ingredients into the wet ingredients until just combined, taking care not to overmix to preserve a tender texture.
Spread half the batter in the prepared pan, dollop teaspoons of 2/3 cup peanut butter over the surface, and then spread the remaining batter on top.
Warm the remaining 1/3 cup peanut butter for about 10 seconds, drizzle over batter, use a knife to swirl, and bake for about 30 minutes until a toothpick shows moist crumbs.
Cool completely at room temperature for about 2 hours, lift from the pan with parchment overhang, cut into 16 squares, and serve.
Last Step: Please leave a rating and comment letting us know how you liked this recipe! This helps our business to thrive and continue providing free, high-quality recipes for you.
Leave a comment & rating below or tag
@feastu on social media!

Delightfully spooky and sweet, these bite-sized mummy cake balls combine moist cake, creamy centers, and a vanilla candy shell for effortless Halloween fun.

Fluffy homemade donuts crowned with a shimmering galaxy glaze. Fry or bake, swirl bold colors, and watch these showstoppers disappear fast.

Buttery shortbread crust meets gooey pecan pie filling in easy bar form, perfect for holidays, bake sales, and cozy weeknights.
Leave a comment & rating below or tag @feastu on social media!
Enjoyed this recipe? Share it with friends and family, and don't forget to leave a review!
This recipe looks amazing! Can't wait to try it.
Comments are stored locally in your browser. Server comments are displayed alongside your local comments.

Join to receive our email series which contains a round-up of some of our quick and easy family favorite recipes.
