
>>

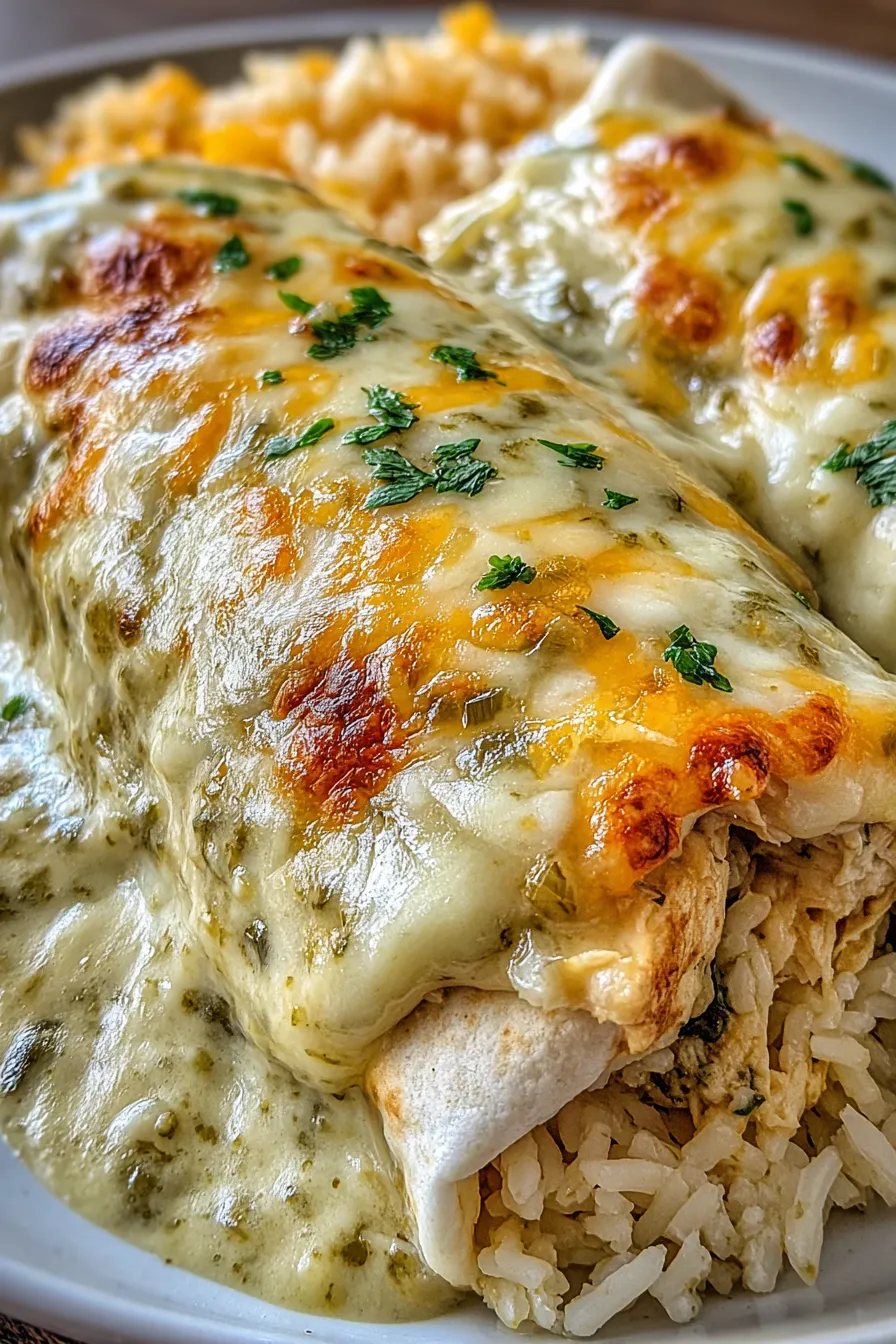
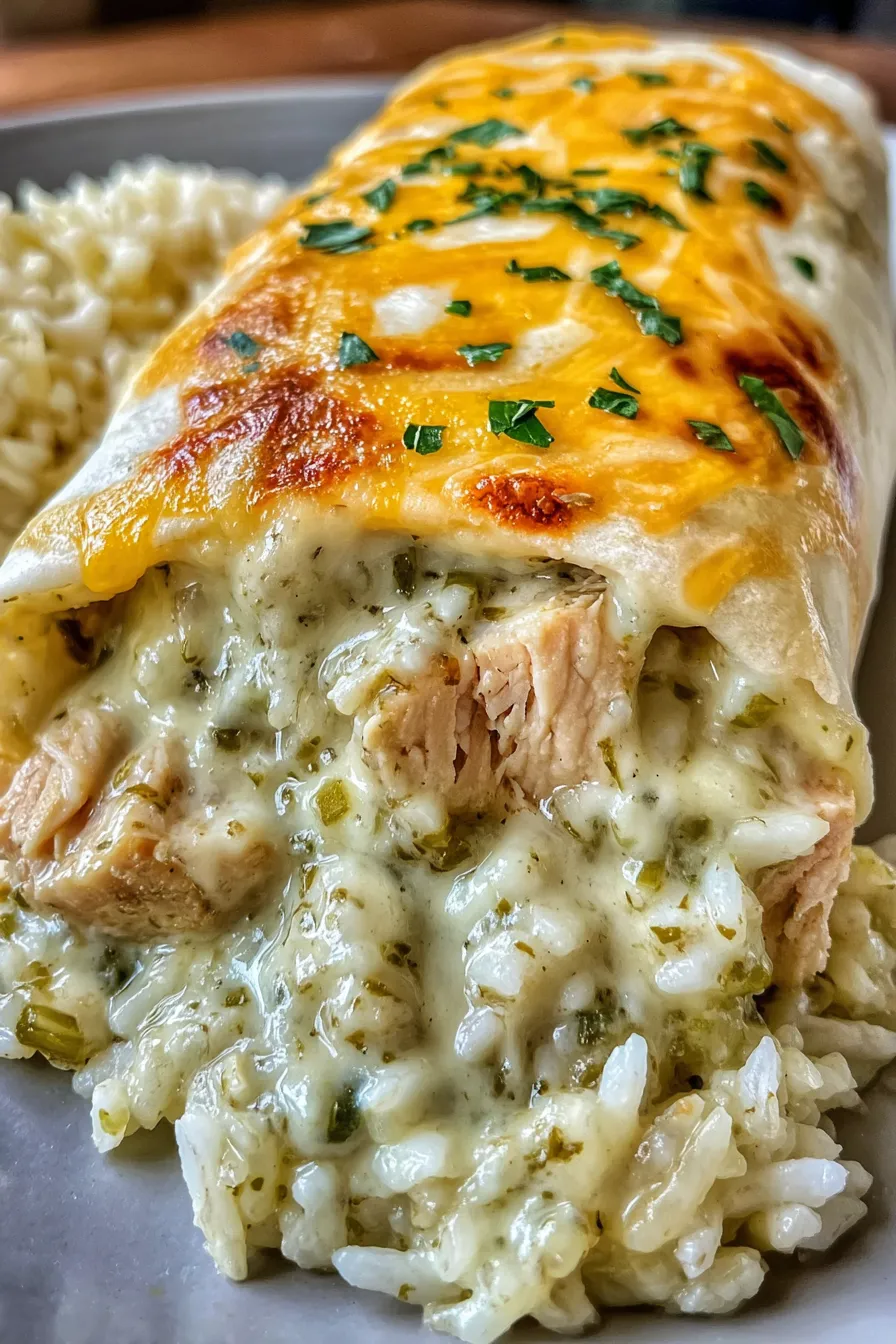
A smoky, comforting burrito filled with shredded smoked chicken, green chiles, cheddar, rice, and a creamy salsa-sour cream mix — ready in under 30 minutes.

This smoked chicken green chile burrito is one of those dishes I turn to when I want comfort food that still feels a little special. I first developed this combination after a weekend of smoking a whole chicken for tacos; there was leftover shredded meat in the fridge and I wanted something quick but memorable. The smokiness from the chicken pairs beautifully with the bright, mild heat of canned green chiles, and the creamy salsa-sour cream binder makes every bite rich and cohesive. It’s the kind of meal that fills the kitchen with a warm, inviting aroma and prompts everyone to gather around the stove while I crisp the tortillas.
What makes this version stand out is how simple pantry staples — canned green chiles, cooked rice, shredded cheddar, and a jar of salsa — transform leftover smoked meat into a fast weeknight favorite. I discovered that warming the tortillas slightly before rolling prevents cracking, and a quick sear seam-side down seals everything inside and gives a satisfyingly crisp exterior. Whether you’re feeding a hungry family or prepping handhelds for friends at a casual gathering, these burritos hit that sweet spot between comforting, smoky, and effortless.
In our house this became an instant favorite after my spouse declared it “perfect” for game nights. I love that the smoky notes from the chicken shine through without overpowering the creamy mix, and the crisp exterior from pan-searing gives each burrito a punchy texture contrast that keeps everyone coming back for seconds.
My favorite aspect of this dish is the contrast between the smoky shredded chicken and the cooling sour cream-salsa binder. Friends have asked for the recipe after one bite, and it’s become my go-to for casual entertaining because it’s both easy to scale and forgiving: swap the protein or add roasted vegetables and the method stays the same.
Store leftover filling and cooked burritos differently for best results. Keep the filling in an airtight container in the refrigerator for up to 3 days — separate portions make reheating faster. If you’ve already seared the burritos, wrap each in foil and refrigerate for up to 2 days; reheat in a 350°F oven until warmed through to avoid sogginess, then sear quickly in a hot skillet for a crisp finish. For freezing, wrap burritos tightly in plastic wrap and then foil: they’ll keep for roughly 3 months. Reheat from frozen on a baking sheet at 350°F for 25–35 minutes or microwave until hot, then crisp in a skillet.
If you don’t have smoked chicken, use shredded rotisserie chicken and add 1/2 teaspoon smoked paprika or a drop of liquid smoke to echo the smoky flavor. For a lighter option, swap sour cream for plain Greek yogurt (1:1) — it adds tang and more protein. To make it vegetarian, replace chicken with a mix of roasted cauliflower and black beans or seasoned jackfruit. Use pepper jack instead of cheddar for more heat, or omit cheese for a dairy-reduced version. For gluten-free, serve as a bowl over quinoa or rice and use corn tortillas if you can find pliable large ones.
Serve these with a simple side salad of crisp lettuce, radish, and a lime vinaigrette to cut the richness, or alongside tortilla chips and extra salsa for dipping. Fresh cilantro, sliced avocado, or a squeeze of lime brightens the flavors on the plate. For a brunch twist, top with a fried egg and a drizzle of hot sauce. These work well at casual gatherings paired with a bowl of black beans, grilled corn, or a light slaw to balance the richness.
This handheld mash-up borrows from Southwestern and Tex-Mex traditions: smoked or roasted meats combined with chiles and cheese are classic, while the burrito format — a flour tortilla wrapped around a hearty filling — reflects regional adaptations in borderland cuisines. Canned green chiles are a New Mexico staple and lend a distinctive mild heat and vegetal note; pairing them with smoked chicken nods to barbecue influences common in American Southwest cooking.
In summer, add grilled corn kernels and charred peppers to the filling for a bright, seasonal touch; in fall swap in roasted butternut squash and sage for a cozy twist. During winter, use smoked thigh meat for extra richness and top with pickled onions to cut the fat. Holiday gatherings can welcome a spicier version with chopped jalapeños and pepper jack, or turn the filling into a burrito bake topped with enchilada sauce and extra cheese before baking.
For batch cooking, prepare the filling and store it in 1-cup portions in airtight containers; assemble and quickly sear just before serving. Alternatively, fully assemble and freeze individually wrapped burritos — thaw overnight in the refrigerator before reheating. Use parchment paper between stacked burritos to prevent sticking. Label containers with the date and reheat on a sheet pan so multiple portions heat evenly.
These burritos are a satisfying example of how a few simple ingredients and a little technique yield a memorable, shareable meal. I hope you make them your own — swap fillings, adjust heat, and enjoy the savory comfort of smoky chicken wrapped in a crisp, golden tortilla.
Warm tortillas briefly before rolling to prevent cracking and ensure a tight roll.
Use day-old or chilled rice to keep the filling from becoming watery.
Press burritos seam-side down in the skillet for at least 30 seconds to seal the seam and avoid unrolling while cooking.
If using rotisserie chicken, add 1/2 teaspoon smoked paprika to mimic smoked flavor.
This nourishing smoked chicken green chile burrito recipe is sure to be a staple in your kitchen. Enjoy every moist, high protein slice — it is perfect for breakfast or as a wholesome snack any time.
Yes. Assemble and refrigerate unseared burritos for up to 24 hours; sear right before serving for best texture.
Wrap tightly and freeze for up to 3 months. Reheat in a 350°F oven from frozen for 25–35 minutes, then crisp in a skillet.
This Smoked Chicken Green Chile Burrito recipe makes perfectly juicy, tender, and flavorful steak every time! Serve with potatoes and a side salad for an unforgettable dinner in under 30 minutes.
In a large mixing bowl, add shredded smoked chicken, drained diced green chiles, shredded cheddar, cooked rice, sour cream, salsa, garlic powder, onion powder, salt, and black pepper. Mix until all components are evenly blended and the mixture holds together when scooped.
Place the flour tortillas on a microwave-safe plate and warm for approximately 15 to 20 seconds to increase pliability for rolling. Alternatively, wrap in a towel and warm in a 300°F oven for 5 minutes.
Distribute the chicken mixture evenly onto the center of each warmed tortilla, leaving space at the edges to fold and roll without spillage.
Fold the short sides of each tortilla inward, then roll tightly from the bottom up to fully enclose the filling. Tuck as you go to create a compact cylinder.
Coat a large skillet with cooking spray or a thin layer of vegetable oil and preheat over medium. The surface should be hot enough to sizzle a drop of water gently.
Arrange burritos seam-side down and cook for 2 to 3 minutes per side or until the surface is golden brown and crisp. Use tongs to turn and press gently with a spatula to ensure even contact with the pan.
Last Step: Please leave a rating and comment letting us know how you liked this recipe! This helps our business to thrive and continue providing free, high-quality recipes for you.
Leave a comment & rating below or tag
@feastu on social media!

Delightfully spooky and sweet, these bite-sized mummy cake balls combine moist cake, creamy centers, and a vanilla candy shell for effortless Halloween fun.

Fluffy homemade donuts crowned with a shimmering galaxy glaze. Fry or bake, swirl bold colors, and watch these showstoppers disappear fast.

Buttery shortbread crust meets gooey pecan pie filling in easy bar form, perfect for holidays, bake sales, and cozy weeknights.
Leave a comment & rating below or tag @feastu on social media!
Enjoyed this recipe? Share it with friends and family, and don't forget to leave a review!
This recipe looks amazing! Can't wait to try it.
Comments are stored locally in your browser. Server comments are displayed alongside your local comments.

Join to receive our email series which contains a round-up of some of our quick and easy family favorite recipes.
