
>>

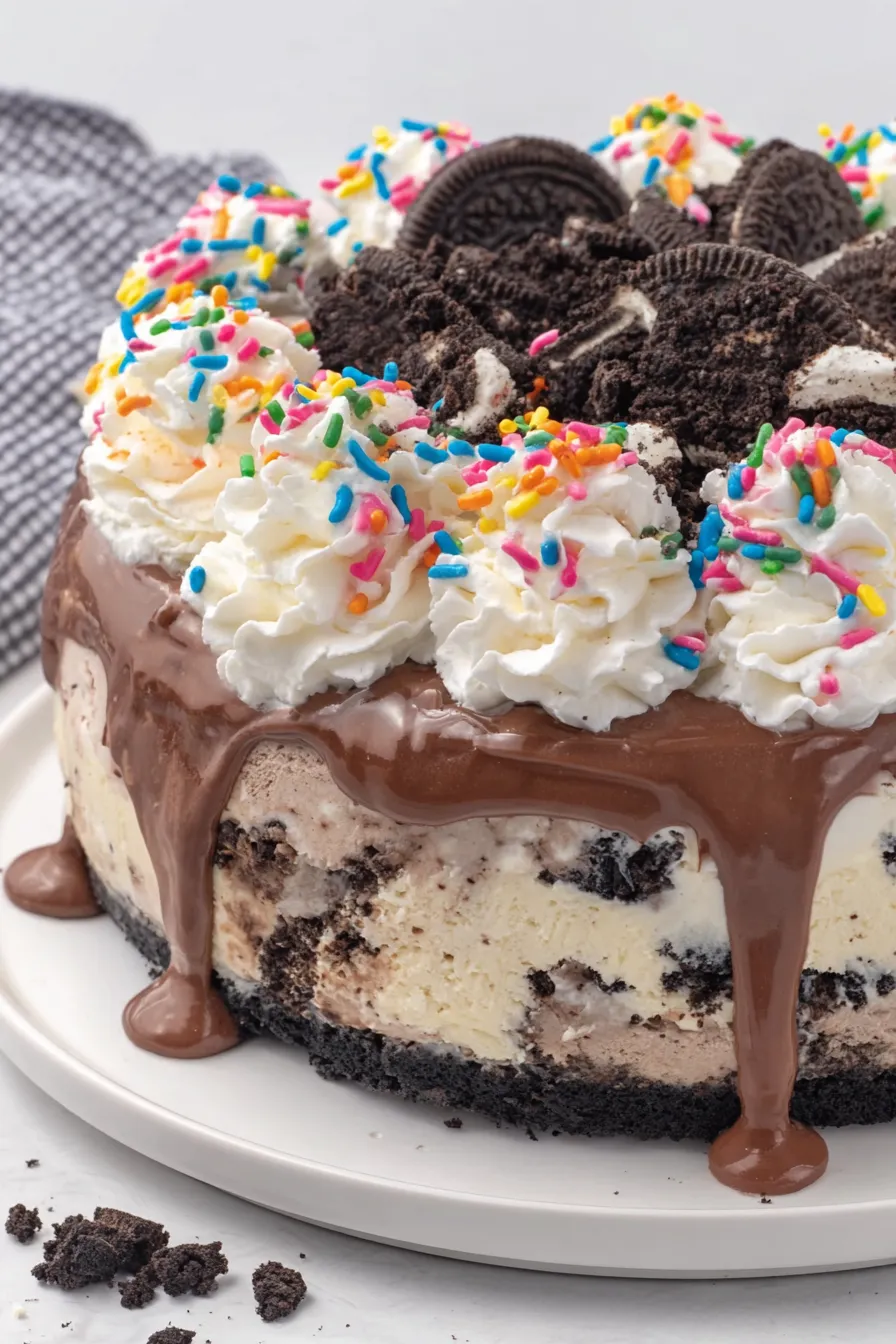
A homemade version of the classic ice cream cake — layers of chocolate ice cream, hot fudge, cookie crumb crunch and whipped cream frosting for a show-stopping party dessert.
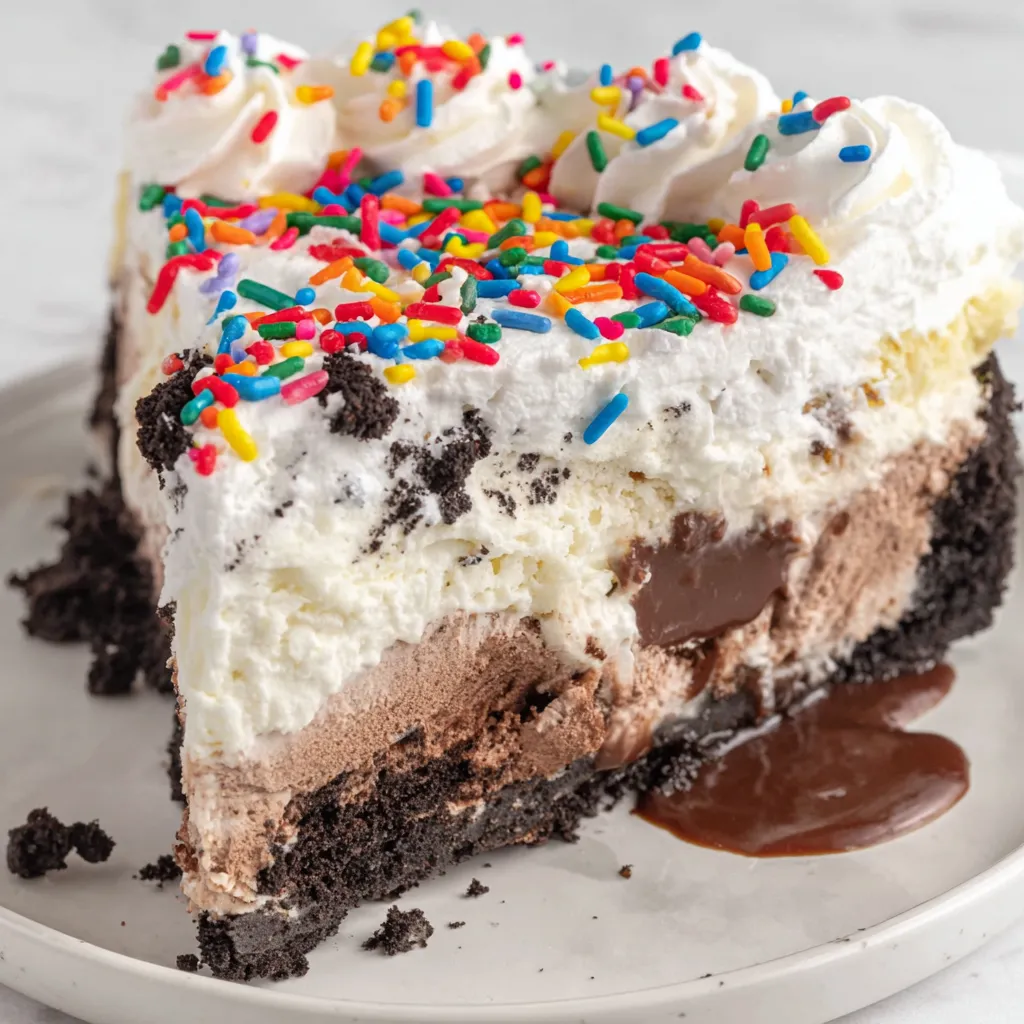
This copycat Dairy Queen ice cream cake has been my celebration staple for years. I first recreated it when a late-summer birthday rolled around and the grocery store version was either sold out or excessively pricey. The balance of a crunchy cookie base, a cold dense chocolate layer, a glossy hot fudge ribbon and a pillowy whipped cream exterior feels indulgent and nostalgic. It slices cleanly, keeps well in the freezer, and always prompts a chorus of "where did you get this?" from guests.
I remember the first time I served this to a crowd: the cake went from freezer to table, and the faces said it all. The chocolate layer is resolutely creamy without being icy, the hot fudge adds a molten richness, and the cookie crumbs provide the texture contrast that makes every bite interesting. It is the kind of dessert that is easy to Customize based on what you have on hand and forgiving of small timing slips — perfect for cooks who want a showpiece with minimal stress.
Personally, I love that it brings a little retro diner magic to my kitchen. On busy holidays I make two at once; one to keep and one to gift. My family teases me that I should open a small summer stand, because the recipe reliably disappears faster than anything else on the table.

My favorite thing is how reliably celebratory this is: birthdays, graduations or impromptu summer gatherings, it always reads festive. I once hid a small stash of extra sprinkles under the top layer so a child could find them when we cut the cake, and that little surprise became a family legend. Practicality meets showmanship here, and that combination keeps folks coming back for seconds.
Store the finished cake well wrapped in plastic wrap and a layer of foil to guard against odours and freezer burn. At home, keep it on the coldest shelf at the back of the freezer rather than in the door. Properly wrapped, the cake maintains quality for up to 1 month, but it is best within 7 to 10 days for peak texture. When reheating or serving, move the cake to the refrigerator for 10 to 15 minutes if you prefer softer slices, or leave on the counter for just a few minutes for cleaner knife lines.
For a dairy-free version, use dairy-free chocolate and vanilla frozen desserts and a nondairy whipped topping like aquafaba-based whipped cream or a coconut cream whip; expect slightly different freezing behavior and adjust thawing times. To make this gluten-free, choose certified gluten-free chocolate sandwich cookies or substitute with crushed gluten-free chocolate wafers. Prefer a fruitier profile? Swap the vanilla layer for strawberry or coffee for a mocha twist. If you want extra crunch, fold 1/2 cup chopped roasted nuts into the cookie crumb layer.
Serve on a chilled platter to delay thawing while on the table. Pair slices with espresso for adults or a simple berry compote for a brighter contrast. Garnish individual plates with fresh mint leaves and a drizzle of extra hot fudge warmed slightly. This dessert is perfect after heavy meals — the cold cleanse and the light whipped frosting make it feel less heavy than one might expect.
The inspiration comes from an iconic soft-serve and cake hybrid popularized in American ice cream counters. Combining frozen layers with a crunchy insert is a technique seen across many cultures, but the American ice cream parlor perfected the celebratory, photogenic cake adorned with whipped borders and colorful sprinkles. The commercial versions made this style familiar, while homemade recreations allow cooks to control quality and flavor intensity.
In winter, swap sprinkles for crushed peppermint and add a ribbon of caramel instead of hot fudge for holiday warmth. In summer, fold fresh chopped strawberries into the vanilla layer and use a light lemon-sugar cookie crumb for brightness. For special occasions, embed thin layers of crushed toffee or toasted coconut between layers to match the seasonality of ingredients.
Assemble the cake up to 48 hours in advance and keep frozen; decorate right before serving to preserve the pristine whipped frosting. If meal-prepping components, make the cookie crumbs and whipped frosting a day ahead and store both in airtight containers. When ready to assemble, soften ice cream just enough to spread and follow the layer-and-freeze sequence to avoid melting. Label the cake with the date to manage freezer rotation.
This cake has become my fallback for celebrations because it looks impressive while being extremely forgiving. Try it once and you\'ll find reasons to make it again: birthdays, graduations, or a simply-sweet Sunday afternoon. Enjoy sharing it as much as eating it.
Use full-fat premium ice cream for the best texture and flavor.
Toast the cookie crumbs briefly to remove excess moisture and deepen flavor.
Chill tools and bowl before whipping heavy cream to help it reach stiff peaks faster.
This nourishing copycat dairy queen ice cream cake recipe is sure to be a staple in your kitchen. Enjoy every moist, high protein slice — it is perfect for breakfast or as a wholesome snack any time.
Let slices sit at room temperature for 3 to 5 minutes for clean slices. For softer slices, thaw 10 minutes.
Yes, use dairy-free frozen dessert and aquafaba or coconut-based whipped topping. Texture will be slightly different.
This Copycat Dairy Queen Ice Cream Cake recipe makes perfectly juicy, tender, and flavorful steak every time! Serve with potatoes and a side salad for an unforgettable dinner in under 30 minutes.
Line a 9-inch springform pan with plastic wrap. Preheat the oven to 350 Fahrenheit and line a 10 x 15-inch baking sheet with parchment.
Combine crushed chocolate sandwich cookies with melted butter, spread on the lined sheet and bake 7 to 8 minutes. Cool completely.
Let chocolate ice cream soften 15 to 20 minutes, then spread an even layer into the pan and freeze 30 to 60 minutes.
Warm hot fudge for 20 to 25 seconds, spread over the chocolate layer, sprinkle cookie crumbs, and freeze 1 hour.
Soften vanilla ice cream and spread on top of the cookie crumb layer. Freeze 4 to 6 hours or overnight.
Chill mixing bowl, then beat heavy cream, powdered sugar and clear vanilla to stiff peaks. Reserve 1 cup for piping.
Remove springform, lift cake using plastic wrap, frost sides and top quickly, pipe border with reserved frosting and add sprinkles. Return to freezer until serving.
Last Step: Please leave a rating and comment letting us know how you liked this recipe! This helps our business to thrive and continue providing free, high-quality recipes for you.
Leave a comment & rating below or tag
@feastu on social media!

Delightfully spooky and sweet, these bite-sized mummy cake balls combine moist cake, creamy centers, and a vanilla candy shell for effortless Halloween fun.

Fluffy homemade donuts crowned with a shimmering galaxy glaze. Fry or bake, swirl bold colors, and watch these showstoppers disappear fast.

Buttery shortbread crust meets gooey pecan pie filling in easy bar form, perfect for holidays, bake sales, and cozy weeknights.
Leave a comment & rating below or tag @feastu on social media!
Enjoyed this recipe? Share it with friends and family, and don't forget to leave a review!
This recipe looks amazing! Can't wait to try it.
Comments are stored locally in your browser. Server comments are displayed alongside your local comments.

Join to receive our email series which contains a round-up of some of our quick and easy family favorite recipes.
