
>>

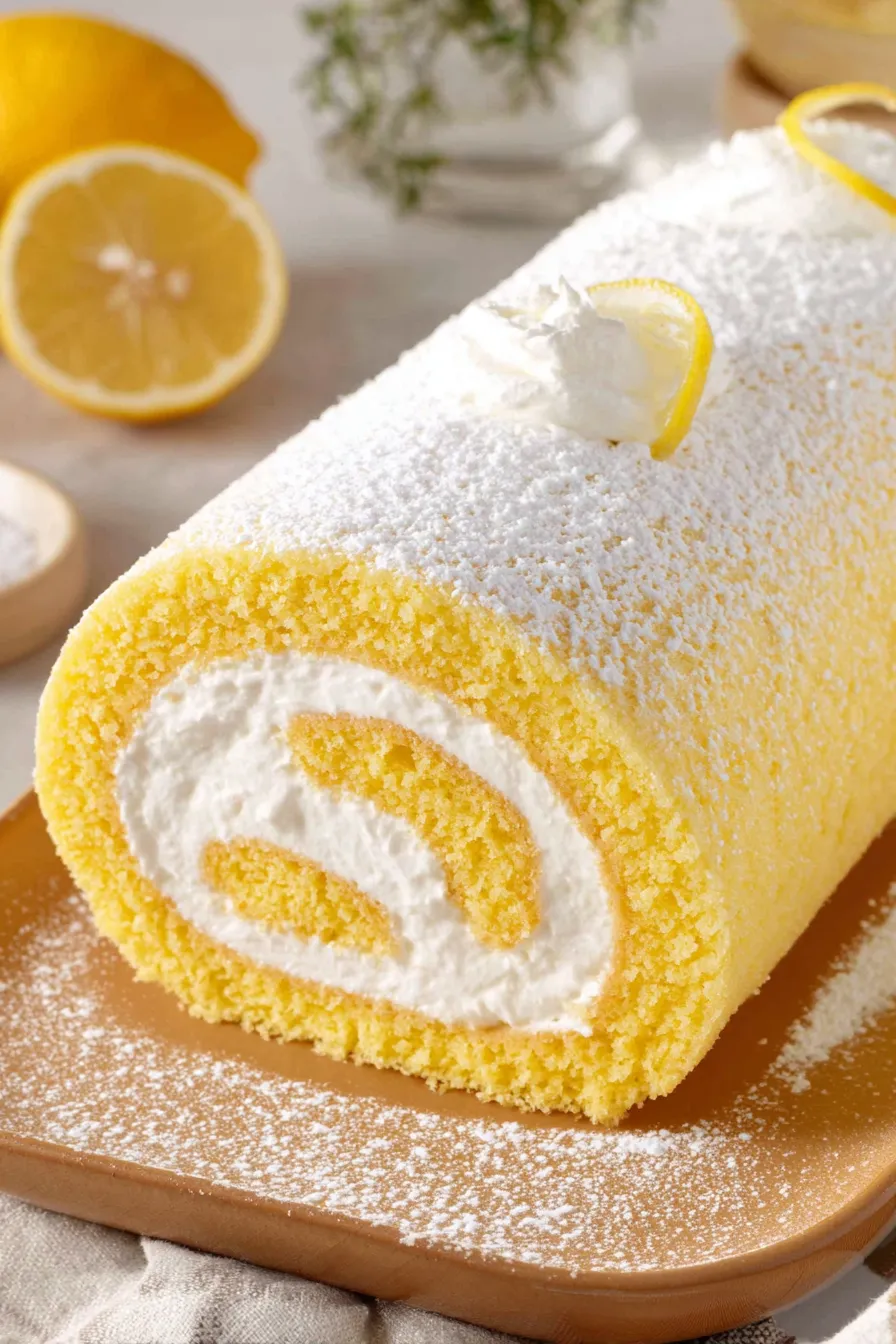
A light, springy lemon sponge rolled around a tangy cream cheese and whipped filling — a bright, elegant dessert perfect for gatherings and afternoon tea.

This lemon swiss roll became my go-to showstopper for spring gatherings the first time I made it. I was chasing a dessert that felt light but still had a bright citrus note; the sponge needed to be tender and flexible enough to roll without cracking, while the filling had to be tangy but silky so each slice felt balanced. I discovered this particular combination on a rainy afternoon when I had a bag of lemons that were bursting with juice and zest. The result was so fresh and lively that family members kept circling back to the counter for another slice.
What makes this version special is the technique: whipping the eggs until they triple in volume gives the cake its spring, and coating a thin tea towel with powdered sugar prevents sticking and preserves the cake's surface. The filling blends softened cream cheese with sifted powdered sugar, brightened by lemon zest and lightened with a cup of thawed whipped topping. It turns a simple sponge into something silky that slices cleanly into elegant half-inch rounds. Every bite offers a delicate balance of sweet cake and lemony cream that has become a celebratory staple in my home.
I’ve watched this dessert win over hesitant lemon critics at family gatherings. One Easter it was the unexpected star; my uncle, who usually opts for dense chocolate desserts, came back for three slices. It’s the sort of recipe that rewards precise technique but forgives small imperfections like a thin crack or two — the filling hides them and the flavor steals the show.

My favorite aspect is how the simple method produces a dessert that looks like it took far more effort than it did. Guests always comment on its delicate texture and bright lemon flavor. One summer picnic I assembled it the night before and the slices came out perfectly even after a chilly ride in a cooler, which taught me that proper chilling is key to neat presentation.
Store the roll wrapped tightly in plastic wrap in the refrigerator for up to 4 days; slice only what you need to preserve moisture. For freezing, wrap the whole uncut roll in two layers of plastic wrap and a single layer of heavy-duty aluminum foil to prevent freezer burn. Thaw in the refrigerator for about 1 hour, then sit at room temperature for 20 to 30 minutes before dusting with powdered sugar and slicing. If you slice before freezing, freeze the slices in a single layer on a tray then transfer to a freezer bag for easier portioning.
For a lighter filling, substitute stabilized whipped cream (1 cup) for the whipped topping and reduce powdered sugar by 1/4 cup. To make the sponge dairy-free, replace the oil with a plant-based oil and ensure your whipped topping substitute is dairy-free, though the cream cheese filling is dairy based; for a dairy-free filling try a coconut cream-based frosting chilled until thick. If you prefer a stronger lemon profile, increase lemon zest to 2 tablespoons in either the batter or the filling, but keep juice at 2 tablespoons to preserve batter structure.
Serve slices with fresh berries and a mint sprig for a pretty spring presentation. The roll pairs nicely with light teas, sparkling wine, or a citrus-forward Riesling. For a dessert table, alternate plain slices with those topped with a dollop of whipped cream and a thin lemon slice. You can also pipe a thin border of remaining filling on top before dusting to give each slice a professional finish.
Rolled sponges appear in many cuisines, from the European Swiss roll to Japanese roll cakes; despite the name, the roll is not strictly Swiss in origin but was popularized through 19th-century European baking. This lemon variation is a modern adaptation that blends the classic technique of a jelly roll with bright citrus flavors common in Mediterranean desserts. The technique of rolling warm sponges to train them not to crack is a pastry classic found across baking traditions.
In summer, serve with fresh berries or a strawberry compote. For winter holidays, add a teaspoon of finely ground cardamom to the batter or replace lemon zest with orange zest for a warmer citrus note. For spring events, fold in a tablespoon of finely chopped candied lemon peel into the filling for extra texture and sparkle.
Make the sponge a day ahead and keep it rolled in the sugared towel to hold shape; chill overnight unfilled. Prepare the filling the same day you plan to assemble for maximum freshness; soften cream cheese at room temperature for easy blending. Use a long offset spatula to spread filling evenly and refrigerate the assembled roll for at least 1 hour to firm before slicing for clean edges. Store in an airtight container and slice with a sharp knife wiped between cuts.
This lemon roll is a small ritual of precision and reward — a simple technique that yields elegant results. Invite friends, make a pot of tea, and enjoy the bright, tender slices together; once you’ve mastered the roll, try flavor variations to make this dessert a permanent part of your baking repertoire.
Use room-temperature eggs and whip them until frothy; this provides the main lift for a flexible sponge.
Dust the tea towel generously with powdered sugar to prevent sticking and to train the sponge to roll without cracking.
Chill the assembled roll for at least an hour before slicing to ensure clean slices and set filling.
Sift powdered sugar before adding to the filling to avoid lumps and to keep the filling silky.
When folding in flour, use a light hand and make two additions to avoid deflating the whipped eggs.
This nourishing lemon swiss roll recipe is sure to be a staple in your kitchen. Enjoy every moist, high protein slice — it is perfect for breakfast or as a wholesome snack any time.
Yes. Wrap the uncut roll in two layers of plastic wrap and one layer of heavy-duty foil. Freeze up to 3 months and thaw in the refrigerator for about 1 hour, then at room temperature for 30 minutes before slicing.
If the batter deflates, gently fold less next time and avoid overmixing after adding the dry ingredients. Make sure eggs are room temperature and beaten until frothy before adding other ingredients.
This Lemon Swiss Roll recipe makes perfectly juicy, tender, and flavorful steak every time! Serve with potatoes and a side salad for an unforgettable dinner in under 30 minutes.
Preheat oven to 375°F and line a 10 x 15 x 1-inch jelly roll pan with parchment paper. Whisk together flour, baking powder and salt in a small bowl.
Combine granulated sugar and lemon zest and stir vigorously to release oils; this concentrates lemon flavor in the batter.
Beat 3 room-temperature eggs on high for about 5 minutes until pale and frothy. This aeration is essential for a springy sponge.
Lower speed and add sugar-zest mixture, lemon juice, oil, lemon extract and food coloring. Mix on medium for 1 to 1 1/2 minutes until combined but still airy.
Gently fold flour mixture into the egg batter in two additions with a silicone spatula, using sweeping motions to preserve volume.
Spread batter into prepared pan and bake 10 to 12 minutes until the cake springs back to the touch. Do not overbake to avoid cracks.
Dust a tea towel with 1/4 cup powdered sugar, invert the cake onto the towel, peel off parchment and roll the cake in the towel from one short end. Cool rolled for about 1 hour.
Beat cream cheese until smooth, add powdered sugar in two additions, mix in lemon zest, fold in thawed whipped topping. Unroll cooled cake, spread filling leaving 1/4-inch border, re-roll, wrap in plastic and chill at least 1 hour.
Dust with 1 tablespoon powdered sugar before slicing into 1/2-inch pieces. Store in an airtight container in the refrigerator up to 4 days or freeze wrapped up to 3 months.
Last Step: Please leave a rating and comment letting us know how you liked this recipe! This helps our business to thrive and continue providing free, high-quality recipes for you.
Leave a comment & rating below or tag
@feastu on social media!

Delightfully spooky and sweet, these bite-sized mummy cake balls combine moist cake, creamy centers, and a vanilla candy shell for effortless Halloween fun.

Fluffy homemade donuts crowned with a shimmering galaxy glaze. Fry or bake, swirl bold colors, and watch these showstoppers disappear fast.

Buttery shortbread crust meets gooey pecan pie filling in easy bar form, perfect for holidays, bake sales, and cozy weeknights.
Leave a comment & rating below or tag @feastu on social media!
Enjoyed this recipe? Share it with friends and family, and don't forget to leave a review!
This recipe looks amazing! Can't wait to try it.
Comments are stored locally in your browser. Server comments are displayed alongside your local comments.

Join to receive our email series which contains a round-up of some of our quick and easy family favorite recipes.
