
>>

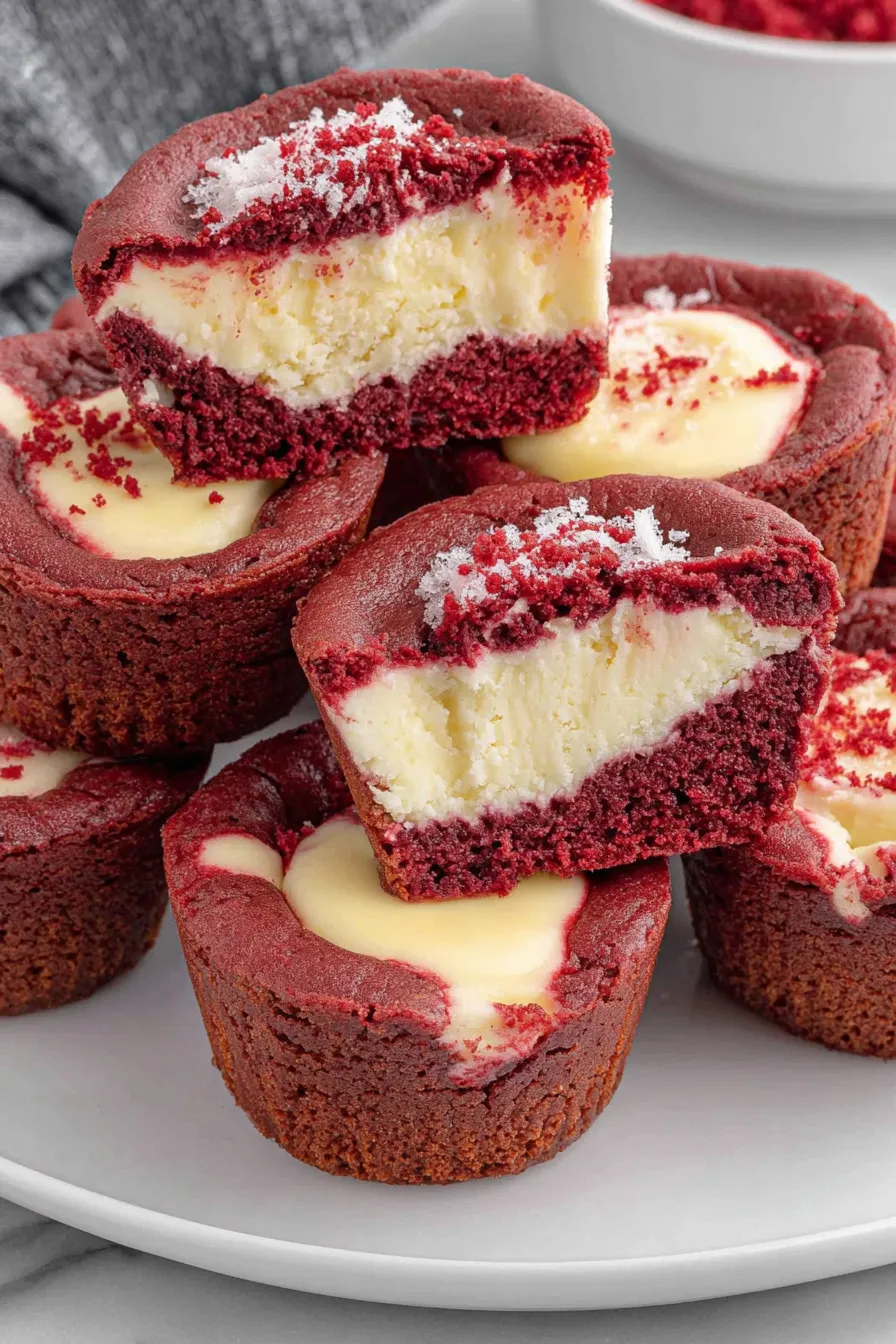
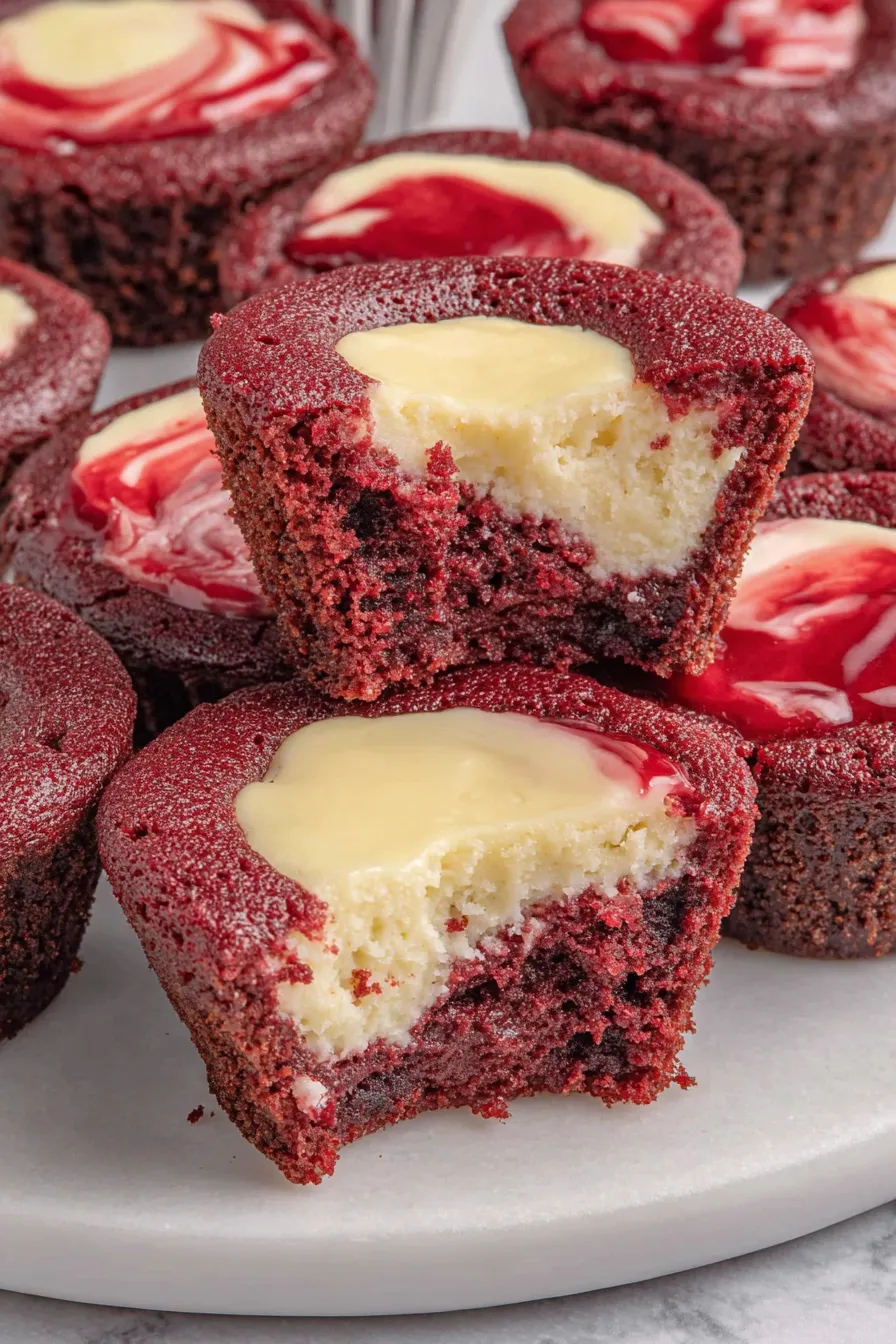
Little bites of velvet-red cake with a creamy cheesecake center — perfect for parties, holidays, or an indulgent snack.
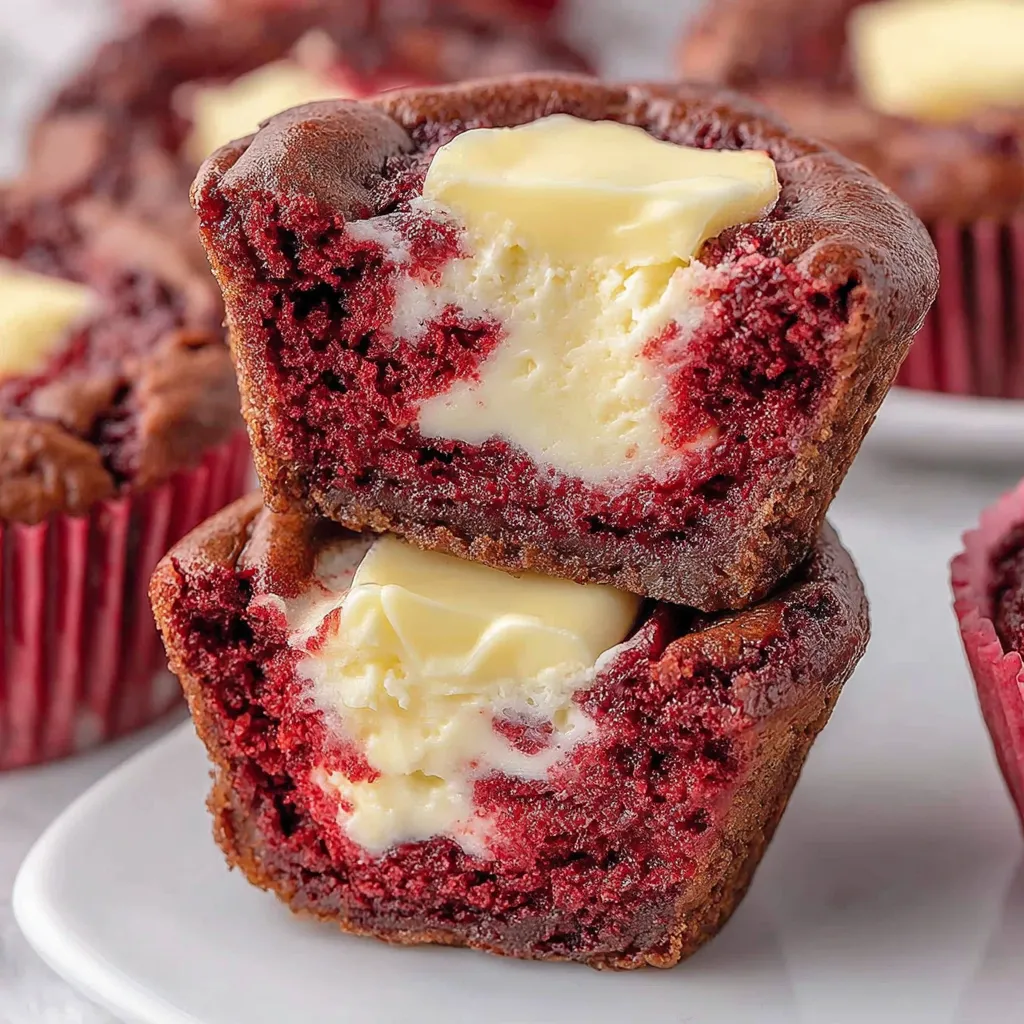
This Mini Red Velvet Cheesecake has been my party trick for years: small, jewel-toned cakes with a tangy cheesecake heart that always disappear first. I first created these on a snowy December afternoon when I wanted something festive but not fussy — a treat you can pop in your mouth in one bite, share easily, and still feel a little decadent. What sets these apart is the balance of textures: the tender, cocoa-kissed red velvet base gives way to a silky, lightly sweetened cheesecake center. The color makes them feel celebratory; the flavor keeps everyone coming back.
I discovered this combination while adapting a full-size layered dessert into finger foods for a family gathering. The first batch was slightly dense because I overmixed, but the second attempt produced perfect, tender bases with a creamy center that cut cleanly with a fork. These bites are reliable in crowds — even picky kids who normally avoid anything labeled "cheesecake" loved the texture and flavor. They’re quick to assemble, bake in minutes, and travel well, so I reach for this recipe whenever I need a small-plate dessert that feels special without a lot of hands-on time.
In my testing, swapping brands of red gel changed the depth of color but not the flavor; Sunny Side Up Bakery’s red produced a consistent, rich shade without adding bitterness. My family’s favorite moment is right after the first bite when the creamy center balances the cocoa notes — it’s become our go-to for office parties and school bake sales.
My favorite part is watching guests take the first bite — there’s always a small collective “ah” when the cream cheese center meets the cocoa-scented base. I’ve served these at birthday gatherings, book club meetups, and holiday cookie exchanges; they’re consistently the first platter to be emptied.
Store cooled bites in an airtight container in the refrigerator for up to 3–4 days. If stacking, separate layers with parchment to prevent sticking. To freeze, arrange them in a single layer on a baking sheet until firm (about 1 hour), then transfer to a freezer-safe container or bag with parchment between layers; keep frozen up to 3 months. Thaw overnight in the refrigerator and bring to room temperature for 15–20 minutes before serving. For quick reheats, a 10–15 second zap in the microwave (on low power) softens centers without altering texture too much.
If you prefer less sugar, reduce the base sugar by up to 2 tablespoons — note that sweetness balance changes slightly with the creamy center. Swap salted butter for unsalted and add 1/4 teaspoon fine sea salt. For a deeper chocolate note, use Dutch-processed cocoa powder; if you only have natural cocoa, increase the vanilla by an extra 1/2 teaspoon to keep flavor warm. For a non-gel option, a concentrated liquid dye works but expect a softer hue and slightly wetter batter — reduce the melted butter by 1 tablespoon to compensate.
Serve chilled or at cool room temperature on a tiered dessert stand for impact. Garnish with a small dollop of whipped cream, a dusting of cocoa, or a few chocolate shavings. Pair with espresso, a nutty dessert wine, or a creamy hot chocolate on cold evenings. For holiday spreads arrange among cookies and bars to add a pop of color and variation in texture.
Red velvet has American roots and rose to mid-20th-century popularity in the southern United States, often associated with classic cake forms and buttermilk tenderizing. The color became iconic at celebrations and has since evolved into many formats — these mini cheesecakes are a playful adaptation that combines the velvet tradition with a New York–style cheesecake sensibility, turning a celebratory cake into a dainty, shareable bite.
In autumn mix a pinch of ground cinnamon into the base for spice warmth; during spring serve with a small spoon of fresh berry compote to brighten acidity. For holiday variations, top with crushed peppermint in winter or toasted chopped pecans for a southern twist. Swap the gel hue for natural beet powder if you want a less processed color, but expect a subtler shade and an earthy note.
Make the red velvet batter and cheesecake filling separately and keep chilled; assemble and bake on the day you plan to serve for best texture. If prepping for a week's worth of snacks, bake and refrigerate in portions, then refresh with a brief chill before serving. Use disposable piping bags to streamline cleanup when producing large batches for events.
These little bites are a small labor of love that reward you with big smiles. Whether you’re building a party platter or experimenting with flavors, they invite creativity and make sharing easy — try making a double batch and freezing half for future celebrations.
Bring eggs and cream cheese to room temperature for smooth emulsification and to avoid lumps in the filling.
Don’t overmix the red velvet batter once flour is added to prevent a tough base; stop when no dry streaks remain.
If using a ziplock bag as a piping bag, snip a small corner and test pressure to avoid overfilling cavities.
Cool baked bites in the pan for 20–30 minutes before removing to minimize cracking and keep shape intact.
This nourishing mini red velvet cheesecake bites recipe is sure to be a staple in your kitchen. Enjoy every moist, high protein slice — it is perfect for breakfast or as a wholesome snack any time.
This Mini Red Velvet Cheesecake Bites recipe makes perfectly juicy, tender, and flavorful steak every time! Serve with potatoes and a side salad for an unforgettable dinner in under 30 minutes.
Preheat oven to 350°F and spray a mini muffin pan with nonstick spray. Ensure eggs and cream cheese are at room temperature to improve mixing and texture.
Whisk together 1 cup flour and 1/4 cup + 1 tablespoon cocoa powder in a small bowl until evenly combined; set aside to prevent lumps.
Whisk melted butter, 1 1/4 cups sugar, red gel, 2 teaspoons vanilla, and 2 beaten eggs until glossy. Stir in dry ingredients just until combined to avoid developing gluten.
Beat 8 ounces softened cream cheese for 1 minute, add 1/4 cup sugar and 1 teaspoon vanilla and mix 1–1½ minutes. Add 1 egg yolk and mix until just combined without streaks.
Spoon 1 tablespoon of red velvet batter into each mini cup. Pipe about 2 teaspoons of cheesecake filling into the center of each base using a piping bag or ziplock bag.
Bake for 8–9 minutes until edges are set and centers are slightly jiggly. Cool in the pan 20–30 minutes before removing, then transfer to a wire rack and chill for best texture.
Last Step: Please leave a rating and comment letting us know how you liked this recipe! This helps our business to thrive and continue providing free, high-quality recipes for you.
Leave a comment & rating below or tag
@feastu on social media!

Delightfully spooky and sweet, these bite-sized mummy cake balls combine moist cake, creamy centers, and a vanilla candy shell for effortless Halloween fun.

Fluffy homemade donuts crowned with a shimmering galaxy glaze. Fry or bake, swirl bold colors, and watch these showstoppers disappear fast.

Buttery shortbread crust meets gooey pecan pie filling in easy bar form, perfect for holidays, bake sales, and cozy weeknights.
Leave a comment & rating below or tag @feastu on social media!
Enjoyed this recipe? Share it with friends and family, and don't forget to leave a review!
This recipe looks amazing! Can't wait to try it.
Comments are stored locally in your browser. Server comments are displayed alongside your local comments.

Join to receive our email series which contains a round-up of some of our quick and easy family favorite recipes.
